

Earlier versions of the Zendesk Integration with AssetSonar brought detailed Asset visibility to the Agent(s) within Zendesk.
AssetSonar has now introduced the ability for Agents and Admins to take actions on IT Assets directly from within the Zendesk platform — creating a seamless and highly streamlined experience that will expedite ticket resolution, and improve Agent productivity and end-user experience.
This continues our vision of seamless IT service and customer experience management in an open and flexible best-of-breed architecture, with specialized solutions for IT asset management and helpdesk /ticketing management.
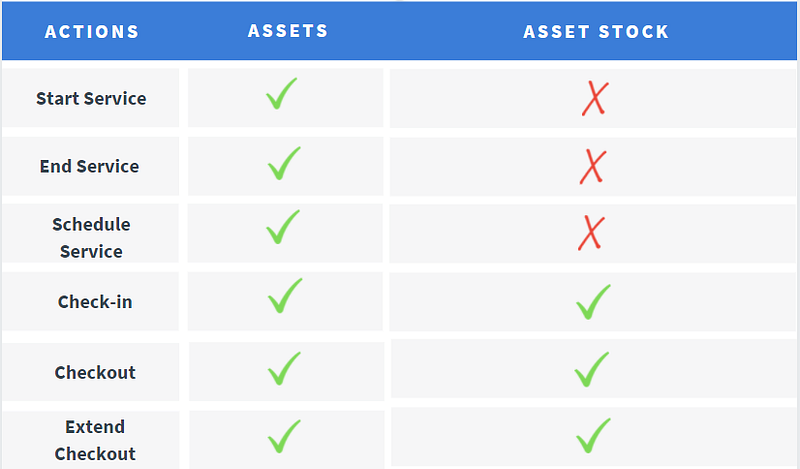
Admins and Agents can now take the following actions on Assets and Asset Stock within Zendesk:
Contents
- Creating a Service ticket
- Starting Service in Zendesk
- Scheduling Service in Zendesk
- Completing Service
- Checking out/Extending checkout for items
5.1. Checking out Asset and Asset Stock
5.2. Extending checkouts for Assets
5.3. Extending checkouts for Asset Stock - Checking in Assets and Asset Stock
- Linking Purchase Orders to tickets
- Viewing ticket history in AssetSonar
1. Creating a Service ticket
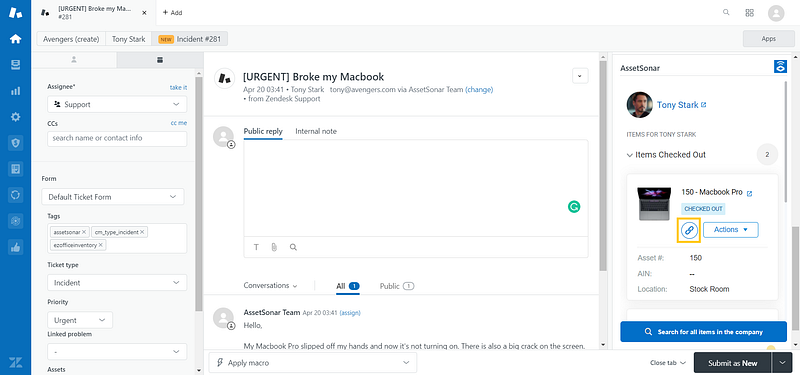
After you have enabled the Zendesk integration in your AssetSonar account, you can create a Service ticket directly from the Zendesk workspace.
You can also link Assets to the ticket from the AssetSonar applet as shown.
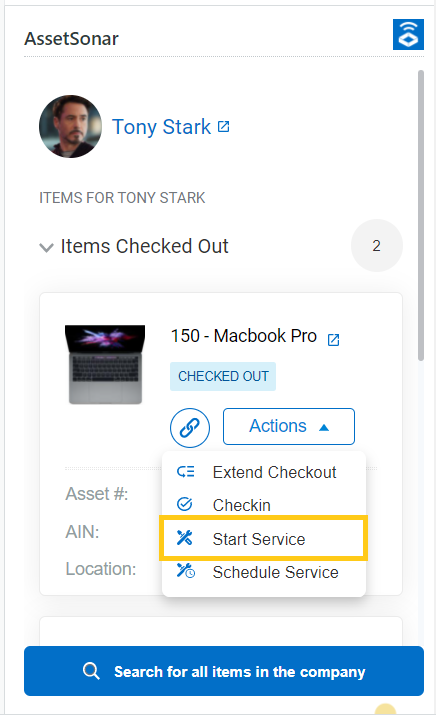
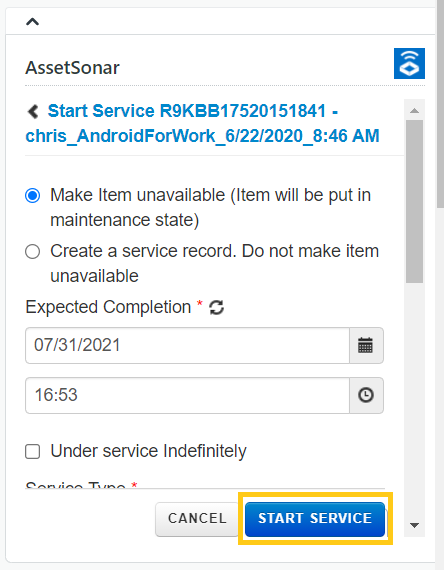
2. Starting Service in Zendesk
You can also start service on an Asset directly from within Zendesk. To do so, click on the relevant Asset → Actions → Start Service.
Fill in details such as Expected Completion Date, Service Type, and Service Performed by Vendor or Member. Hit ‘Start Service’ once done.
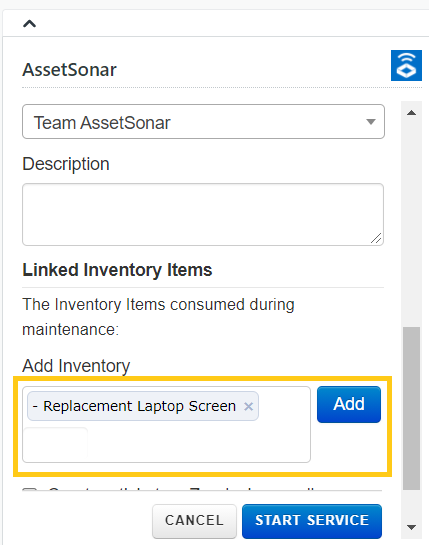
You can even link Inventory items that must be consumed during the maintenance process.
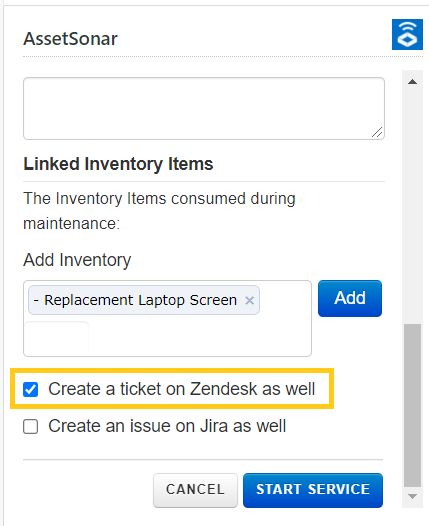
Before starting the service, if you select the highlighted option, the service ticket is also created in Zendesk records.
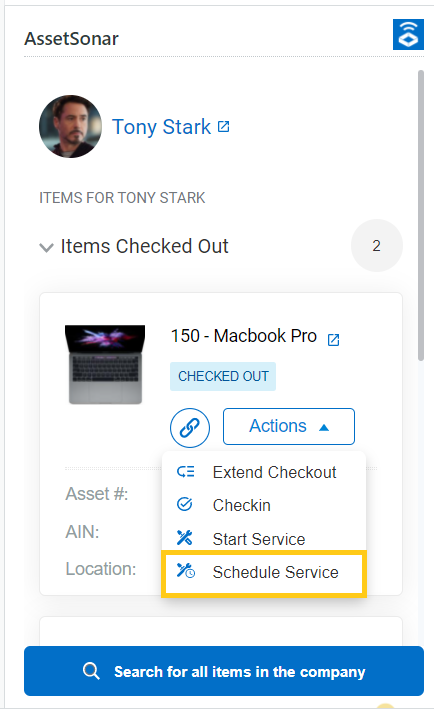
3. Scheduling Service in Zendesk
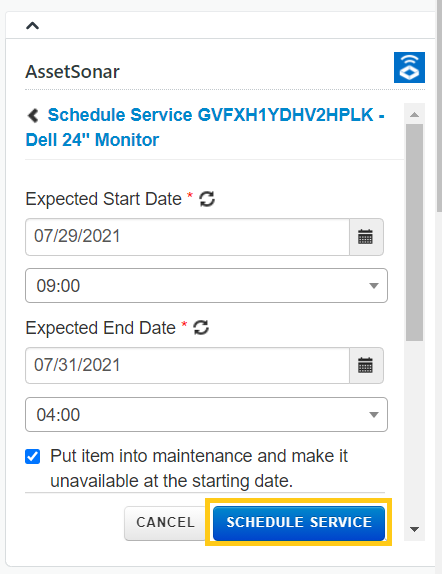
The Direct Actions capability also gives you the option to schedule future services on Assets from within Zendesk. Simply click on the relevant Asset → Actions → Schedule Service.
Enter the requisite information and then click ‘Schedule Service’.
4. Completing Service
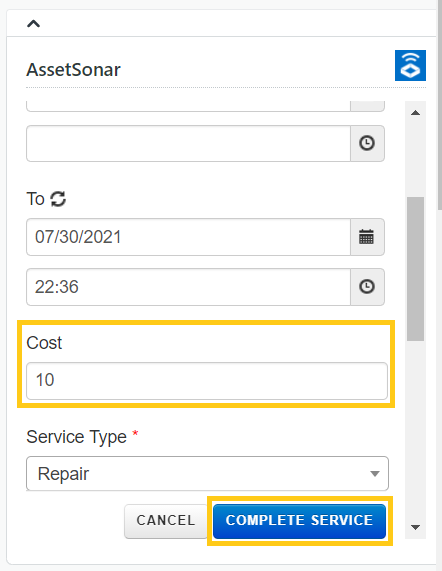
This option enables users to directly finish the maintenance session for a particular Asset. From the relevant Asset card, click on Actions → Complete Service.
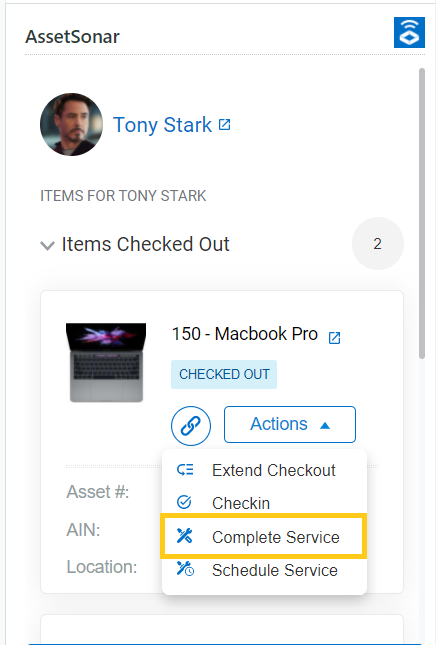
Enter the cost that was incurred for maintenance and hit ‘Complete Service’ to finish the session.
Read more: AssetSonar’s Zendesk Integration: Powerful IT Asset Tracking and Ticket Management Combined
5. Checking out/Extending checkout for items
According to the new setting, users can also check-in and check out Assets and Asset Stock directly from the Zendesk workspace.
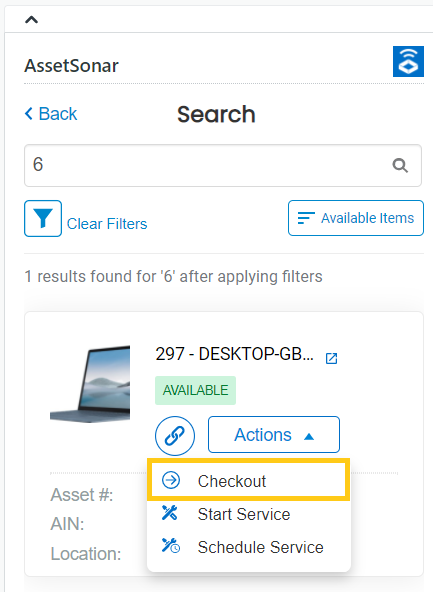
5.1. Checking out Asset and Asset Stock
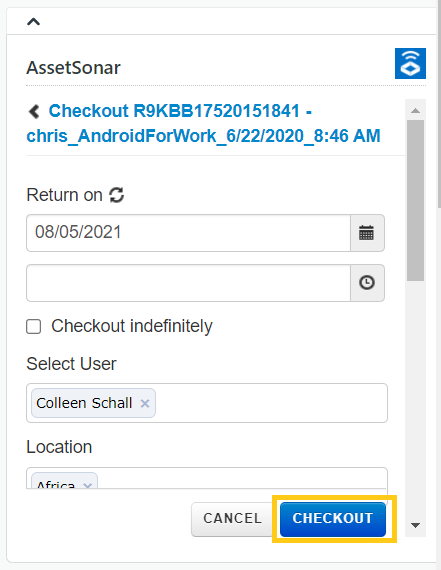
To checkout an Available Asset directly from Zendesk, click on the option highlighted below.
Following this, you’ll be redirected to the Checkout Details page with the same fields as shown in AssetSonar.
While checking out Asset Stock, users are asked to enter the Quantity they want to check out.
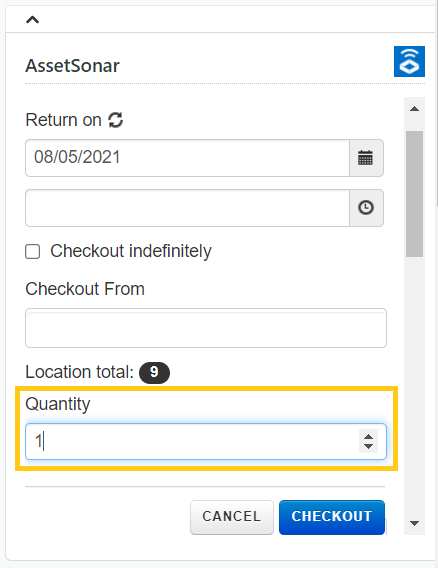
Once the Asset Stock quantity is entered, hit ‘Checkout’ to confirm the action from within Zendesk.
5.2. Extending checkouts for Assets
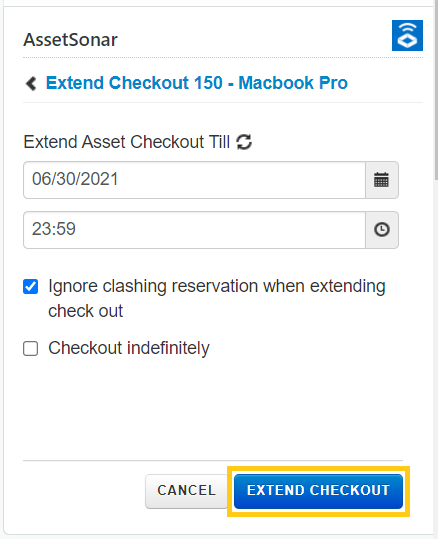
Once an Asset is checked out, users can also extend the checkout period from within Zendesk. Go to the ticket and click on the extend checkout button as shown below:
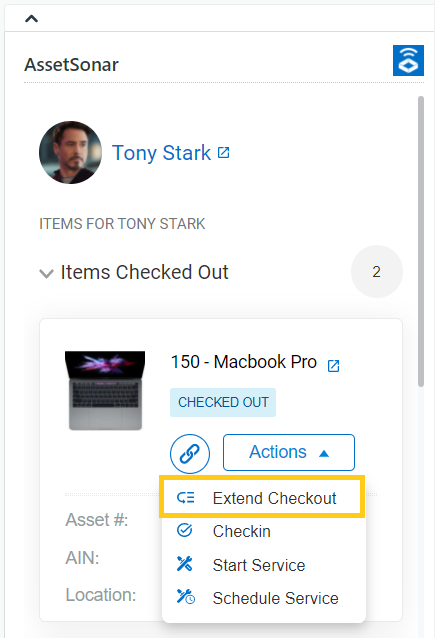
Once you click this button, the following overlay will appear:
5.3. Extending checkouts for Asset Stock
When extending checkout for Asset Stock in a ticket, you will be asked to choose which users you want to extend the checkout of Asset Stock items for:
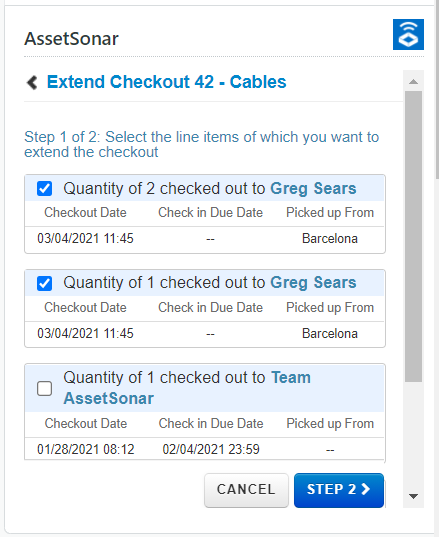
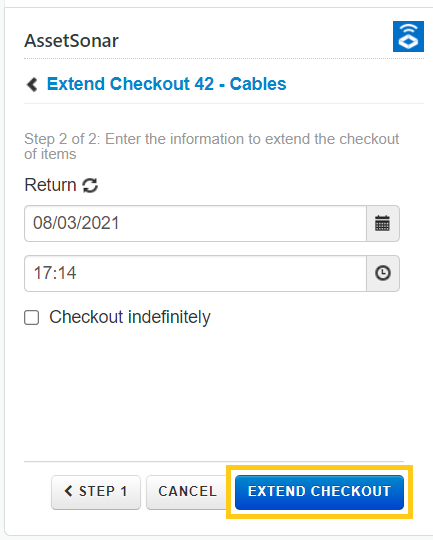
Once the line item is selected, the user can then move to Step 2 to fill in the following details:
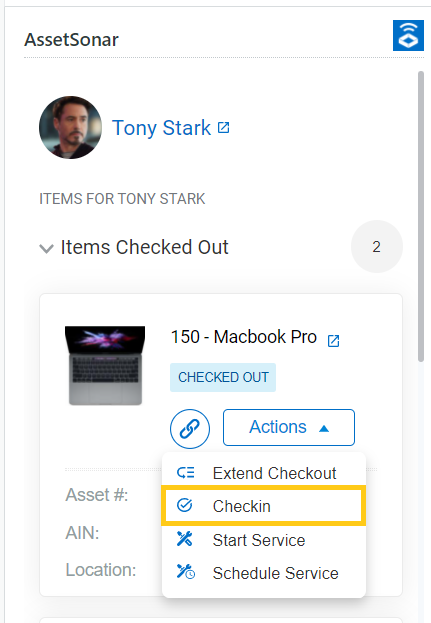
6. Checking in Assets and Asset Stock
Users can also check-in Assets from the Zendesk Tickets by clicking the ‘Check-in’ button and filling in the form with relevant details:
However, for Asset Stock, you will be asked to select specific users from whom you want to check the Asset Stock items back in:
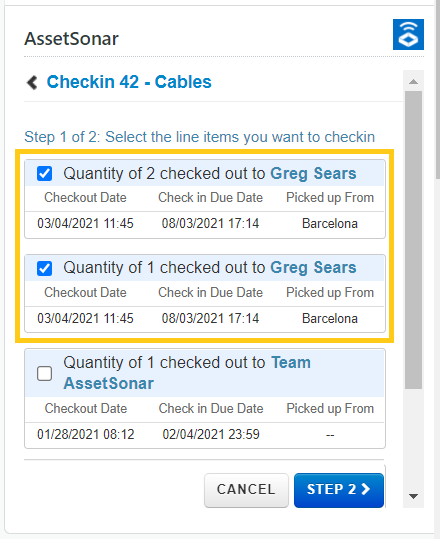
After selecting the relevant items, you can confirm check-in for Asset Stock.
Read more: Generate Zendesk Ticket Reports with AssetSonar
7. Linking Purchase Orders to tickets
You can also create a new Purchase Order or link an existing one to a Zendesk ticket. Let’s say, you receive an Item Request ticket for a new device that does not already exist in your ITAM inventory. You can create a Purchase Order for that device and link it to the ticket.
Go to the AssetSonar window panel in the ticket. From here, click on ‘Add Purchase Order’.
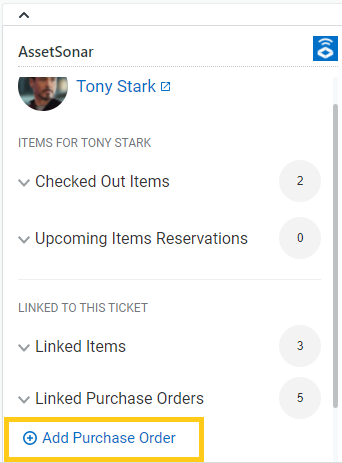
Then, you’ll be asked to either create a new PO or link the ticket to an existing one.
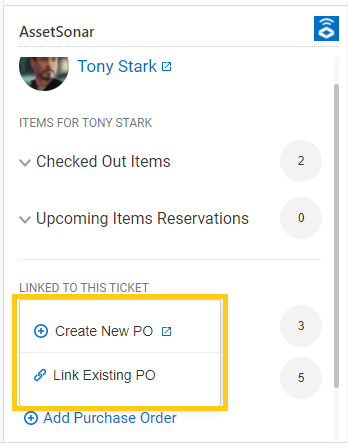
If you wish to create a new PO, the ‘Create New PO’ button will redirect you to the AssetSonar app. Here, you can generate a new PO and add all the relevant information.
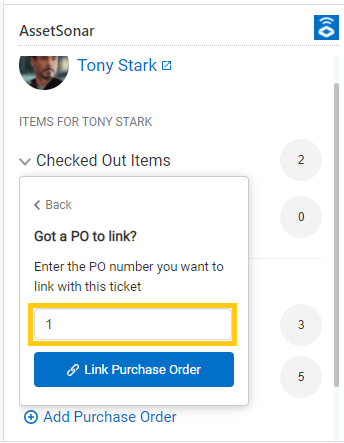
You can also link an existing PO by entering the PO number.
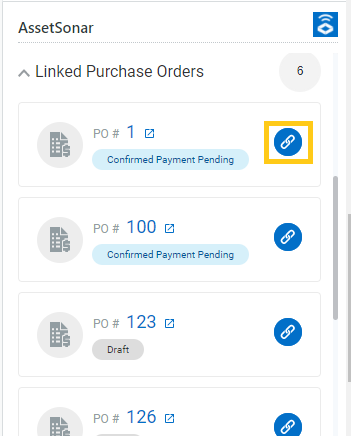
Once done, you can click on the PO# in the Linked Purchase Orders tab to view all details:
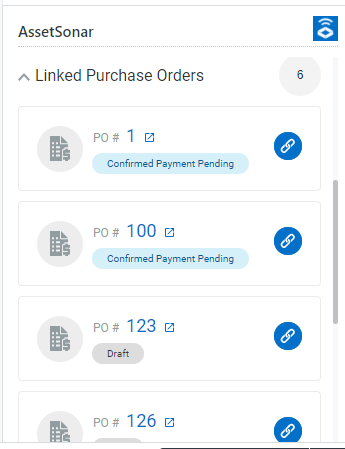
After adding the required POs you can link/unlink them from the button on the right-hand side.
8. Viewing ticket history in AssetSonar
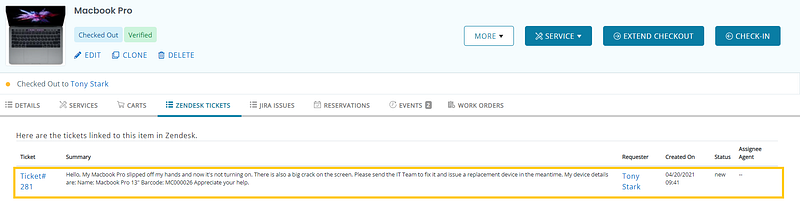
For all the service tickets created, scheduled, and completed in Zendesk, users can now view them in their AssetSonar account. Click on the Asset linked to the Zendesk ticket you created. On the Asset Details page, from the Zendesk Tickets tab, you can view the tickets associated with the Asset:
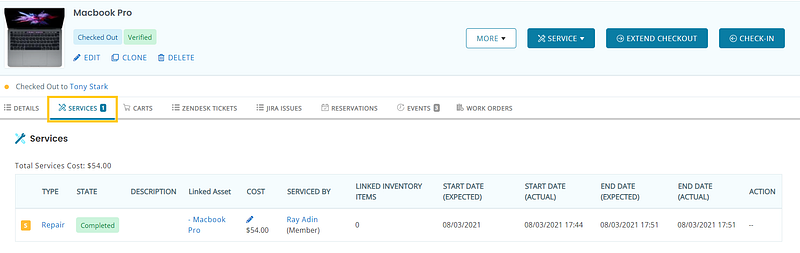
Similarly, details about the services scheduled and completed associated with the Zendesk ticket can be viewed under the Services tab.
Furthermore, users can also view Check-in and Checkout History associated with Linked Items in AssetSonar. Simply head to the relevant Asset Details page and follow the pathway, More → History → Check-in/Checkout History.
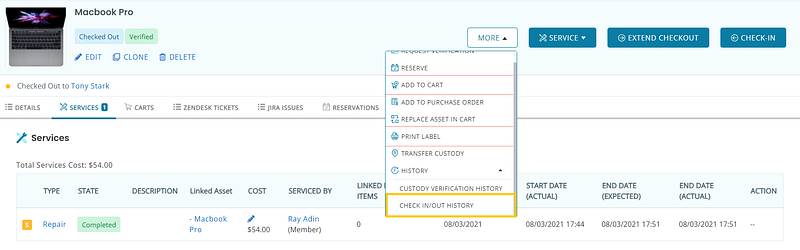
This is how the history displays:

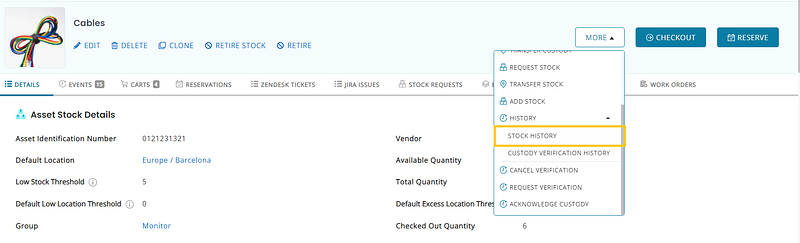
For Asset Stock, go to More → History → Stock History from the Details page of the concerned Asset Stock item.
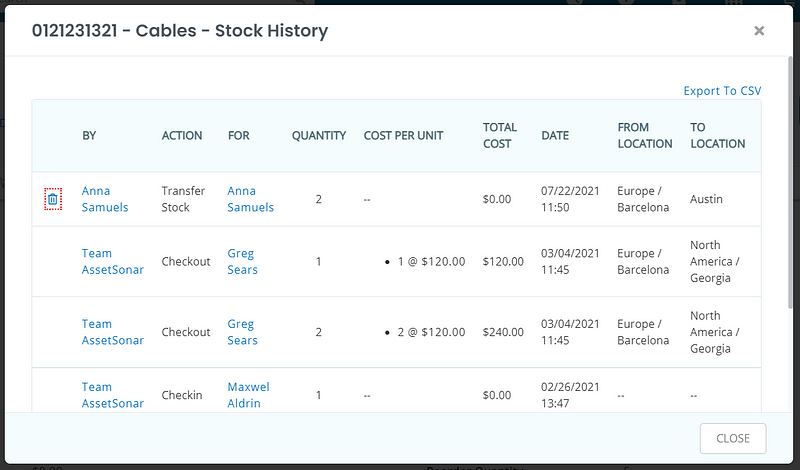
The Asset Stock history tab looks something like this:
Read more: Streamline Request Management With AssetSonar’s Zendesk Help Center Integration
Integrate your Zendesk application with AssetSonar today and expedite your ITSM workflows for faster incident management.
About AssetSonar
AssetSonar is the leading ITSM tool used by IT-intensive organizations and businesses all over the globe. Sign up today for a free 15-day trial.
For more assistance, drop us an email at support@ezo.io. You can also visit our blog for detailed support posts.
Join the Conversation: Twitter | Facebook


