


You can use the Arbitration function to specify how Staff Users interact with the IT Assets that are visible to them. This helps strengthen access control and ensures that Administrator permission is required for certain actions such as check-ins/checkouts.
In AssetSonar, access to data and user permissions are defined by their roles. For instance, Alice as an Administrator can check out IT Assets to Benny (Staff User), or reserve them for John (Staff User). However, Benny and John (both Staff Users) can only take actions for themselves i.e. Benny can only reserve IT Assets for himself and not for John.
Contents
- Setting up Access Control
- Processing Staff User requests
- Types of Arbitration
3.1. All checkouts and check-ins require Administrator approval
3.2. Pre-approved checkouts: Administrator(s) can pre-approve future reservations
3.3. Staff Users can check in/check out specific IT Assets by themselves but need Administrator approval for the rest
3.4. Some Staff Users require Administrators approval whereas others don’t
3.5. Staff Users can only check out IT Assets by scanning them - Staff User settings based on User Listings
1. Setting up Access Control
You can select your access control level from Settings → Company Settings → Policy → Arbitration in a User Listing.
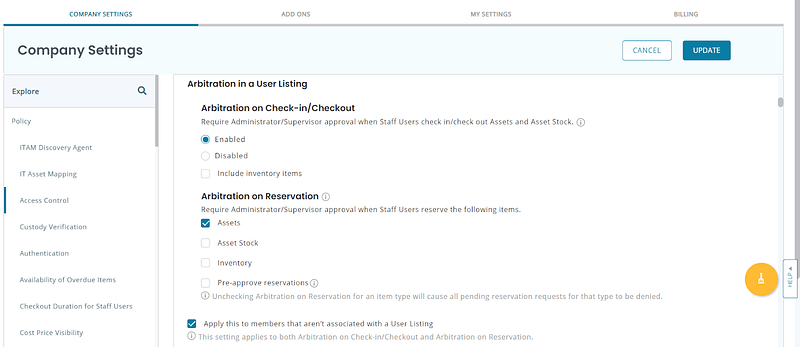
Note: You can either enable ‘Service and Maintenance for Staff Users’ or Arbitration.
- When Arbitration is enabled, Staff Users can only reserve an IT Asset or request a check-in by requiring Administrator approval.
- When Arbitration is disabled, Staff Users can check in and check out IT Assets themselves without the need for Administrator approval.
There are two types of Access Control in AssetSonar; Simple and Advanced. The Simple mode enables you to choose the same Arbitration settings throughout the application. Alternatively, the Advanced mode lets you specify Arbitration settings by groups, locations, or both. You can also choose arbitration settings for your User Listings. Learn more about Advanced Access Control in AssetSonar.
If you want more granular control, you can implement Custom Roles. While the AssetSonar system has predefined user roles, every company has different access control needs and might want to configure unique roles for each user. Our Custom Roles functionality enables you to do just that. Personalize settings and permissions for each user and gain more control than ever before. Learn more about Custom Roles.
2. Processing Staff User requests
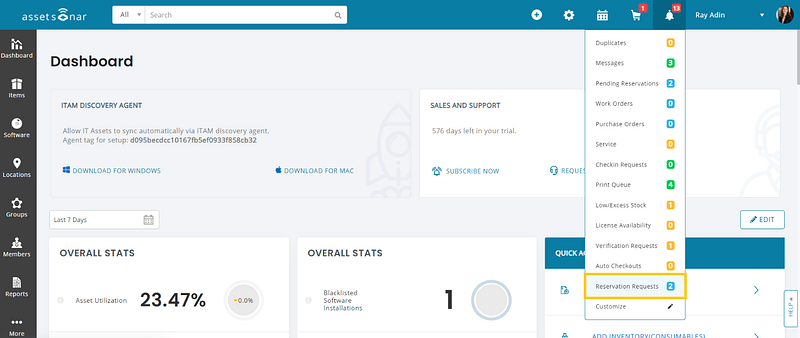
When Arbitration is enabled, Administrators get the choice to accept or deny check-in/checkout or reservation requests made by Staff Users. Reservations can be viewed from the Dashboard → Notifications bell → Reservation Requests.
You can approve/cancel a Reservation Request by clicking on the values in the highlighted column.
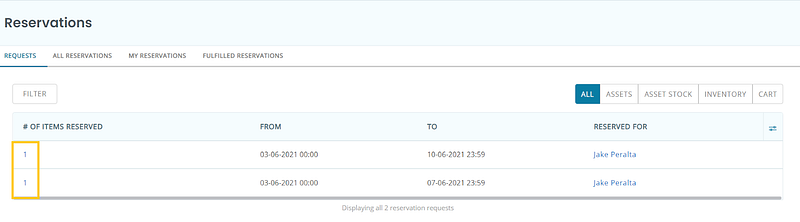
This leads you to the following dialog box where you can approve/deny requests.
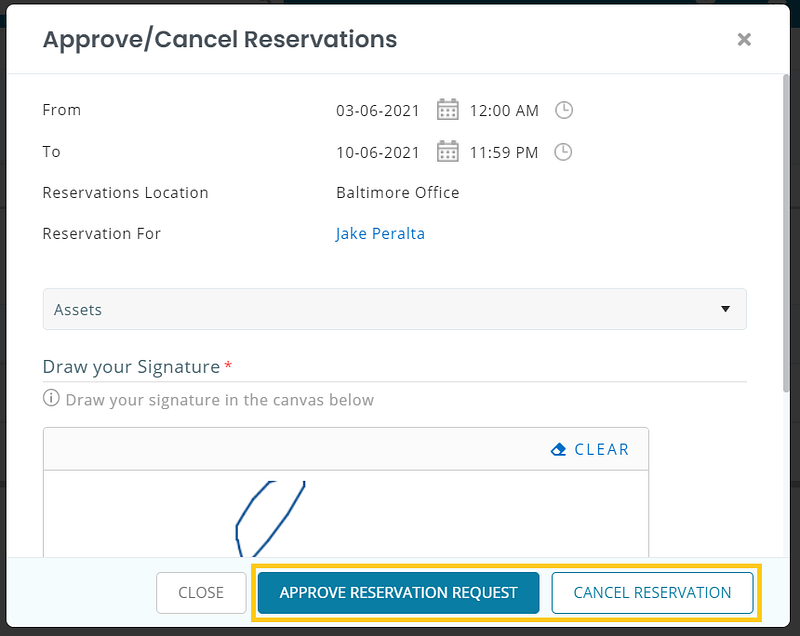
Reservations get added to the Availability Calendar once the Administrator has approved the requests. They get canceled if the Administrator denies the request(s). You can also specify a reason for denying the Reservation Requests.
3. Types of Arbitrations
3.1. All checkouts and check-ins require Administrator approval
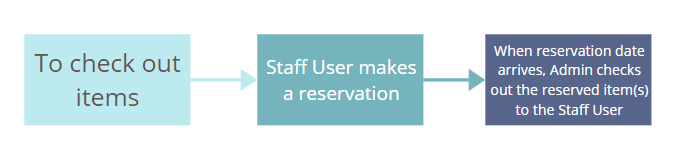
- Checkout: Staff Users are not allowed to check out any IT Assets by themselves; they have to reserve them first. Once the reservation date arrives, the Administrator will check out the IT Assets themselves.
- Check-in: Staff Users cannot check in IT Assets themselves; they need to request check-ins. An Administrator then approves these check-in requests.

Note: Administrators can always view checkout reservations from the Availability Calendar and check-in requests by utilizing the ‘Check-in Pending’ filter on the Item Listings Page.

3.2. Pre-approved checkouts: Administrators(s) can pre-approve future reservations
Different from the previous workflow, AssetSonar also offers ‘Pre-approved Checkouts’. This means an Administrator can pre-approve reservation(s). When the reservation date arrives, Staff Users can check out the reserved item(s) for themselves as needed.

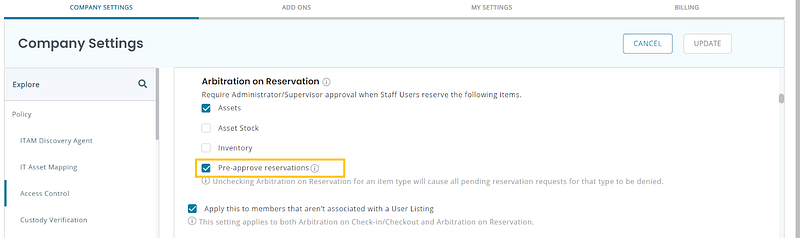
This can be done by extending Arbitration to Reservations, allowing Staff Users to ‘request’ a Reservation. Such Reservations appear under the Reservation Requests option under Notifications Bell for Administrators to review and take action on. For this purpose, you must enable ‘Arbitration on Reservations’ from Settings → Company Settings, choose the relevant items you want to apply the rule on, select ‘Pre-approved reservations’, and update settings.
3.3. Staff Users can check in/check out specific IT Assets by themselves but need Administrator approval for the rest
Asset-level arbitration provides enhanced access control for scenarios where only specific Assets/Packages need to have arbitration enabled or disabled. This is useful when you want an Administrator to step in when checking out high-ticket items is involved.
You can enable this type of Arbitration from Settings → Add Ons → Asset Level Arbitration → Enabled.

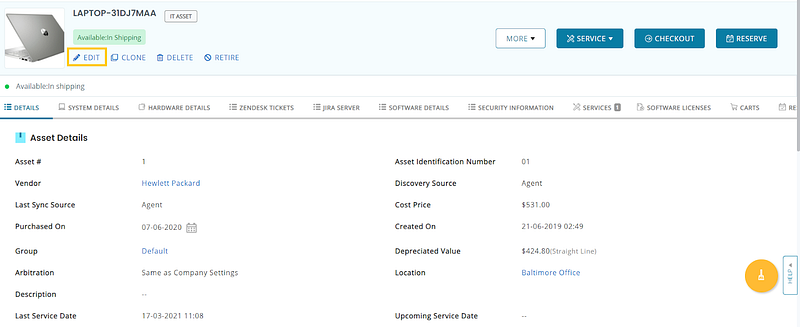
In order to change Asset Level Arbitration for a particular item, click the ‘Edit’ button on the Asset Details Page.
Next, choose one of the following from the ‘Arbitration’ field dropdown.
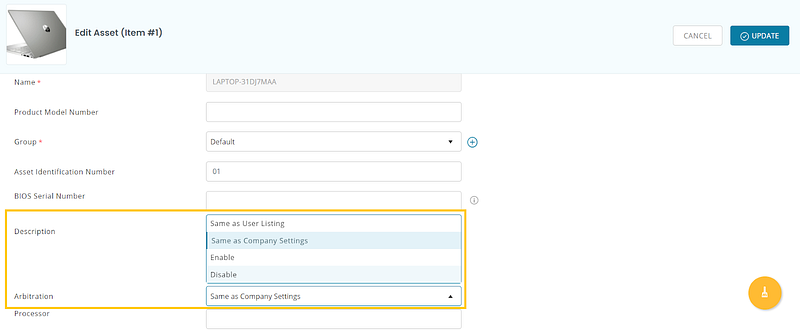
Here’s what the following levels of Arbitration imply.
- Same as Company Settings: No change in Asset Level Arbitration. The company-level settings for general Arbitration (enabled/disabled) will be applied to the IT Asset.
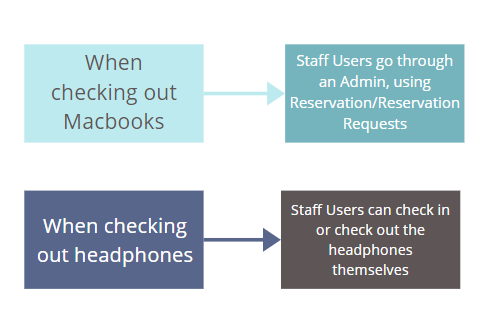
- Enable: This will restrict Staff Users to undertake actions on specific Assets/Packages only (overriding the company-level setting). For instance, you might want Staff Users to be able to self-checkout headphones.
- Disable: This will not restrict Staff Users’ access to specific Assets/Packages.
3.4. Some Staff Users require Administrator approval while others don’t
In multi-team organizations, an Administrator’s intervention might be required for check-in/out to certain User Listings whereas, for others, it might not. Let’s say, you want company interns to require Administrator approval for check-in/out and reservations of IT Assets, but not the full-time employees.
AssetSonar allows you to set up Arbitration settings specific to each User Listing. To configure these, follow the pathway: More → User Listings → User Listing Name e.g. Interns → Settings. This will lead you to the following page:
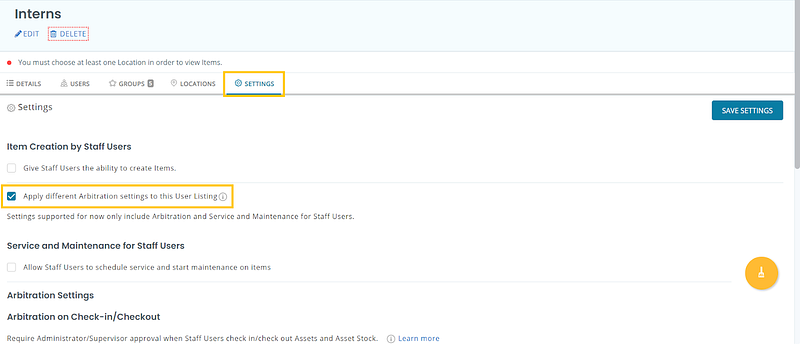
Select the highlighted option to reveal User Listing Level Arbitration settings as illustrated below:

You can then enable preferred Arbitration settings to require Administrator approval for item check-ins/checkouts and reservations made by Interns only.
Note: Access Control must be enabled from Settings → Company Settings → Access Control for User Listings module to show up.
3.5. Staff Users can only check out IT Assets by scanning them
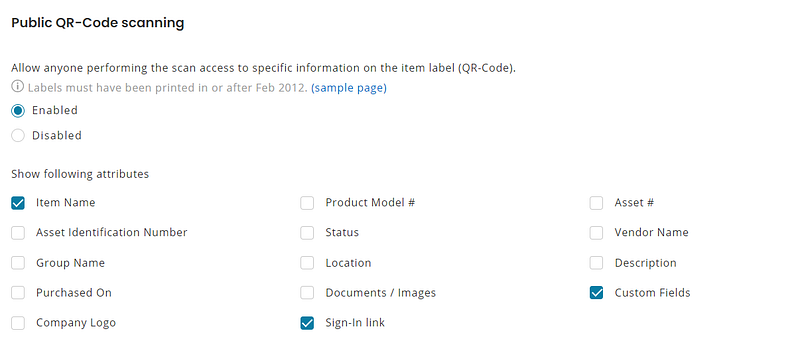
In this workflow, Staff Users are only allowed to see (and take actions on) IT Assets that have been checked out to them. However, they can pull up limited details of other items by scanning the QR Codes. This limited view gives Staff Users the option to check out items.
In essence, you enforce Staff users to scan items before checking them out.
Follow these steps to implement this setting:
- Set Arbitration to ‘Disabled’.
- Ensure Visibility is set to ‘Currently checked out to Staff Users’ only.
- Configure the limited view from Company Settings → Public QR Code scanning.
4. Staff User settings based on User Listings
AssetSonar gives you Staff Users the ability to take certain actions based on the User Listing(s) they belong to. These actions include:
- Creating items
- Scheduling and starting maintenance on items
To configure Staff User settings specific to each User Listing, go to User Listings → User Listing Name → Settings. Check the options illustrated below and hit ‘Save Settings’.
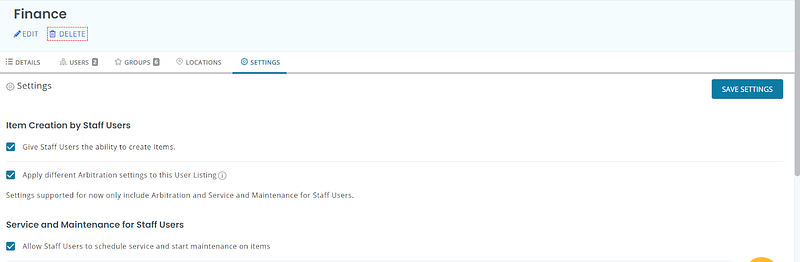
Note that default Company Arbitration settings will apply to a User Listing if Arbitration settings specific to the User Listing have not been enabled.
Related Posts
– Types of Members in AssetSonar
– Managing Access Control For Large Teams
About AssetSonar
AssetSonar is the leading hardware asset management software used by IT-intensive organizations and businesses all over the globe. It gives you the freedom to customize user permissions and roles as per your needs. Sign up today for a free 15-day trial.
For more assistance, drop us an email at support@ezo.io. Visit our Knowledge Base and blog for updates and other tutorials.
Join the Conversation: Twitter | Facebook


