

AssetSonar enables you to effectively manage IT Assets by streamlining your check-in and checkout workflows. In this article, we’ll take you through using AssetSonar to set up a Barcode scanner on your PC or Mac devices. To learn how to set up a Barcode scanner on the AssetSonar mobile app, click here.
AssetSonar gives you a lot of options to speed up checkouts and reservations. These include:
- Selecting a few item checkboxes from the IT Asset Listings page and choosing the ‘Checkout’ option from the Actions dropdown.
- Using AssetSonar’s mobile app to bulk scan labels and take actions.
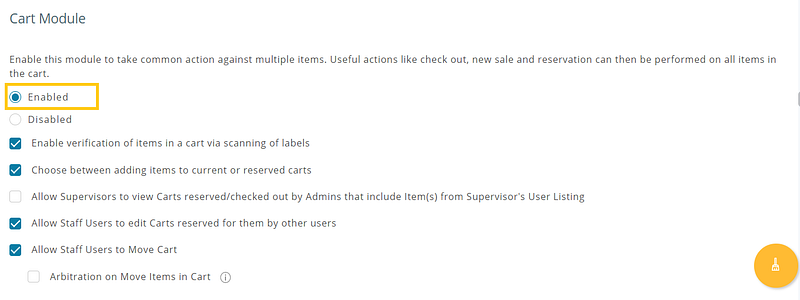
- Using the Cart to add IT Assets and check them out in one go. The Cart functionality can be enabled from Company Settings → Add Ons → Cart Module.
Contents
- Using Barcode scanners with Carts
- Setting up Barcodes for IT Assets
- Choosing the right Barcode scanner
- Setting up the Barcode scanner
- Testing the scanner
1. Using Barcode scanners with Carts
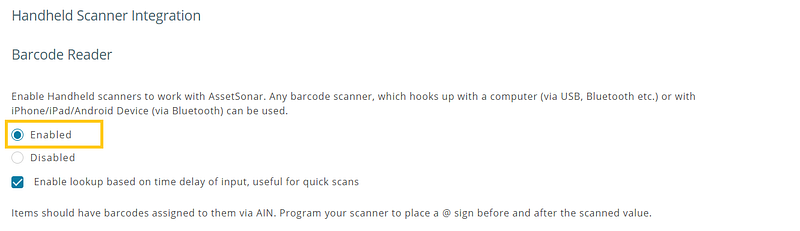
To make checkouts and reservations for multiple IT Assets even quicker, you can plug in a Barcode scanner with your PC or Mac. This allows you to add items to a Cart by scanning them in. Before we begin, make sure to enable the handheld scanners from settings. Follow the pathway: Settings → Add Ons → Handheld Scanner Integration → Barcode Reader → Enabled.
2. Setting up Barcodes for IT Assets
A Barcode is simply a sequence of alphabets, numbers, and dashes — for example, ABC-123aa-9878. No two items can have the same Identification Number, because it has to uniquely point to a specific item. Let’s play out a few scenarios showing you how to populate Barcodes into your AssetSonar account.
2.1. You already have Barcodes on your IT Assets
The existing barcode sequence needs to be added to the ‘Asset Identification Number’ field of the item. Say a Laptop (denoted as Asset #13 in your account) has the Barcode LAP-000001. You’ll add LAP-000001 in the ‘Identification Number’ field for Asset #13. This can be done by clicking the ‘Edit’ button.
These Identification Numbers can also be imported via Excel. Alternatively, you can scan them in using our mobile app. When editing or adding an IT Asset in the app, simply tap the barcode icon next to the ‘Asset Identification Number’ field:
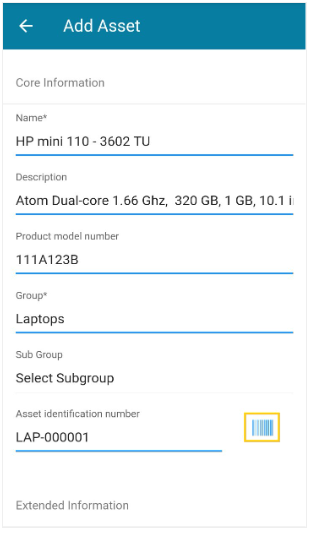
The mobile or iPad camera scanner will come up, allowing you to scan the Barcode you want to associate with this IT Asset. Once you’ve scanned the Barcode, save the item details and you’re done!
2.2. You have to create Barcodes for your IT Assets
If you want to create Barcodes afresh, add a unique sequence of numbers in the ‘Asset Identification Number’ fields of IT Assets. Next, create a Print Label template for your Barcodes. Please email us at support@ezo.io for a detailed guide on label designing and printing.
Tip: Smaller barcode sequences get scanned quicker.
3. Choosing the right Barcode scanner
Any Barcode scanner that connects to a computer via a USB or Bluetooth, etc., can be used with AssetSonar. Three important things to look for when choosing a Barcode scanner are as follows:
- The scanner should be able to connect to a PC or Mac and be HID (Human Interface Device) compliant.
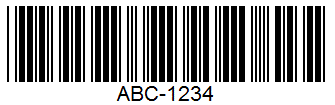
- The scanner should be configurable and allow an @ prefix and an @ suffix. This is because the barcode ABC-1234 will be scanned as @ABC-1234@.
- AssetSonar uses Code 39 for Barcode encoding, although our mobile apps support scanning multiple formats. If you’re using Barcodes generated via the AssetSonar Label Designer, the Barcode scanner should support Code 39 Barcodes.
- Note: Code 39 Barcode encoding allows the use of digits and characters up to 39 characters.
4. Setting up the Barcode scanner
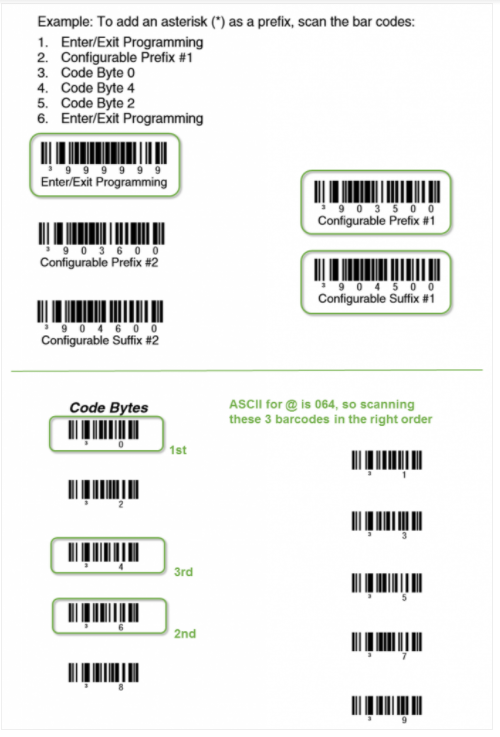
Let’s use the Honeywell VoyagerCG 9540 Barcode Scanner in this example. You’ll have to consult the relevant Configuration Guide to add an @ sign as a suffix and prefix to your specific Barcode scanner. We’ve outlined the steps for the Honeywell scanner below:
- Scan the Enter/Exit Programming barcode. The scanner will now be in programming mode.

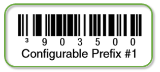
2. Scan the Configurable Prefix #1 barcode. Now the scanner will expect the prefix (in our case, @) to be scanned.
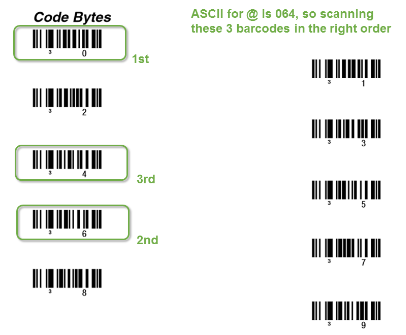
3. From the ASCII conversion chart, you’ll see that the @ character is 064.
4. From the Code Bytes, scan 0, then 6, and then 4 (highlighted as 1st, 2nd, and 3rd in the image below).
5. Now @ is configured as the prefix and will be added to the start of every Barcode that is scanned.

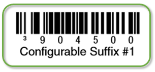
6. Next, scan the Configurable Suffix #1 barcode. Now the scanner will expect the suffix (in our case, @) to be scanned.
7. From the Code Bytes again, scan 0, then 6, and then 4 (highlighted as 1st, 2nd, and 3rd in the image below ). Now @ is configured as the suffix and will be appended to every barcode that is scanned.
8. Scan the Enter/Exit Programming Barcode again, this time to exit the programming mode.

Here is the excerpt from the VoyagerCG guide we used.
5. Testing the Scanner
It’s time to test this out! To see if the scanner is configured correctly:
- Hook up the Barcode scanner to your PC or Mac using a USB port or Bluetooth.
- Click on the Search Bar in your app (or use any other text area).
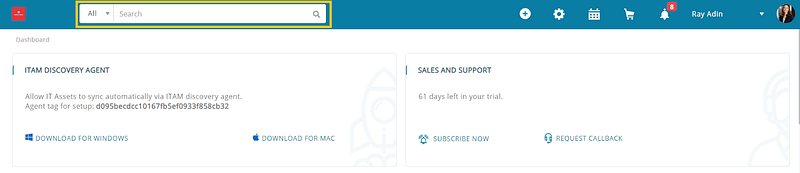
3. Scan a Barcode, say ABC-123
4. It should print @ABC-123@ in the address bar (or text area). Seems like everything is in order!
5. Next, go to the Carts page and scan in your Barcodes. If items associated with them exist in the system, they’ll be populated in the Add Items field:
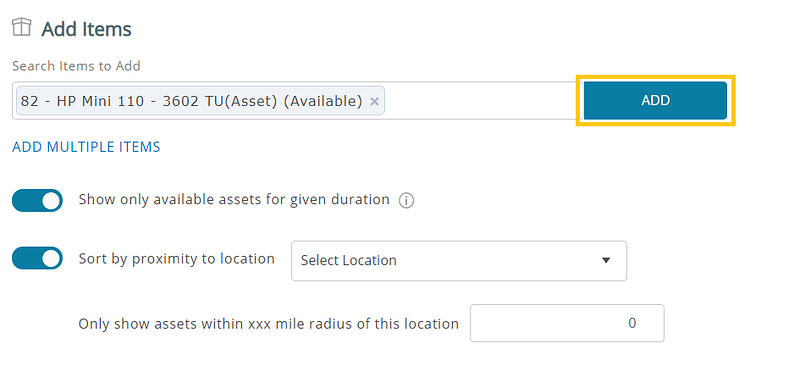
6. Scan as many labels as you like and then hit the ‘Add’ button to put all of them into your Cart.
Note: If you scan a Barcode that’s not in your AssetSonar account, it will be shown in red:

And that’s it! You’ve learned all about scanning items in AssetSonar.
Read more: Setting up RFID IT Asset Tracking with AssetSonar
About AssetSonar
AssetSonar is a powerful IT asset management software that supports Barcode tracking of IT Assets for streamlined workflows. It speeds up your inventory checkout processes and improves overall productivity.
We offer a 15-day trial to help you see what we’re all about. Try us out today!


