

AssetSonar integrates with the SCIM protocol so you can manage the identity data of your employees on the cloud and seamlessly provision them access and user rights into the AssetSonar application from any identity provider including Onelogin.
Contents
- What is SCIM?
- Why use SCIM?
- [How-to] implement SCIM user provisioning with OneLogin
3.1. Step 1: Enable SCIM in AssetSonar
3.2. Step 2: Add the AssetSonar application in OneLogin - Importing users to Custom Roles
- Provisioning user(s)
5.1 Provisioning Users into Groups - Setting up alerts for user sync and updates
1. What is SCIM?
SCIM, or System for Cross-domain Identity Management, is an open standard that automates user provisioning for your organization. It communicates user identity data of your employees from identity providers to service providers.
An identity provider (IdP) is a system that contains a robust directory of user identities and single, consistent login credentials for each of your employees. Onelogin is an example. A service provider (SP) is an enterprise SaaS application that requires these user identities so your employees can log into the application.
The SCIM protocol ensures that any changes made to user identities in the IdP, such as OneLogin are automatically synced in the SP i.e. AssetSonar.
2. Why use SCIM?
Managing the user life cycle is crucial for businesses. As companies grow or experience turnover, their employee count keeps changing. They need a quick and easy way to add or delete user accounts in their company directories and simultaneously authorize or revoke employees’ access to various business applications.
Our integration with SCIM simplifies the user experience by automating your user provisioning processes. It automatically creates, updates, and deletes users in your AssetSonar account as you create, update, and delete them in IdP tools like Onelogin. Since data is communicated automatically, it saves your IT team valuable time and reduces the risk of error stemming from manual data entry.
AssetSonar’s SCIM integration with Onelogin offers various benefits. These include:
1. Centralized user management: Manage the team from one central platform where you can invite employees, grant access to relevant users, and de-provision them when they leave the organization.
2. Strengthen your identity strategy: SCIM provisioning with Onelogin allows you to strengthen your identity strategy and manage your teams by folding AssetSonar passwords into your already established workflows.
3. Streamlined onboarding: SCIM bridge with Onelogin reduces the work required to seamlessly onboard new employees so your IT team can spend more time on other tasks.
3. [How-to] implement SCIM user provisioning with OneLogin
Let’s walk you through some basic steps on how to implement SCIM-based user provisioning with Onelogin!
Step 1: Enable SCIM in AssetSonar
To enable SCIM in your AssetSonar account, follow the pathway: Settings → Add Ons → User Provisioning via SCIM and select ‘Enabled’. Hit ‘Update’.
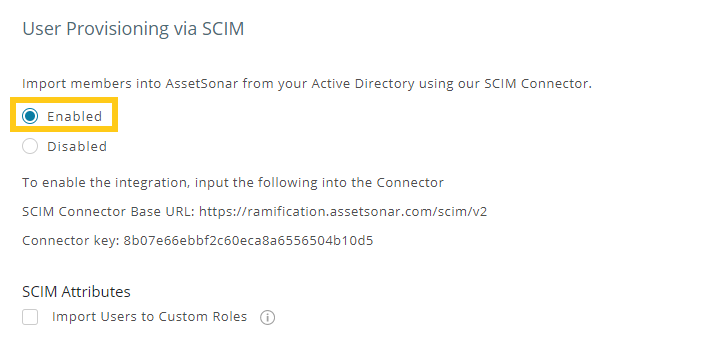
This action reveals additional information shown below:
- SCIM Connector Base URL
- Connector Key
You will need to enter the two values in the ‘Tenant URL’ and ‘Secret Token’ data fields respectively in Step 2.
Step 2: Add the AssetSonar application in OneLogin
Before you go ahead and start provisioning users, you must first add the AssetSonar application in your OneLogin portal.
The process is very simple.
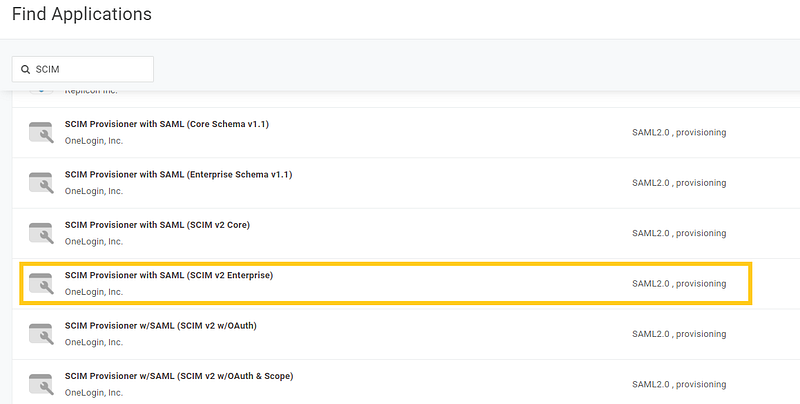
1. In your Onelogin account, go to Applications and enter SCIM in the search bar.

2. Select “SCIM Provisioner with SAML (SCIM v2 Enterprise)”.
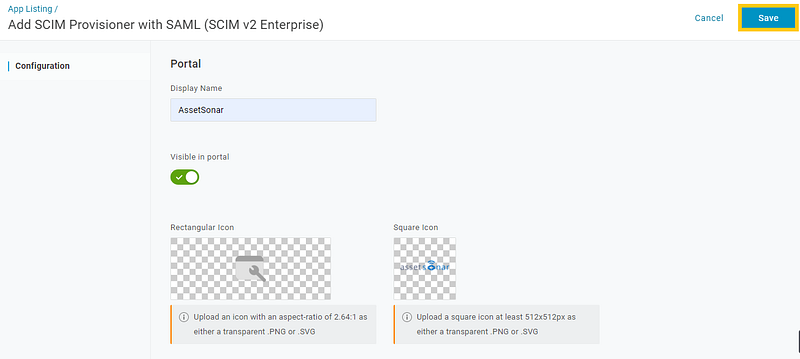
3. This leads you to the Configurations page. Enter the required details and hit “Save”.
4. Once you have saved the generic information, more options would become available. Click on “Configuration” and scroll down to the API Connection.
5. In the SCIM base URL field, enter the URL from your SCIM settings in AssetSonar and the connector key should be entered in the “SCIM Bearer Token” section.
6. In the SCIM JSON Template, add the following schema:
{
“schemas”: [
“urn:scim:schemas:core:1.0”
],
“userName”: “{$parameters.scimusername}”,
“name”: {
“givenName”: “{$user.firstname}”,
“familyName”: “{$user.lastname}”,
“formatted”: “{$user.display_name}”
}
}
Once you have filled out the required fields, hit “Enable”.
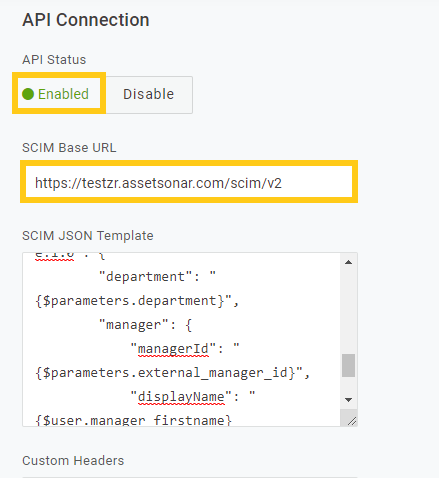
7. Once you have enabled the API, click “Save”.
4. Importing users to Custom Roles
If you want to map your users and their respective roles in a way that their hierarchy is reflected in AssetSonar, then you can do so by checking the ‘Import Users to Custom Roles’ option.
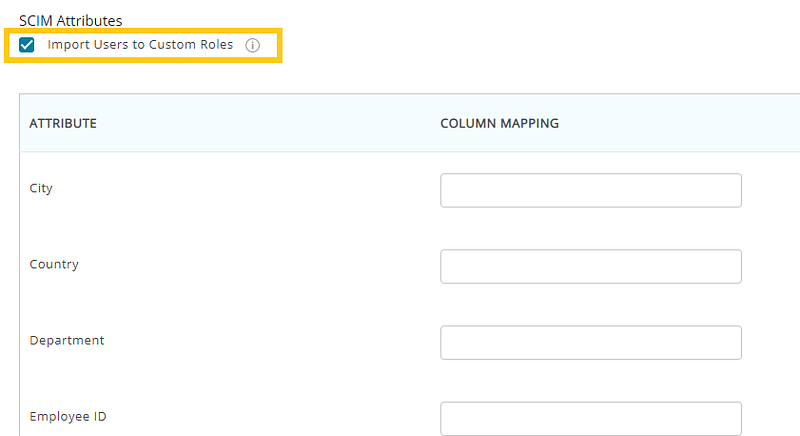
Once you have checked the setting, the following options would appear on the attribute and column mapping table:
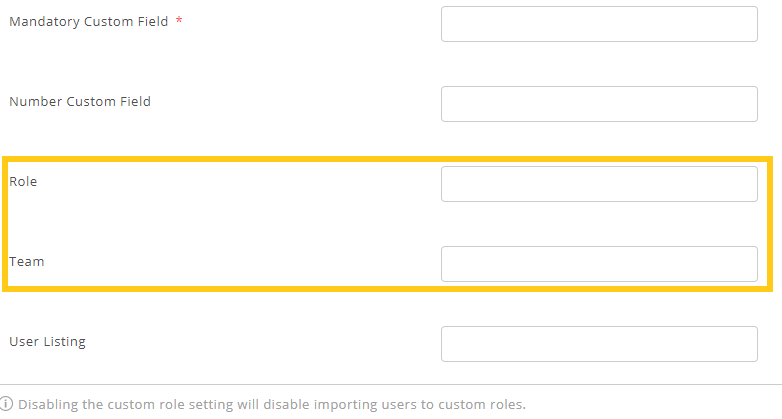
Note: If the data values for Roles and Teams are not already specified in AssetSonar, the users belonging to these Roles and Teams will not get provisioned into AssetSonar. You will receive an email listing the users that could not be provisioned.
If a custom role imported from OneLogin via SCIM does not exist in AssetSonar, users belonging to that custom role can be provisioned to a default role in AssetSonar. You can set the Default Role using the option highlighted below:
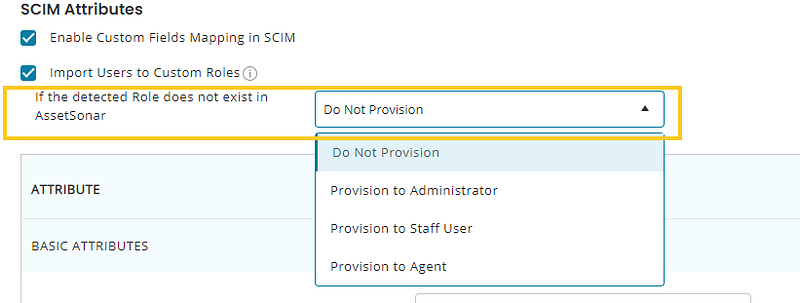
Let’s say, you imported users belonging to the custom role Customer Success team from OneLogin via SCIM and this custom role is not present in AssetSonar, users belonging to this role will be provisioned as Administrators.
If you do not wish to provision these users as Administrators, you can also select the option ‘Provision to some role’ and provision these users to a custom role that already exists in AssetSonar.
5. Provisioning User(s)
To enable the Onelogin provisioning service for AssetSonar, carry out the steps outlined below:
1. Go to the Provisioning tab and click on “Enable Provisioning”.
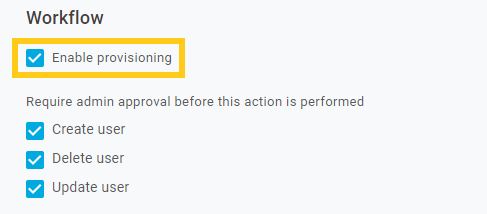
2. Update the remaining fields as shown below:
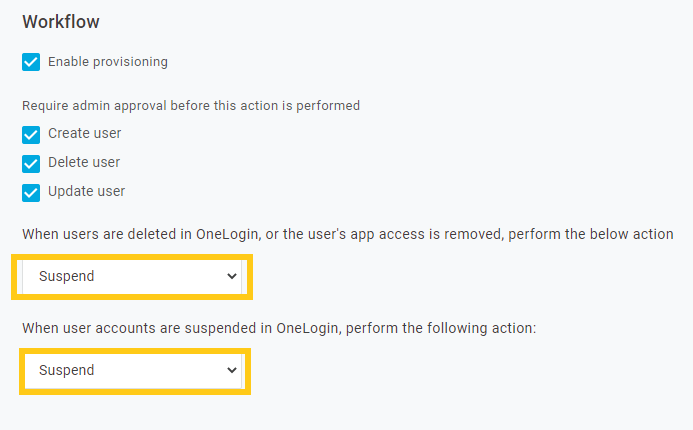
Once updated, hit “Save”.
3. Go on the Users tab and add the users that you wish to provision for AssetSonar. Once entered all the details, click on “Save”.
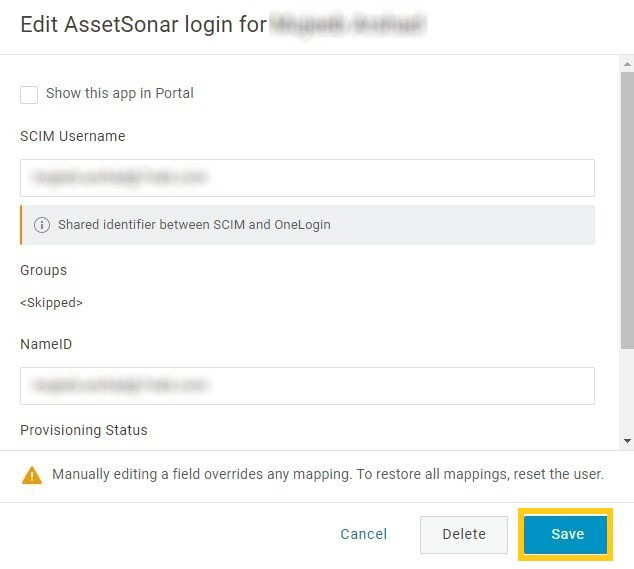
Once provisioned, the user status would be updated.

6. Setting up Alerts for user syncs and updates
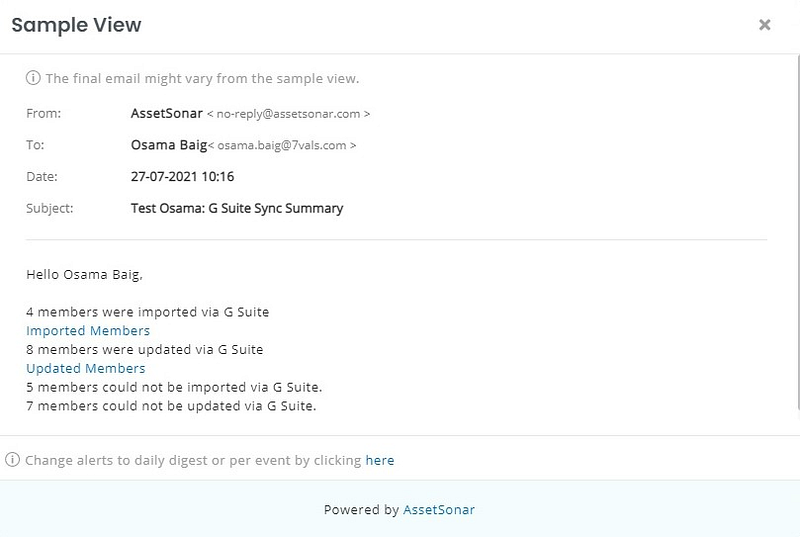
AssetSonar allows you to set up and receive alerts whenever users imported from OneLogin via SCIM are synced or updated. You can set these up from both “my Alerts” and “ServiceDesk Alerts”. Alerts that were previously sent through email are now grouped and can be managed through the Alerts section. Select the email alerts of your preference as shown:
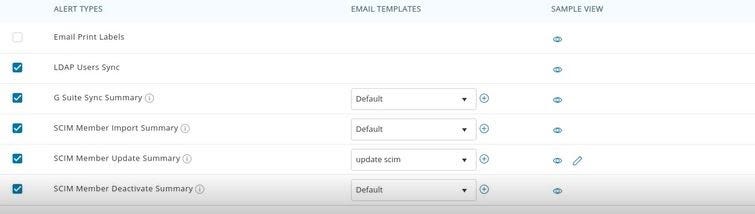
Moreover, the content of the email alerts can be switched to pre-generated templates that can be easily renamed or edited. The default template for email alerts is shown below.
Read more: [How to] Implement User Provisioning via SCIM with Azure AD in AssetSonar
About AssetSonar
AssetSonar is the leading IT asset management software used by IT-intensive organizations and businesses all over the globe. Sign up today for a free 15-day trial.
For more assistance, drop us an email at support@ezo.io. You can also visit our blog for detailed support posts.
Join the Conversation: Twitter | Facebook


