

AssetSonar integrates with the SCIM protocol so you can manage the identity data of your employees on the cloud and seamlessly provision them access and user rights into the AssetSonar application from any identity provider including Azure AD.
1. What is SCIM?
SCIM, or System for Cross-domain Identity Management, is an open standard that automates user provisioning for your organization. It communicates the user identity data of your employees from identity providers to service providers.
An identity provider (IdP) is a system that contains a robust directory of user identities and single, consistent login credentials for each of your employees. Azure AD is an example. A service provider (SP) is an enterprise SaaS application that requires these user identities so your employees can log into the application.
The SCIM protocol ensures that any changes made to user identities in the IdP, such as Azure AD are automatically synced in the SP i.e. AssetSonar.
2. Why use SCIM?
Managing user lifecycle is crucial for businesses. As companies grow or experience turnover, their employee count keeps changing. They need a quick and easy way to add or delete user accounts in their company directories and simultaneously authorize or revoke employees’ access to various business applications.
Our integration with SCIM simplifies the user experience by automating your user provisioning processes. It automatically creates users in your AssetSonar account as you create them in IdP tools like Azure AD. Since data is communicated automatically, it saves your IT team valuable time and reduces the risk of error stemming from manual data entry.
Note: Our SCIM integration currently supports Azure AD, Onelogin, and Okta only.
AssetSonar’s SCIM integration with Azure AD offers various benefits. These include:
- Centralized user management: Manage the user identities, access rights and privileges, and action permissions of your employees and teams from a single space.
- Compliance with security policy: Mitigate security risk with consistent login credentials and single-sign-on (SSO) capability as employees no longer need to sign in to each of their accounts individually. This also reduces the need for password resets.
- Ready-to-use integration: Save your IT team the effort of in-house custom development with our ready-to-use integration.
3. Pre-requisites
Before you set up SCIM with Azure AD, you need to consider some pre-requisites. You must have:
- The Tenant URL and Secret Token. See step 4.1.
- Global Administrative rights for the Active Directory.
- Access rights to set up Enterprise applications.
4. [How-to] implement SCIM user provisioning with Azure AD
Let’s walk you through some basic steps on how to implement SCIM-based user provisioning with Azure AD!
Step 1: Enable SCIM in AssetSonar
To enable SCIM in your AssetSonar account, follow the pathway: Settings → Integrations→ User Provisioning via SCIM and select ‘Enabled’. Hit ‘Update’.
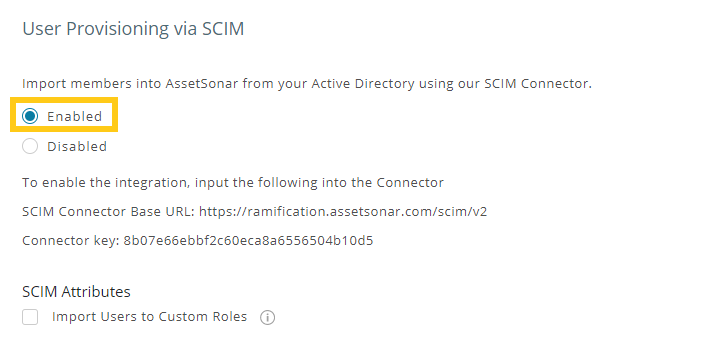
This action reveals additional information shown below.
- SCIM Connector Base URL
- Connector Key
You will need to enter the two values in the ‘Tenant URL’ and ‘Secret Token’ data fields respectively in Step 2.
Step 2: Add the AssetSonar application in Azure AD
Note: The AssetSonar application currently published on Azure AD does not support SCIM. To proceed, you must first add a custom AssetSonar application to your Azure portal.
The process is very simple.
1. Go to your Azure Portal and sign in. Note: Make sure you are in the correct directory!
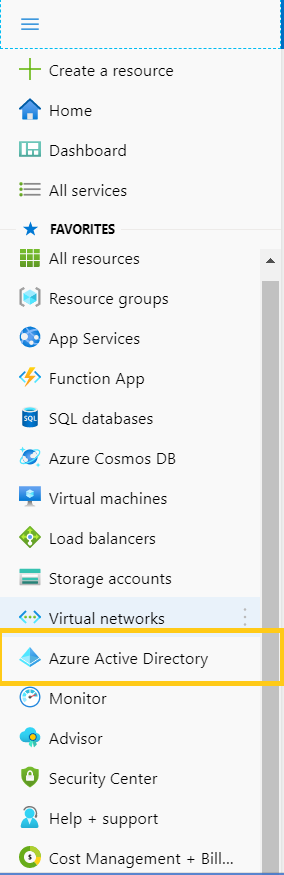
2. Navigate to ‘Azure Active Directory’ on the left-hand side.
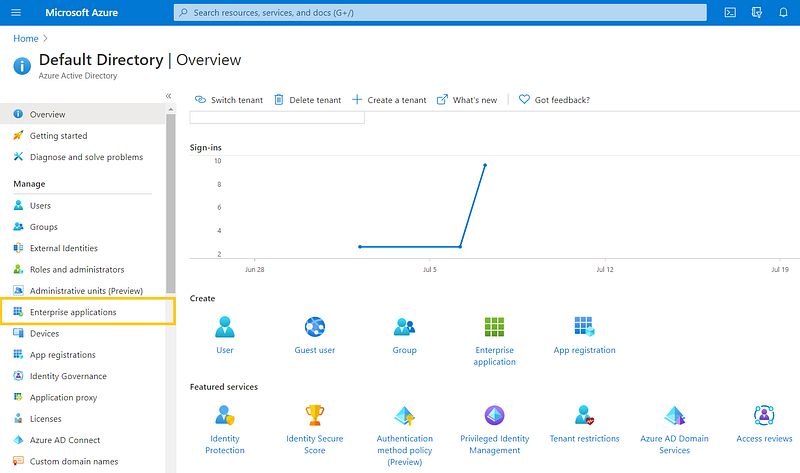
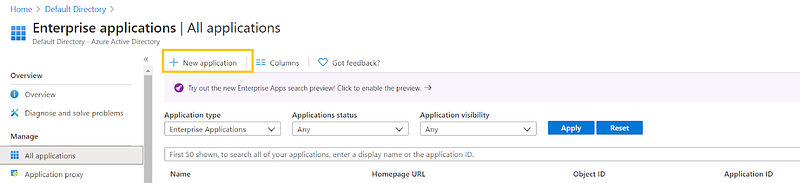
3. Go to Enterprise Applications → All Applications → New application.
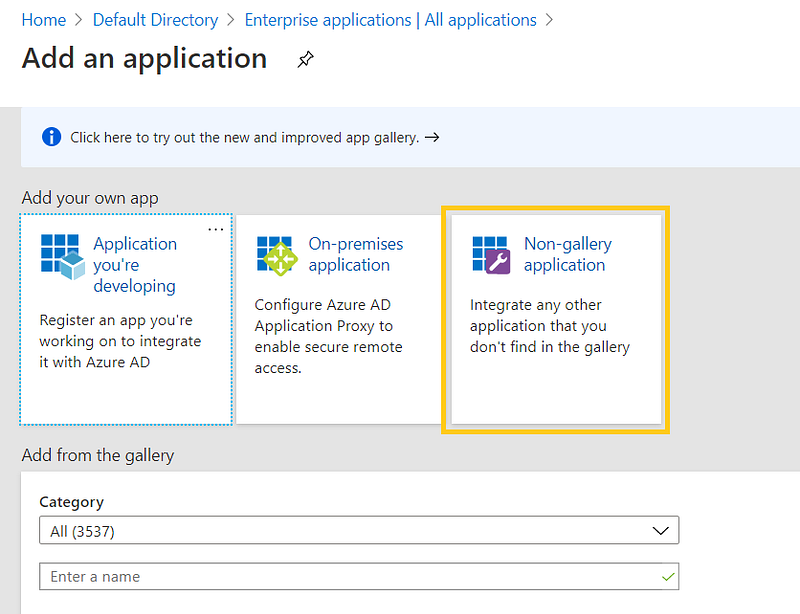
4. Select ‘Non-gallery application’.
5. Add ‘AssetSonar’ as the name of the application, and click ‘Create’. Please do not choose AssetSonar application appearing as recommendation below. The application currently recommended doesnot support SCIM.
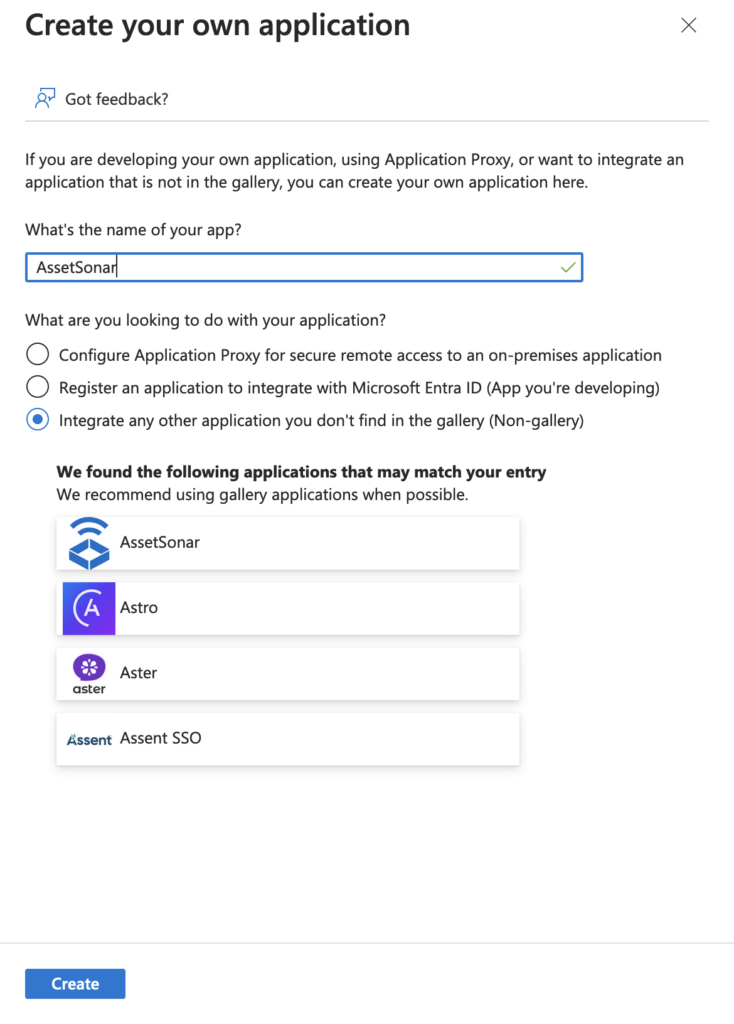
The application has been created in your Azure Active Directory.

Step 3: Configure the SCIM connection in Azure AD
Now, configure some additional settings in your Azure portal.
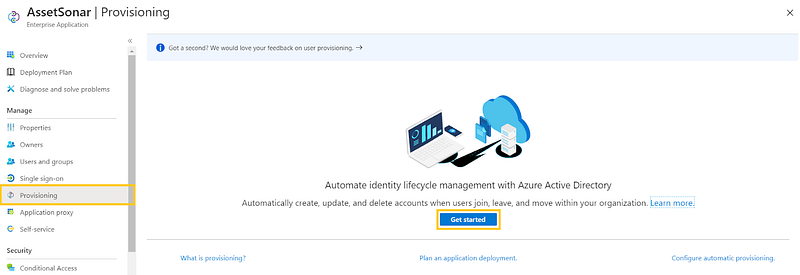
- Go to the Provisioning tab in the Manage section and click on ‘Get Started’.
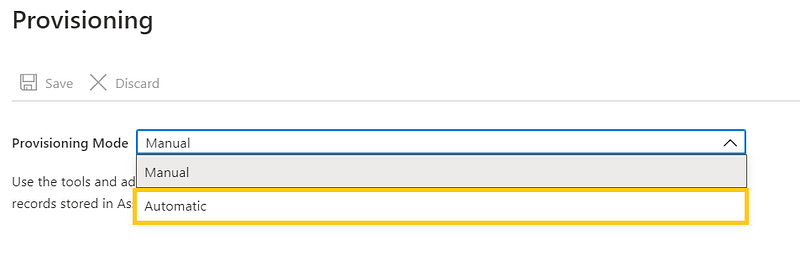
2. Set the Provisioning Mode to ‘Automatic’.
3. Under the Admin Credentials section, input the SCIM Base Connector URL and the Connector Key (from Step 1) into the Tenant URL and Secret Token fields respectively. Click ‘Test Connection’ to ensure Azure AD can connect to AssetSonar.
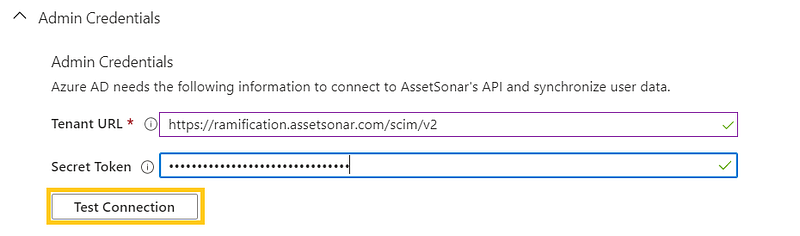
If the connection fails, ensure your AssetSonar account has Admin permissions and try again.
4. In the Notification Email field, enter the email address of the person or group who should receive the provisioning error notifications and check the checkbox ‘Send an email notification when a failure occurs’.

5. Click ‘Save’.
Once the provision settings have been saved, you’ll get the following notification.

5. Importing users to Custom Roles
If you want to map your users and their respective roles in a way that their hierarchy is reflected in AssetSonar, then you can do so by checking the ‘Import Users to Custom Roles’ option.
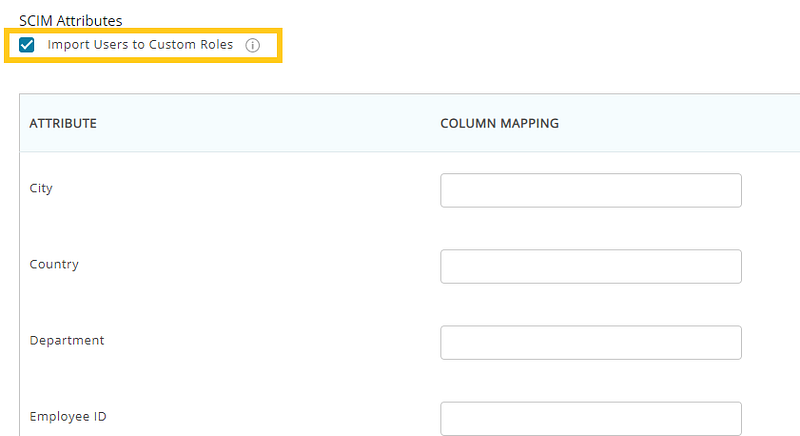
Once you have checked the setting, the following options would appear on the attribute and column mapping table:
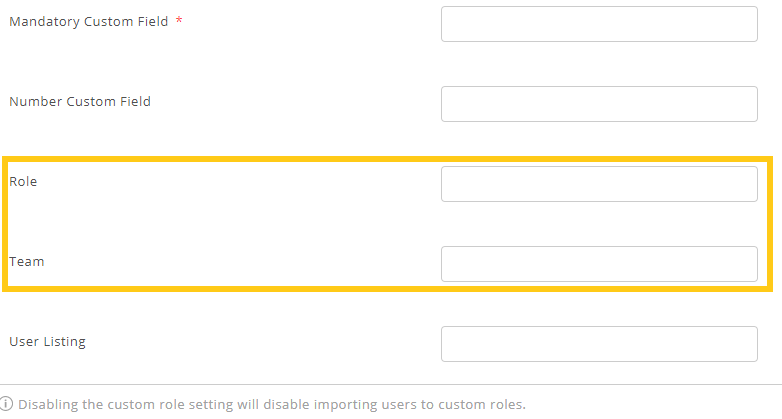
If a custom role imported from Azure AD via SCIM does not exist in AssetSonar, users belonging to that custom role can be provisioned to a default role in AssetSonar. You can set the Default Role using the option highlighted below:
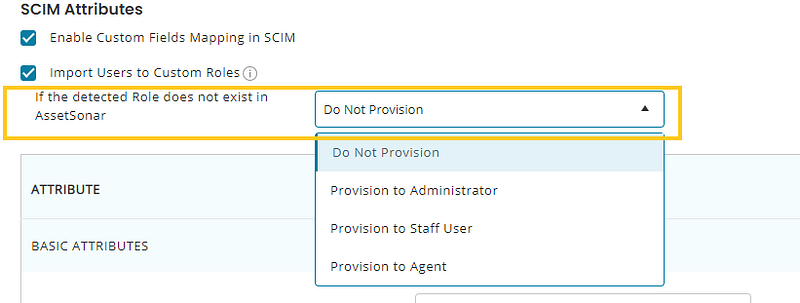
Let’s say, you imported users belonging to the custom role Customer Success team from Azure AD via SCIM and this custom role is not present in AssetSonar, users belonging to this role will be provisioned as Administrators.
If you do not wish to provision these users as Administrators, you can also select the option ‘Provision to some role’ and provision these users to a custom role that already exists in AssetSonar.
6. Provisioning user(s)
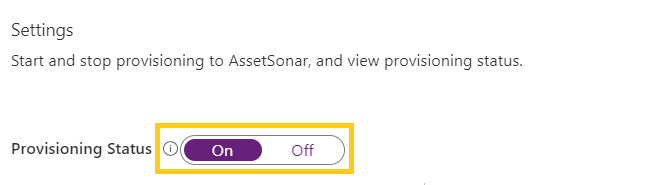
To enable the Azure AD provisioning service for AssetSonar, carry out the steps outlined below:
- Go to the Settings section and change the Provisioning Status to ‘On’.
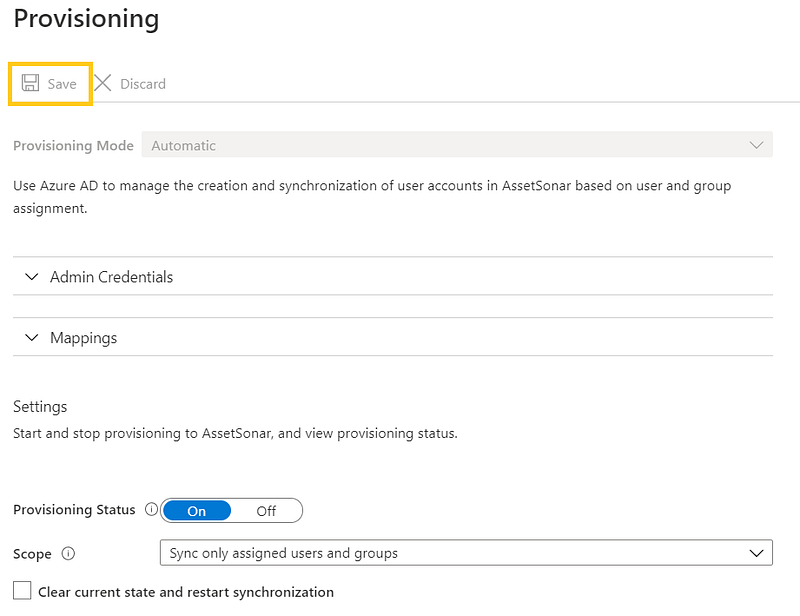
2. Define the users that you would like to provision to AssetSonar by choosing the desired values in Scope in the Settings section.

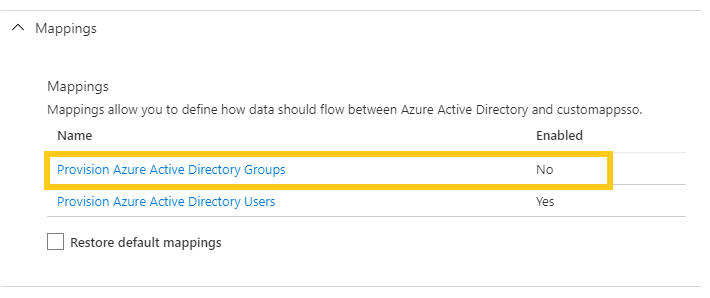
3. As you can only provision users and not groups for Azure AD via SCIM, disable the “Provision Azure Active Directory Groups” from Mappings.
4. When you are ready to provision, click ‘Save’.
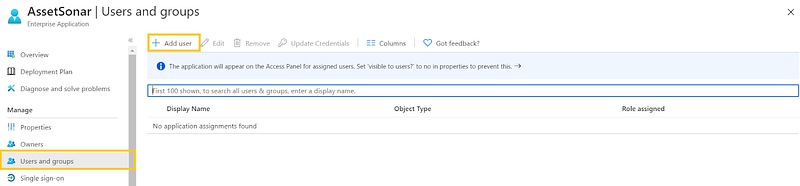
5. If you selected ‘Sync only assigned users and groups’, please navigate back to the Users and Groups section of the AssetSonar App. Click on ‘Add user’ to add relevant users.
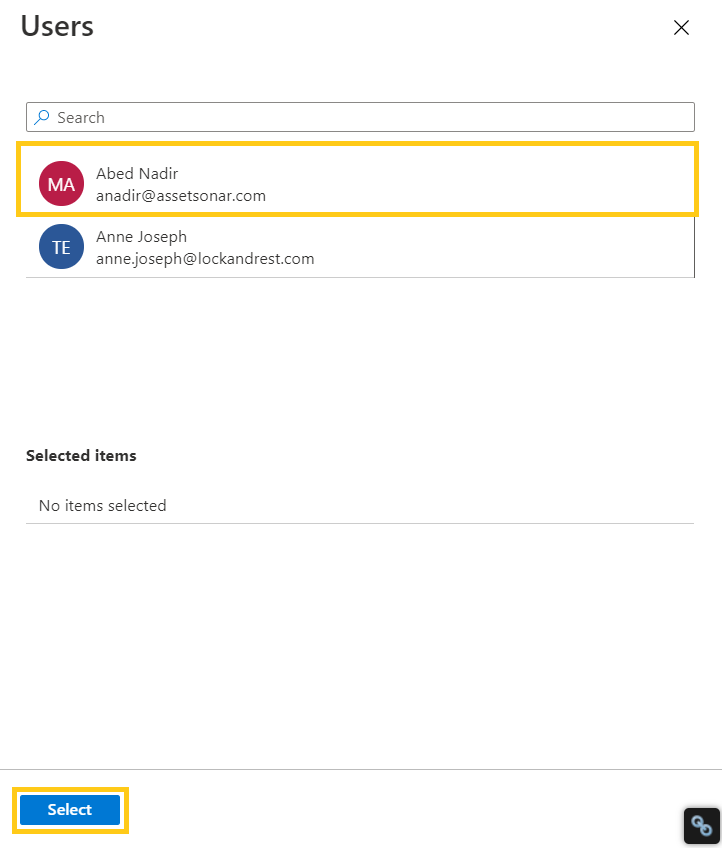
6. Click on the relevant User’s details and hit ‘Select’.
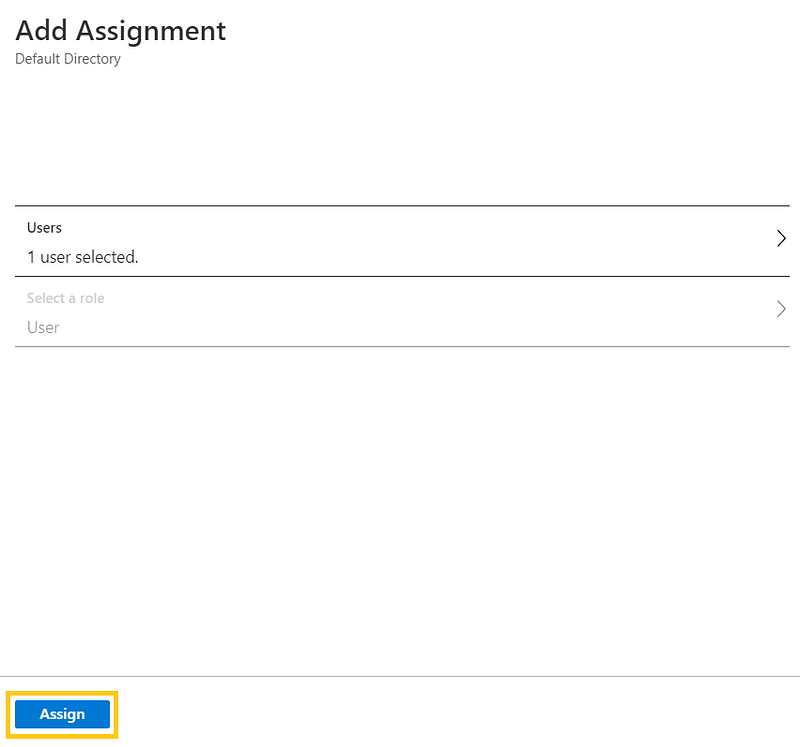
7. Click on ‘Assign’.
You’ll get the following alert once the assignment has been successful.

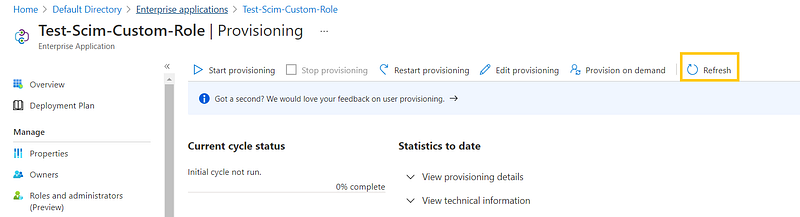
8. Now, go to the Provisioning section in the AssetSonar application and click on ‘Refresh’.
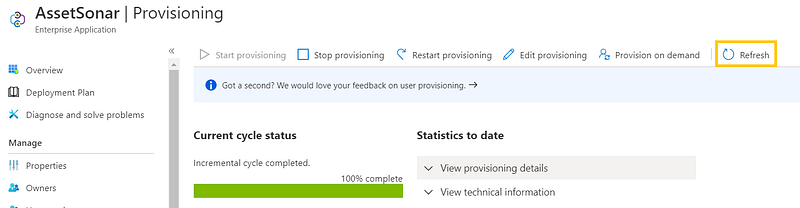
This shall sync the selected User in your AssetSonar account and provide them access rights into the application, as shown.
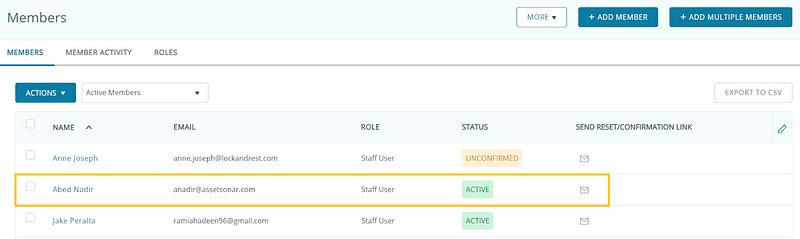
Note: Azure uses Operational Schema for User Update and Deletion. Currently, AssetSonar’s SCIM connection uses an Enterprise Schema. We’ll soon be supporting the Operational Schema for User Updates and Deletion.
7. Mapping of Active Directory Attributes
As an Administrator, you should be able to view, edit and add which user attributes must flow between Azure AD and AssetSonar when user accounts are provisioned or updated.
Attribute mapping can be useful when you have to map essential things like street address, employee badge number, or location etc.
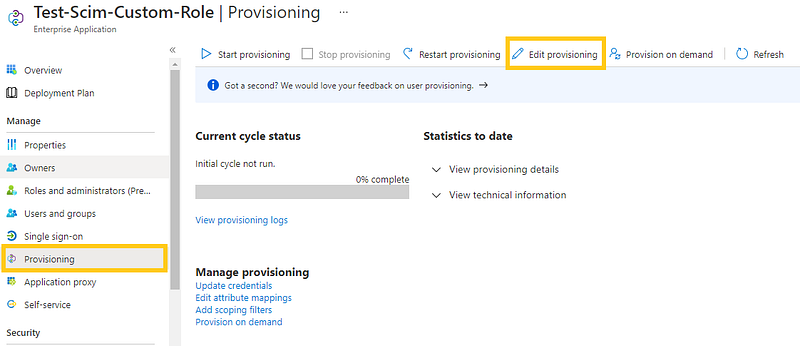
For mapping Active Directory Attributes to AssetSonar, log in to your Azure AD portal and click on ‘Enterprise Applications’. Choose the relevant SCIM application and an overview page will open up.
On the App Overview page, select the ‘Provisioning’ option. Then, click on ‘Edit Provisioning’ as shown below:
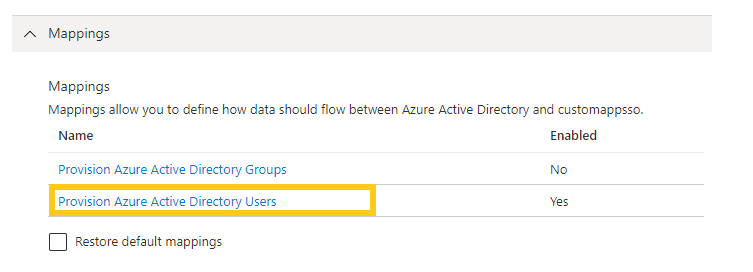
Now, click on the ‘Mappings’ configuration and a dropdown will appear. Here, select ‘Provision Azure Active Directory Users’.
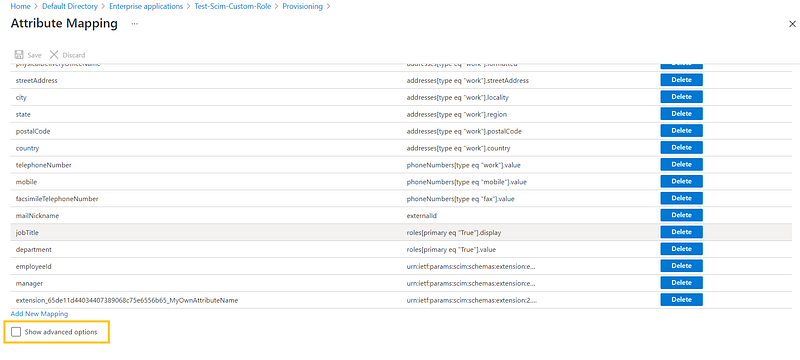
This leads you to the Attribute Mapping page. The usernames are exhibited under Azure Active Directory Attribute while the values under customappsso Attribute are mapped in AssetSonar.
For example, as you can see below, userPrincipalName from Azure AD will be mapped against userName in AssetSonar as we have directed.
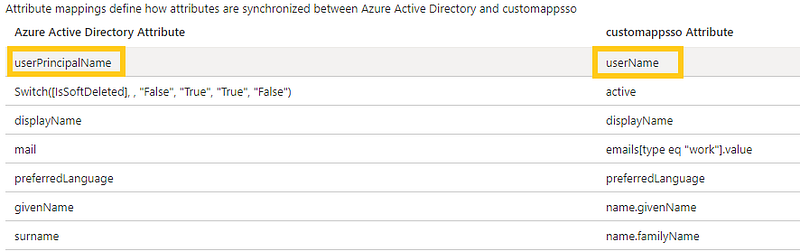
This way, if you want to map Azure Active Directory Attributes onto the AssetSonar application, you can easily copy and paste the specific attribute name from customappsso Attributes.
7.1. Adding Custom Attributes
If you want to add more attributes, then follow the steps given below:
- Scroll down to the end of the Attribute Mapping page and select ‘Show advanced options’.
2. Now, click on the ‘Edit attribute list for customappsso’ button.
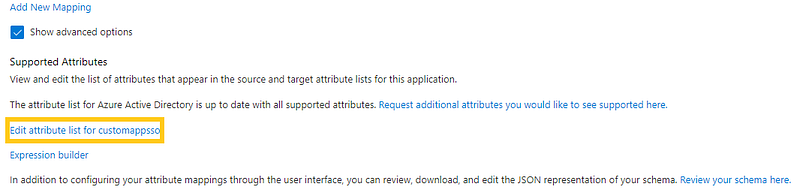
3. A new attribute can be added through a command prompt. After extracting commands from the command prompt, you get the option to add a custom attribute as illustrated below:

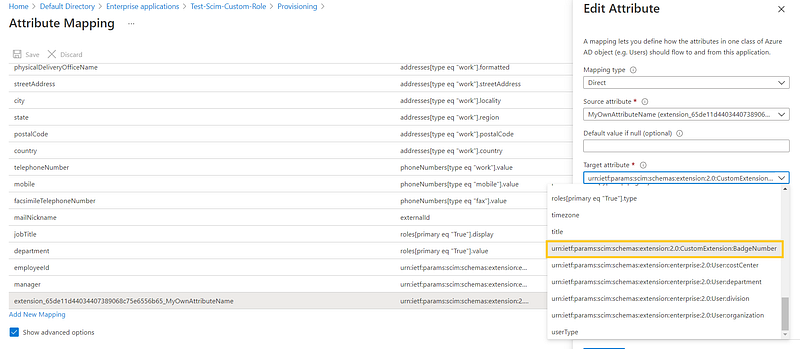
4. Add a custom extension attribute. However, make sure that you keep the format precisely the same as it is in Azure documentation. For instance, the following format should remain the same:
urn:ietf:params:scim:schemas:extension:2.0:CustomExtension:
You can add the attribute name at the end.
This will allow users to add custom attributes to Azure AD. Once this process is done, you can easily map that attribute from Azure AD to a field in AssetSonar. Copy the entire name (as highlighted below) and paste it in the SCIM Attributes section of AssetSonar settings as shown below:
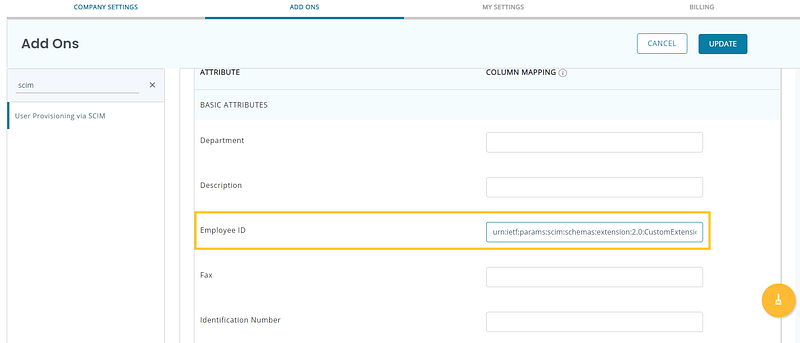
Click ‘Update’ to refresh settings. Now, go back to Azure Active Directory → Enterprise Applications → Application Name and click on ‘Refresh’.
8. Merging Users
You can provision Users from multiple sources whether manual or through a protocol like SCIM into the system and can merge them as data gets updated so you can maintain the latest information on your users especially if they are added through spreadsheets. Merging will take place if the user is brought in through SAML, and/or manual entry (CSV or single port entry) and then merged via SCIM.
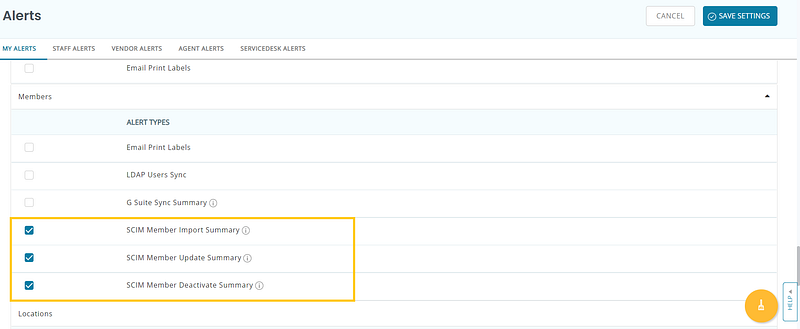
9. Setting Up Alerts For User Syncs And Updates
AssetSonar allows you to set up and receive alerts whenever users imported from Azure AD are synced or updated. You can set these up from both My Alerts and ServiceDesk Alerts. Alerts that were previously sent through email are now grouped and can be managed through the Alerts section. Select the email alerts of your preference as shown:
Moreover, the content of the email alerts can be switched to pre-generated templates that can be easily renamed or edited. The default template for email alerts is shown below.

Read more: [How-to] Implement User Provisioning via SCIM with AssetSonar and Okta
Frequently asked questions
About AssetSonar
AssetSonar is the leading hardware asset management software that integrates with Microsoft Intune. It is used by IT-intensive organizations and businesses all over the globe.
Sign up today for a free 15-day trial.
For more assistance, drop us an email at support@ezo.io.


