


Many educational institutes, especially K-12s, check out hundreds of devices such as laptops or Chromebooks when a term starts. Upon completion of an educational year or a semester, all these devices are required to be returned en masse. Going to the individual Cart/Item Details pages to check these items back in can be a painstaking task.
To expedite this process, AssetSonar has introduced the Quick Check-in feature that allows users to directly check in Asset and Asset Stock items right from the dashboard.
You can use the Quick Check-in button to do a quick search for checked out items by typing out their AINs or Names, or by scanning their barcode. Simply scan the label of the IT Asset, or type its Name or AIN into the Search field and check in the item right from the page.
Note: If the item is part of a bundle, AssetSonar will auto-suggest the complete bundle for a quick check-in.
Let’s look at how to use this feature in more detail!
Contents
- Enabling Quick Check-in
- Searching items for Quick Check-in
2.1. Checking in items at different locations
2.2. Setting default/custom return dates - Checking in Bundles
- Custom fields for Quick Check-ins
- Enabling Quick Check-in alerts
1. Enabling Quick Check-in
To enable the feature, go to Settings → Add Ons → Quick Check-In and click ‘Enabled’.

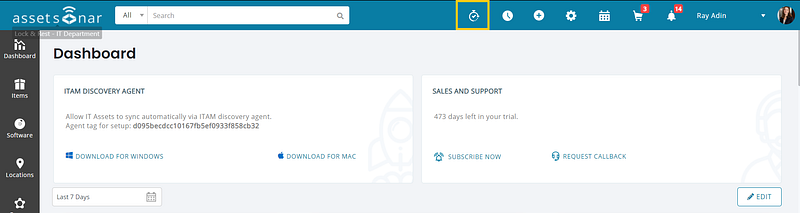
After you have enabled the setting, you will be able to view the Quick Check-in icon on the top right corner of the dashboard.
Note: The Quick Check-in only applies to Asset, Asset Stock, and Bundles.
2. Searching items for Quick Check-in
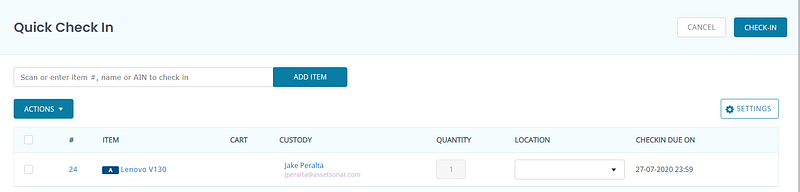
When you click the Quick Check-in icon on the dashboard, you’ll be redirected to the main page.
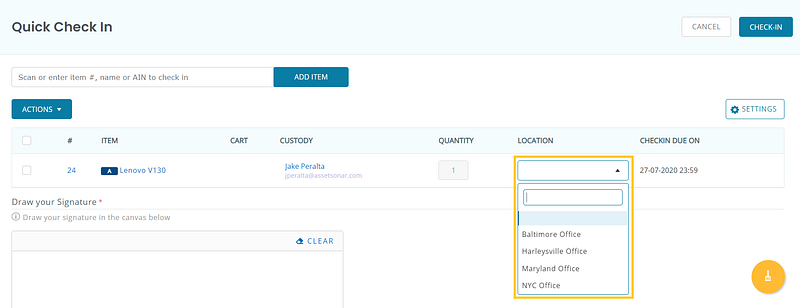
Here, you can search for the item you want to check in by the item Name, AIN, and Number or via a barcode scan. The search results will appear as follows:
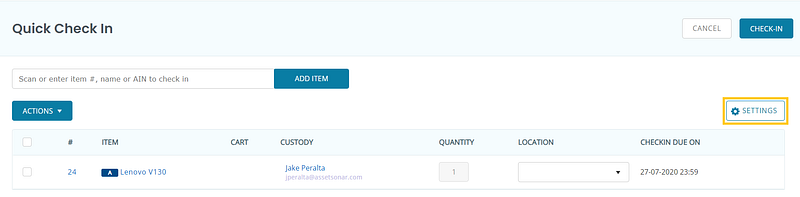
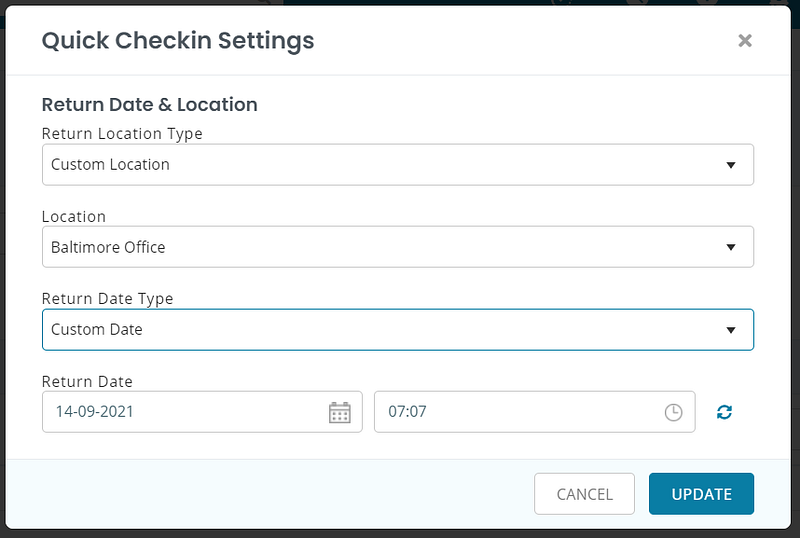
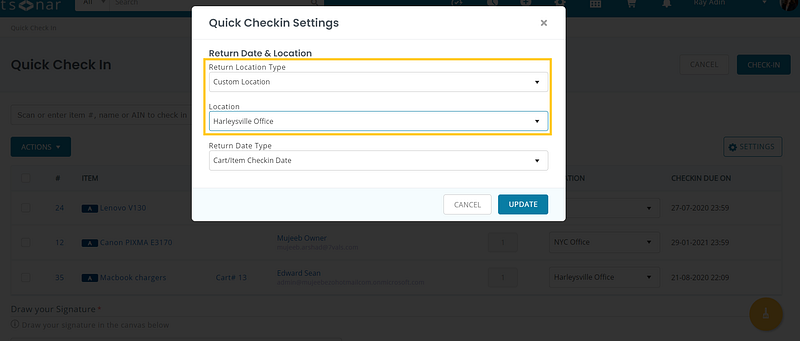
When using the Quick Check-in feature, users can select different locations and return dates. The Settings button on the right corner of the page pops up an overlay to choose a location and return date as shown below:
2.1. Checking in items at different locations
Oftentimes, an Asset is checked out for one location but needs to be checked into a different location. To be able to enter individual Asset locations, you must have enabled this checkbox in Settings:

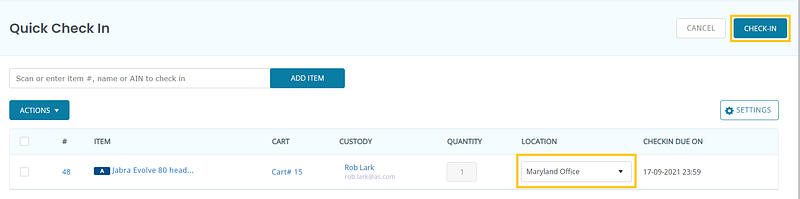
Enabling this checkbox will allow users to select locations for each Asset in the table. If this setting is disabled, then you can only choose the default location from the dialogue box on the Quick Check-in page.
Note: Asset Stock cannot be checked in at different locations. It will be checked to its original location i.e. where it was prior to the checkout.
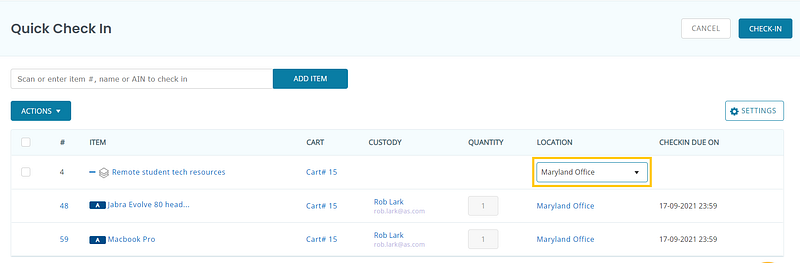
For assigning locations to individual Assets, you can choose a location from the dropdown on the Quick Check-in page.
Note: This setting is only available if you have enabled different locations from Add Ons → Quick Check-in.
For adding a single location while mass checking in Items, you can select the Location from the Settings overlay on the Quick Check-In page:
2.2. Setting default/custom return dates
You can choose to return Assets and Asset Stock either on the return date of Cart(s) or a custom return date from the dialogue box on the Quick Check-in page:
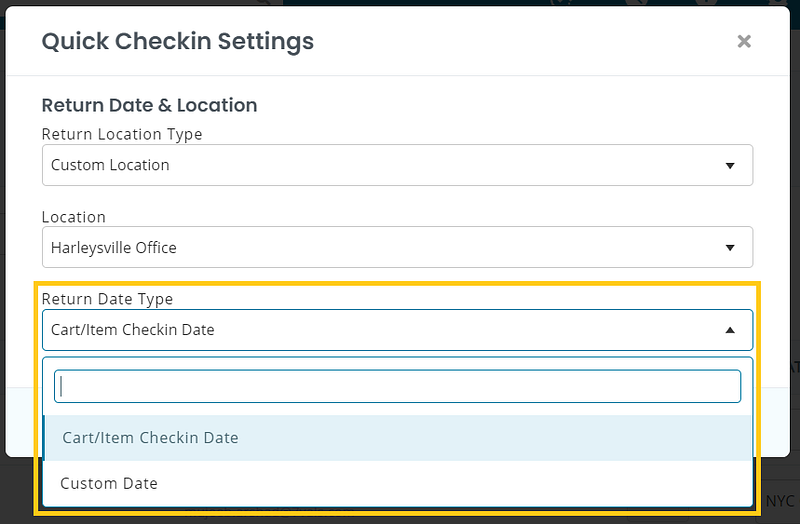
The custom date should be any date before the Asset’s expected check-in date. Let’s say, a laptop was initially scheduled to be checked in on 28th July. However, an employee/student decided to return it earlier i.e. on 24th July. In such a case, you can easily set the custom date to the 24th of July when checking in the Asset.
3. Checking in Bundles
Items in a Bundle can be checked in together or as individual items. To check in a Bundle as a whole, simply search for the Bundle on the Quick Check-in page and enter the relevant details.
Click on the ‘+/-’ button to toggle between the expanded and collapsed views of the Bundle.
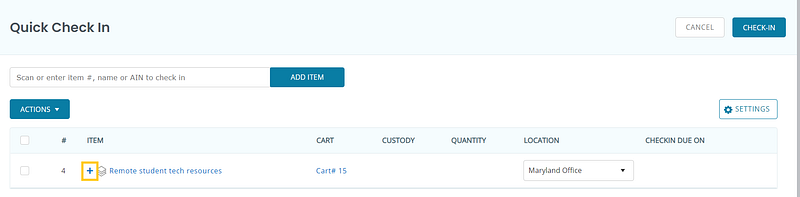
When checking in a Bundle, users can also enter a location for the whole Bundle.
In addition to this, users can also check in separate items from a checked out Bundle. For instance, if you only want to check in the headphones from the Bundle, look up the headphone in the search bar of the Quick Check-in page. Then, specify the relevant location and hit the ‘Check-in’ button:
4. Custom fields for Quick Check-ins
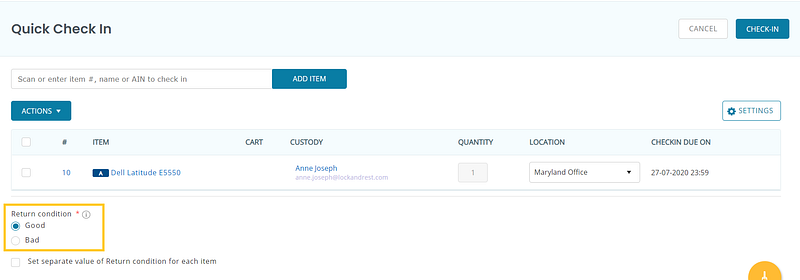
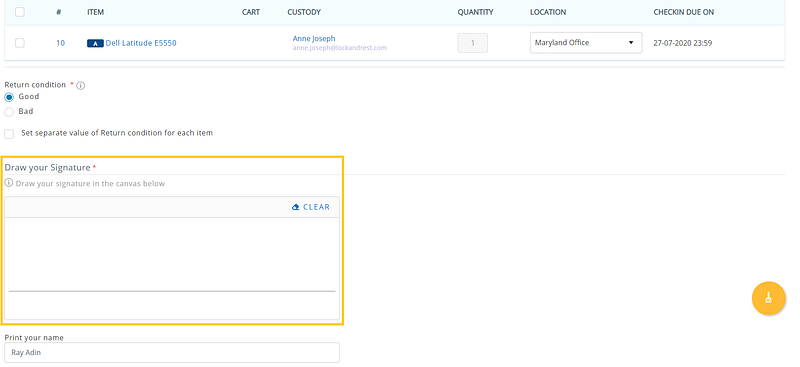
There are several custom fields that may be mandatory for item check-in. If the fields are not filled while initially checking out the Asset/Asset Stock, the system will ask you to first fill in the mandatory custom fields before performing the Quick Check-in.
Similarly, if user signatures are mandatory on check-ins, then you will be required to sign before you can take the Quick Check-in action.
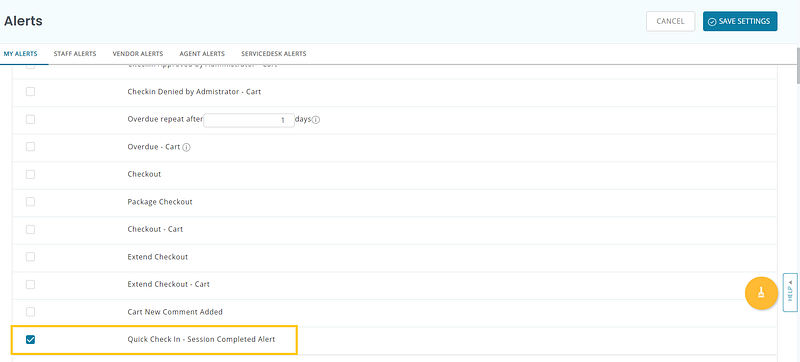
5. Enabling Quick Check-in alerts
You can also turn on alerts for Quick Check-in. To do so, go to the Navigation Menu → Alerts → My Alerts → Check-In/Checkout:
Read more: Confirm Item Availability And Take Quick Actions With Check Availability In AssetSonar
About AssetSonar
AssetSonar is a powerful software licensing tool used by IT-intensive organizations and businesses all over the globe.
For more assistance, drop us an email at support@ezo.io.


