

You can use AssetSonar’s Procurement module to create and manage Purchase Orders — helping you easily define the types, quantities, and agreed cost prices of items you need. The Procurement Module ensures that Purchase Orders are processed quickly by creating linkages between IT Assets and their vendors.
It also gives you greater control over your dealings with suppliers. You can print invoices for sending on to vendors or keeping for yourself, and watch your IT Asset inventory list get updated as soon as the system receives IT Assets against a Purchase Order, without having to take any action on your end!
Contents
- Enabling Purchase Orders
- Creating a Purchase Order
2.1. Adding custom fields
2.2. Adding mass items
2.3. Applying taxes
2.4. Specifying destination location per Line Item - Access by User-type
3.1. Administrators
3.2. Staff Users - Approver and Approved By
- Receiving IT Assets against a Purchase Order
- Purchase Orders and Stock Quantities
- Purchase Order states
- Purchase Order for Software Licenses
8.1. Purchasing additional seats for an existing license
8.2. Purchasing a new license
8.3. Custom Reports for Software POs - Deleting a Purchase Order
- Communicating with vendors
- Documents and reports
- Purchase Order alerts
1. Enabling Purchase Orders
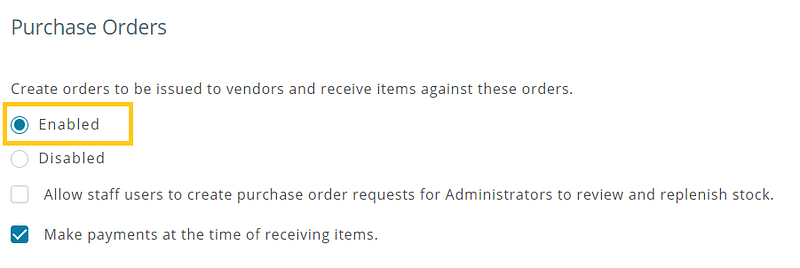
To enable the Procurement module, you must be on the advanced features plan or above. In your AssetSonar account, go to Settings → Add Ons → Purchase Orders and click ‘Enabled’.
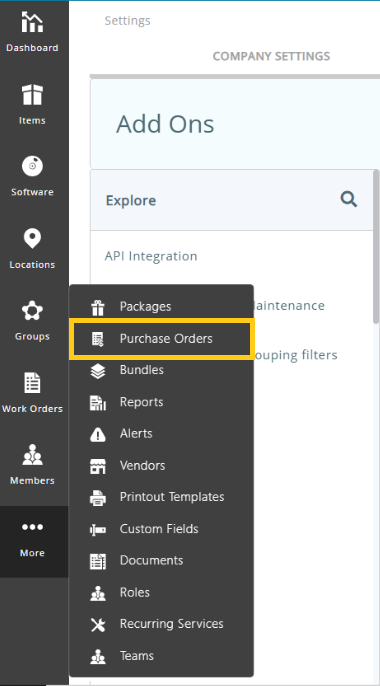
You can now access Purchase Orders from the side navigation bar by clicking on More → Purchase Orders.
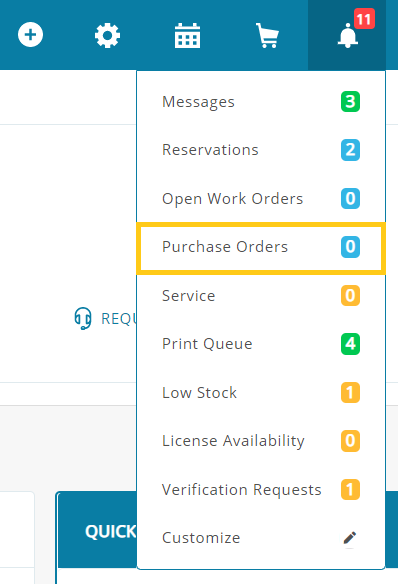
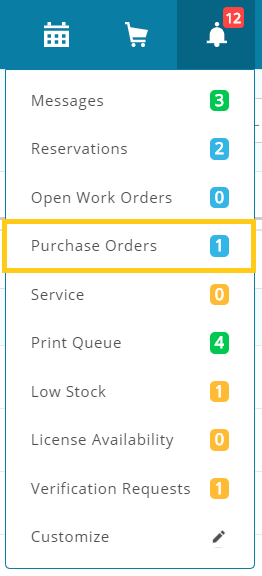
If Staff Users want to access Purchase Orders, they can do so from the Notification bell → Purchase Orders.
2. Creating a Purchase Order
To create a new Purchase Order, go to More → Purchase Orders and click on the ‘Add Purchase Order’ button on the top right of the page.
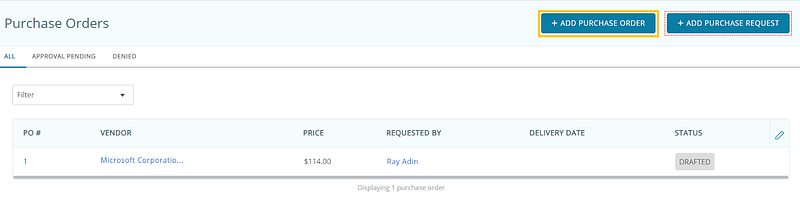
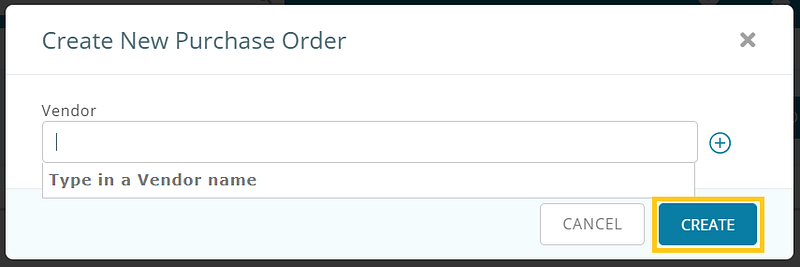
This pops open an overlay prompting you to choose a vendor to create the Purchase Order against.
Now, on the Purchase Order Details page, you can add details such as Payment and Shipment Terms (for additional information of your vendor), the Delivery Location (referring to the location the received IT Assets will be added to), and Description (which will appear on the PO invoice).
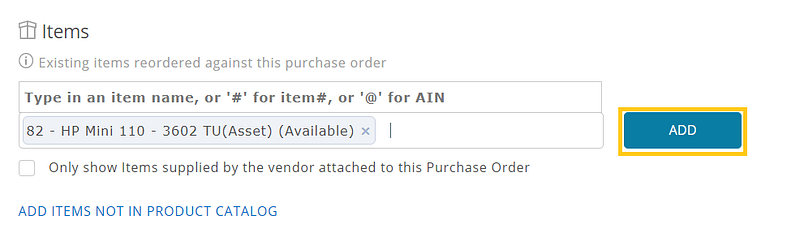
If you scroll below, you can also add IT Assets to your Purchase Order, and adjust their quantity and price based on your agreement with the vendor.
You can also add new items that do not exist in your existing IT inventory list by clicking on the option ‘Add items not in product catalog’. Once the Purchase Order is marked received, these new items are automatically created in the system. Here’s the overlay that opens up when you click on this button:
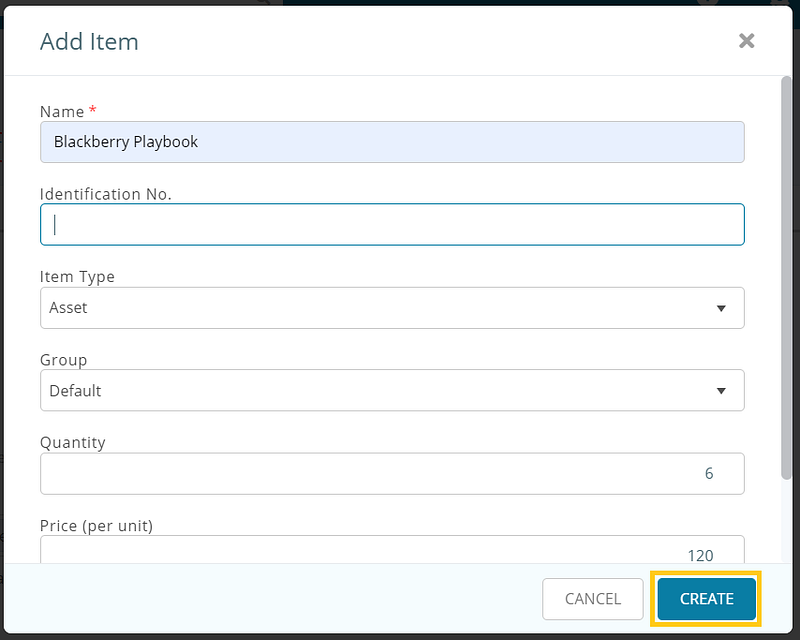
Note: New items from within the Purchase Order Details page can be added when a Purchase Order is in a drafted or pending state.
2.1. Adding custom fields
AssetSonar also gives you the option to add custom fields for Purchase Orders from More → Custom Fields.
2.2. Adding multiple items
IT Assets can also be added in bulk to Purchase Orders. If you edit the Quantity and Price (per unit), the system automatically calculates the Line Total for each of the IT Assets.
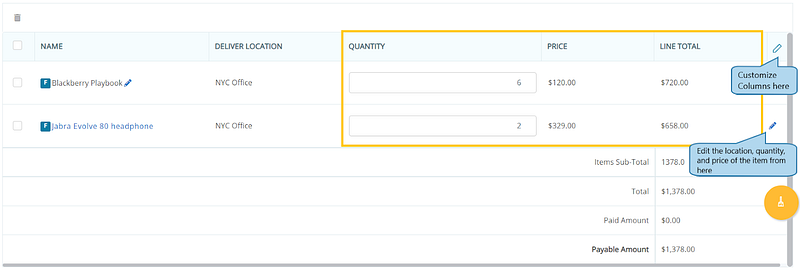
As with all listing pages in AssetSonar, the ‘Edit’ icon at the top-right can be clicked to customize columns for this page.
2.3. Applying Taxes
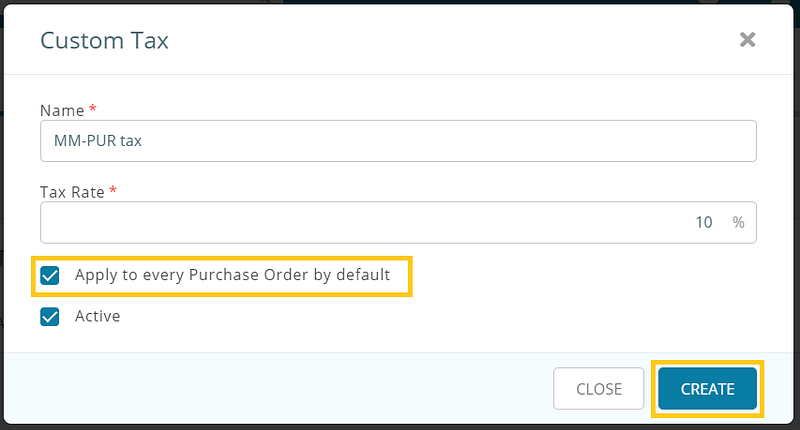
You can apply multiple custom tax rates by default to every Purchase Order. To do so, go to Settings → Company Settings → Tax Details for Purchase Orders → Edit/Create New Tax → Click ‘Apply to every Purchase Order by default’.
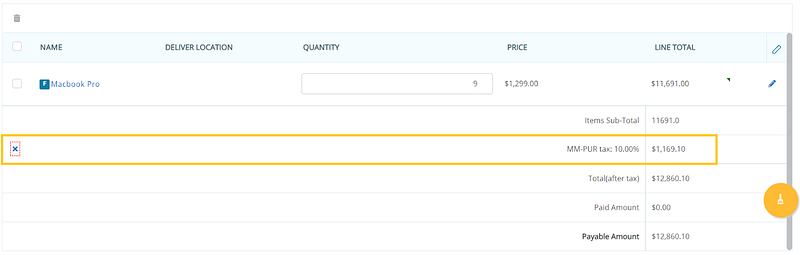
You can also view and remove the Purchase Order tax rate from the Line Items section, as shown below:
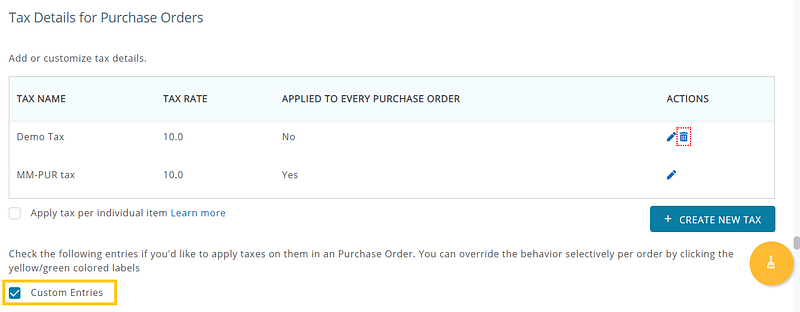
Customizability is key to AssetSonar! We give you the ability to include custom entries in tax calculations from within the Purchase Order Details page. You can select it under the Tax details in Company Settings.
2.4. Specifying destination location per Line Item
A Purchase Order might often include items that are ordered for different locations. In this scenario, your employees may have to manually log the location against each Inventory item once the shipment is received, making the process of data-keeping and inventory tracking painstaking.
For this reason, the Procurement module in AssetSonar enables you to set the Inventory destination in advance. You can specify a Delivery Location for each of your Line Items from the get-go, right when you’re drafting a Purchase Order.
Hit the ‘Confirm Order’ button on the top right once you are done drafting the Purchase Order. Please note that you cannot add more items to a confirmed Purchase Order. You are now ready to receive items against this Purchase Order.
3. Access by User-type
3.1. Administrators
You must be an Administrator to experience full access to AssetSonar’s Procurement module. An Admin has the ability to edit Purchase Orders. They can add IT Assets not present in the existing IT inventory list to Purchase Orders by clicking the ‘+Add Items not in product catalog’ button.
Admins can not only edit and approve/deny but also send Purchase Order Requests for approvals from other Admins. In other scenarios, an Admin can approve a Purchase Order Request made by them as well.
Admins can also add IT Assets in bulk to a Purchase Order using the ‘Action’ button on the IT Asset Listings page to help faster processing of orders. They can either add these to an existing drafted Purchase Order or create a new one right there.

3.2. Staff Users
The action permissions of Staff Users differ from those of the Admins. While Staff Users can add new items not existing in the current product catalog to a Purchase Order, they cannot access the Purchase Order module or make Inventory stock requests via Purchase Orders until given authorization by Admins to do so.
To allow Staff Users to access the Procurement module, select the option to ‘Allow staff users to create purchase order requests for Administrators to review and replenish stock’ from Settings → Add Ons → Purchase Orders.

3.3. Customize Access
If you have a specific format of recording information and don’t want everyone to be able to create new items via Purchase Orders, then go to Settings → Add Ons → Purchase Orders and uncheck ‘Allow staff users to create items not present in the existing product catalog’. This setting is enabled by default.
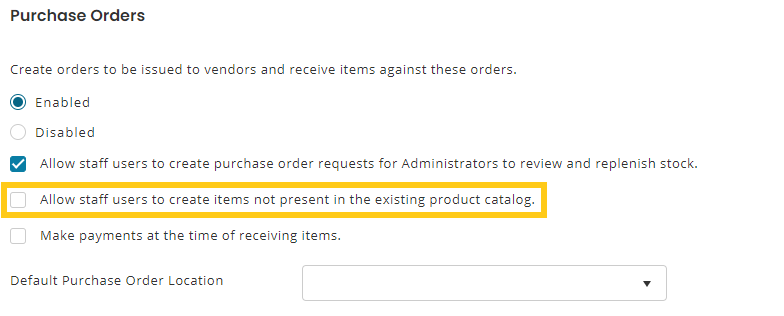
This way, you can have more control over who should be permitted to create items via Purchase Orders. Once disabled, the staff users would not be able to see the ‘Add items not in product catalog’ option on the Purchase Order details page.
4. Approver and Approved By
AssetSonar offers its users enhanced requisition submission and response by adding flexibility around who makes requests and who approves them. This plays out well when you want to hold your employees accountable for their actions and keep track of purchased inventory.
An Admin and Staff User can set ‘Approver’ to a Purchase Order (in the Drafted or Pending state) by clicking the ‘Edit’ icon against the ‘Approver’ field on the Purchase Order Details page. See the image below:

Once a Purchase Order has been confirmed or approved by an Administrator, you can no longer edit this field.
The field for ‘Approver’ works in two different scenarios:
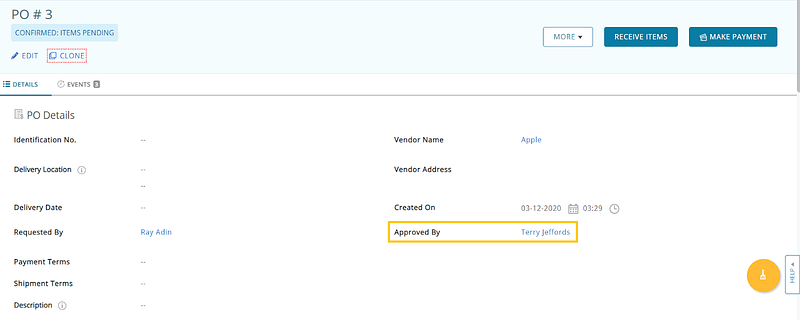
- Scenario 1: If you have specified an Approver for a Purchase Order, but it is approved by a different Admin, then the ‘Approved By’ field below the ‘Approver’ field will show the name of the Admin who approved the Purchase Order Request. Hover on the name against the ‘Approved By’ field and it will show you the selected Approver’s name. See the image below:
- Scenario 2: If you haven’t set an Approver for a Purchase Order, then the Admin approving the Request is automatically set as the Approver in the Purchase Order Details page.
For the above scenarios to work out, a user who created the Purchase Order has to click the ‘Make Request’ button. An Admin approving the Purchase Order must click the ‘Approve Request’ button to finalize the Purchase Order approval. Once done, the ‘Approved By’ field shows up on the Purchase Order Details page in place of the ‘Approver’ field.
Request Approved Alert: An email alert is generated and sent to the Approver when a Purchase Order is confirmed or approved given that the ‘Request Approved’ alert is enabled in the Requester’s and the Approver’s AssetSonar accounts. The Approver and the Admin who has approved the Purchase Order, will both receive this email separately. If no Approver is set, all the Admins will receive the ‘Request Approved’ alert.
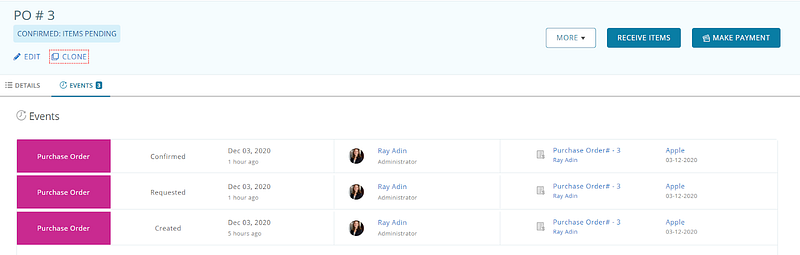
Request and Approval Activity Log and History: A step-by-step activity log is recorded of a Purchase Order including actions taken on it such as who created, approved, or denied it, etc. You can see these activities under the ‘Events’ tab.
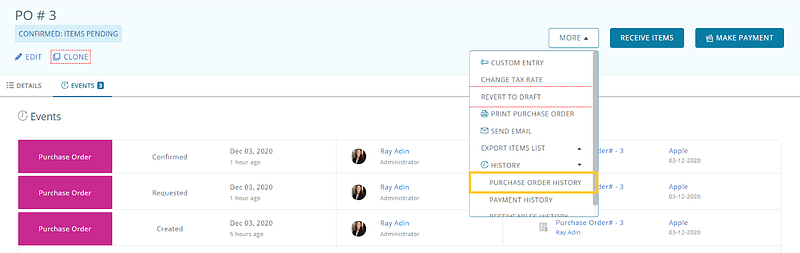
Similarly, you can also keep track of all actions taken on a Purchase Order from the Purchase Order details page by going to More → History → Purchase Order History.
Please note that Staff Users can access Purchase Orders from the Notification bell → Purchase Orders.
5. Receiving IT Assets against a Purchase Order
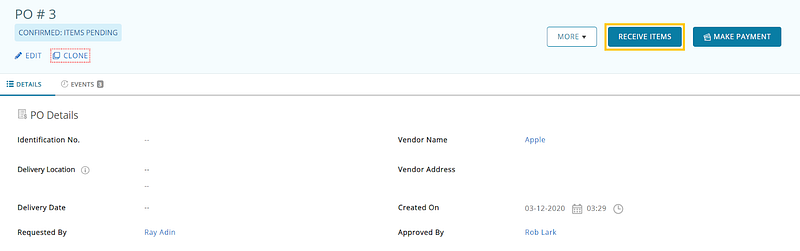
Any time an IT Asset is received against a Purchase Order, AssetSonar will automatically update the product catalog as well as any associated details like Cost Price, Location, etc. To do this, hit the ‘Receive Items’ button on the top right of the Purchase Order Details page.
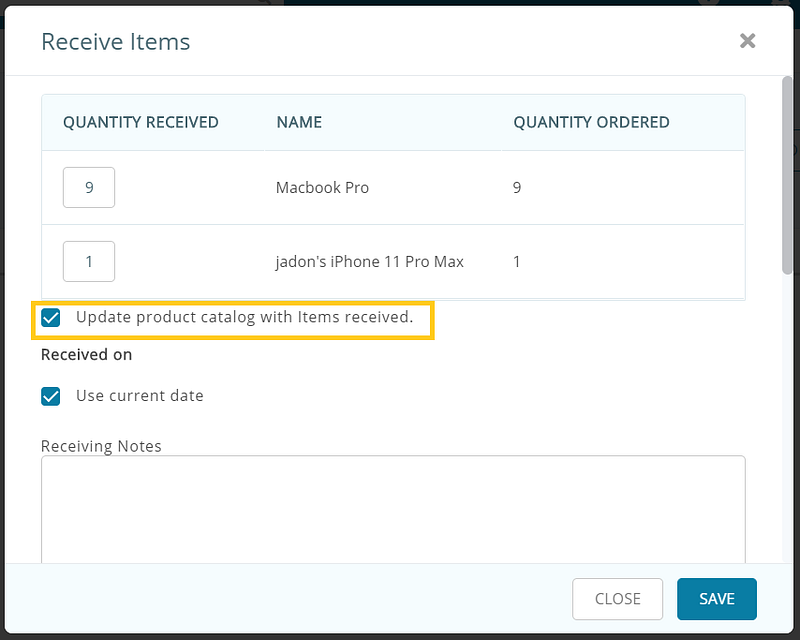
Select the ‘Update product catalog with items received’ button if you want the system to be updated automatically.
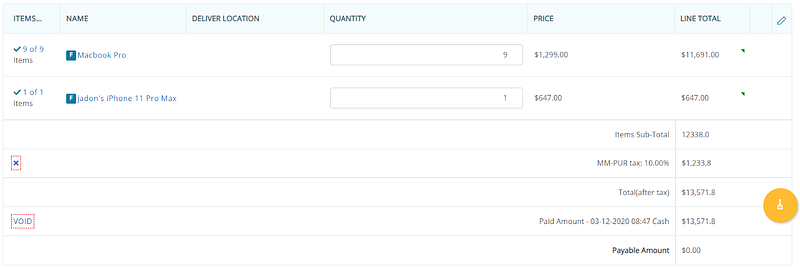
After receiving these IT Assets, click the ‘Make Payment’ button. The image below illustrates how the pricing table will be shown after you receive the items.
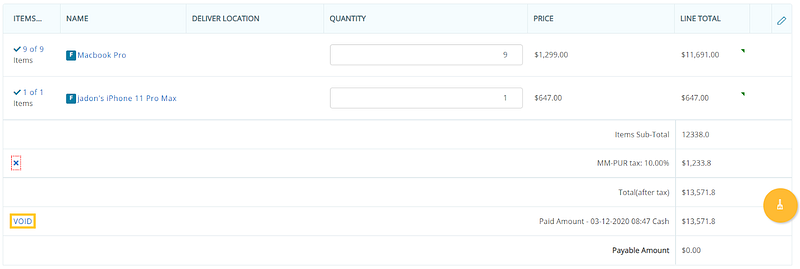
You can move a payment to the Void state by clicking on the ‘Void’ button.
6. Purchase Orders and Stock Quantities
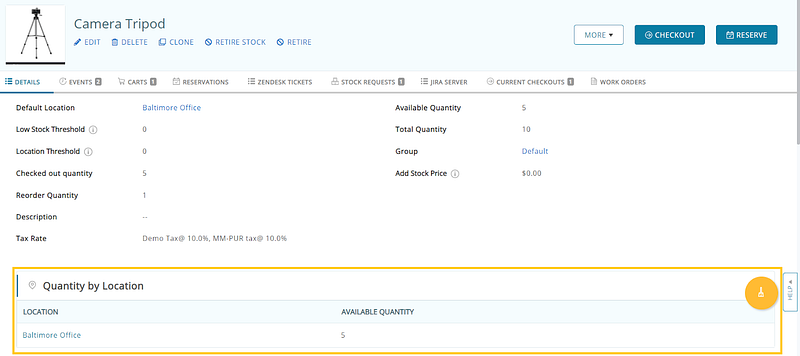
AssetSonar not only updates the list of IT Assets received against a Purchase Order but also helps you manage Asset Stock and Inventory quantities. On the Asset Stock and Inventory Details page, you’ll find a section entitled ‘Stock Requests’ where you can request additional stock.

There is also a ‘Quantity by Location’ section which updates after the items from each Purchase Order are received:
7. Purchase Order states
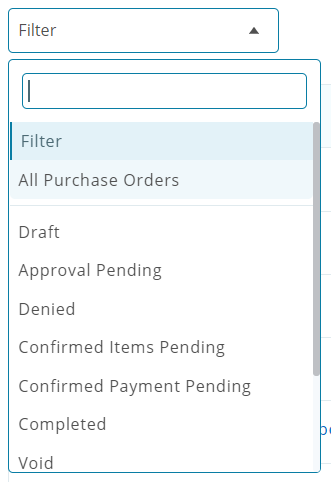
A Purchase Order can move through many states depending on whether an order has been confirmed, payments made, and the items that have been received against it. You can view all Purchase Orders, and their approval pending and denied updates from More → Purchase Orders or Notifications bell → Purchase Orders. You just have to apply the relevant filter from the Purchase Orders Listing page:
Here’s what the different Purchase Order states mean:
- Drafted: The Purchase Order has been drafted. You can clone, delete, and void the order at this stage, as well as add items or edit any details you’d like.
- Confirmed Items Pending: This means that the Purchase Order is confirmed, but the IT Assets ordered are yet to be received. You will not be able to add items to it or edit their price, but you can still update Delivery Dates and custom fields. Note that if both the payment and items are pending in a Purchase Order, AssetSonar will only reflect the ‘Confirmed Items Pending’ status.
- Confirmed Payment Pending: The IT Assets ordered through a Purchase Order have been received, but the payment has not been made yet. This means that either a partial payment or the entire sum is pending.
- Completed: All activities relating to the Purchase Order have been successfully completed, with the items received and the payment made in full.
- Void: Although a Purchase Order can be cloned at any stage, it can only be voided when it is in the Drafted or Completed state. This will remove all references to the Purchase Order from the system, including reports. Note: If IT Assets were created through a Purchase Order, they must be first deleted or retired before the Purchase Order can be made void.
8. Purchase Orders for Software Licenses
With Purchase Orders, you can also streamline the process of procuring Software Licenses.
As an IT Admin, you can draft Purchase Orders for acquiring additional seats of an existing Software License or new seats of licenses that do not currently exist in your catalog.
The PO module enables you to track procurement details of licenses and automatically updates your license inventory when you receive licenses associated with a Purchase Order. It also maintains a log of your purchases for audit purposes.
8.1. Purchasing additional seats for an existing license
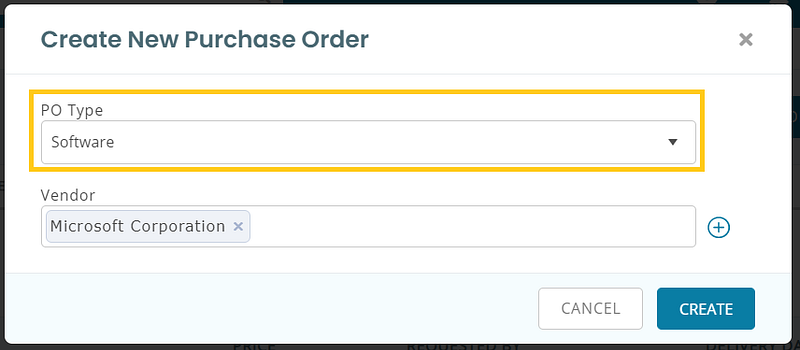
To create a Purchase Order for a Software License, go to More → Purchase Orders → Add Purchase Order, select ‘Software’ as the PO Type, type in Vendor details, and hit ‘Create’ as shown:
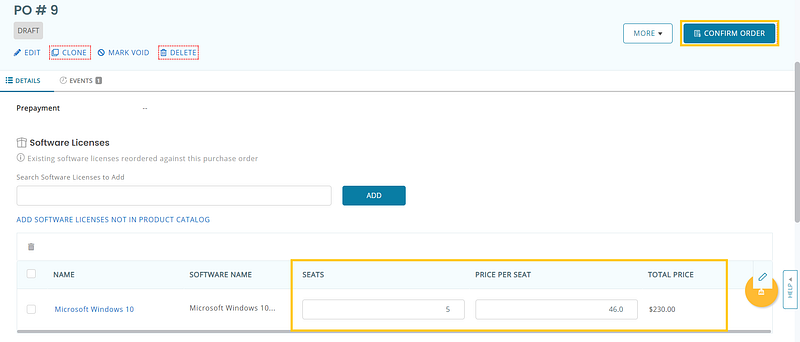
Now, search and add the existing Software License that you want to acquire additional seats for from the details page of the Purchase Order. We use the license for Microsoft Windows as an example below.
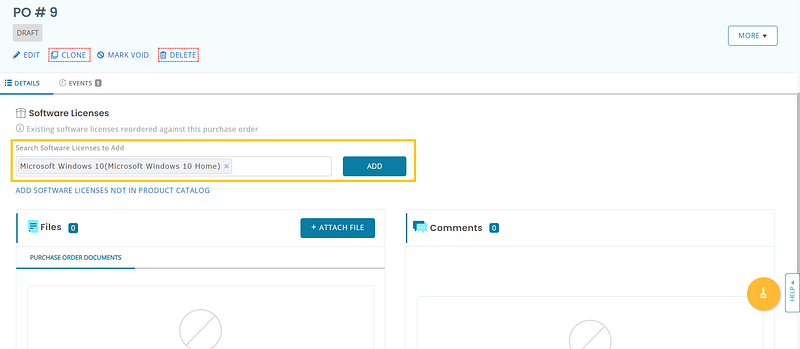
You can now edit details such as the number of additional seats you want to purchase for the license and its cost and confirm the PO.
Note: You can only edit/remove Software Licenses from a PO as long as it is in the Drafted state.
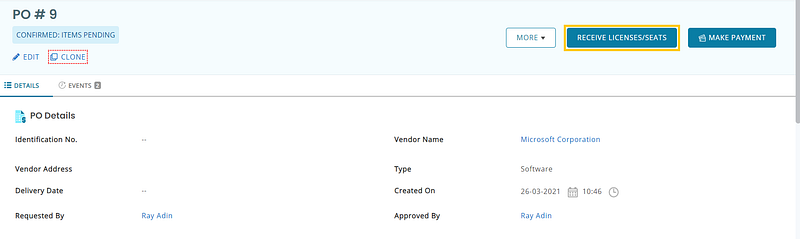
When you receive a Purchase Order, additional seats associated with the PO will be automatically added to the Software License. To do so, click on the ‘Receive License/Seats’ button from the PO Details page.
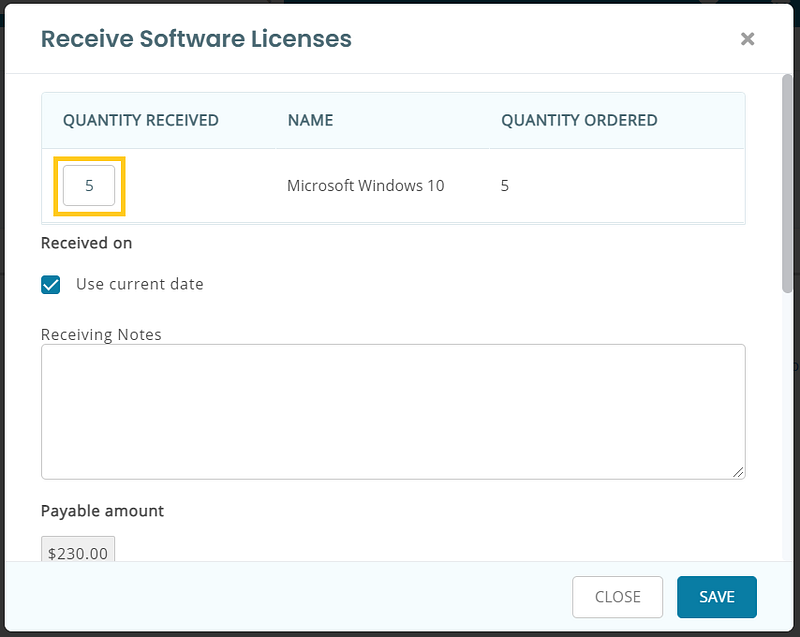
This pops open a dialog box where you can specify the actual number of license seats received, the amount paid, and the payment method.
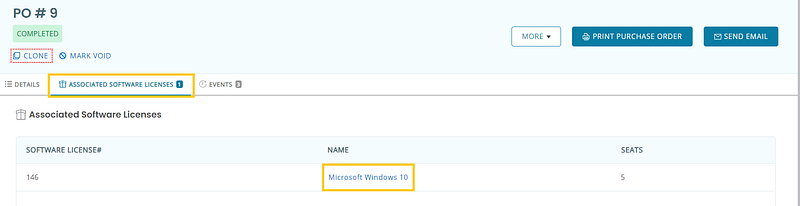
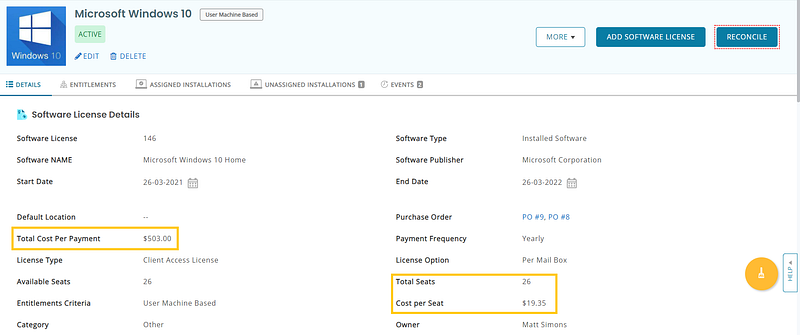
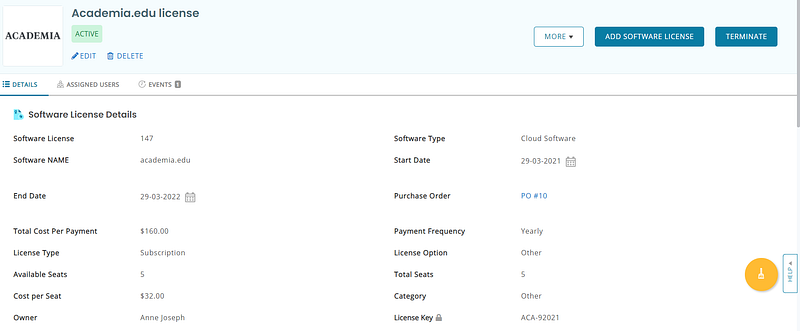
Once the PO is marked Complete, the Software License gets updated for the added quantity. You can view the updated data from the Associated Software Licenses tab.
AssetSonar updates the following data fields:
- Purchase Order #
- Total cost per payment
- Total and available seats
- Cost per seat
Note: The payment you make for additional seats of an existing license gets added to the payment table during the upcoming payment cycle.
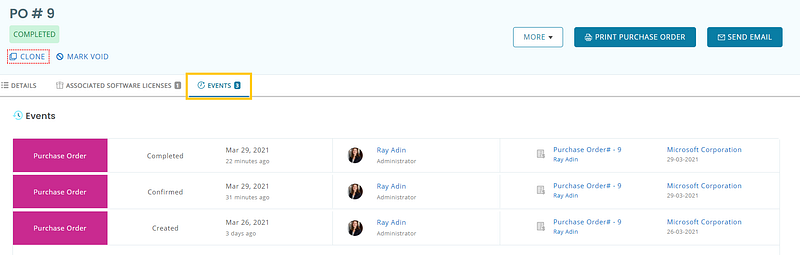
You can view all the actions taken on the Purchase Order from the Events tab of the PO or the Software License.
8.2. Purchasing a new license
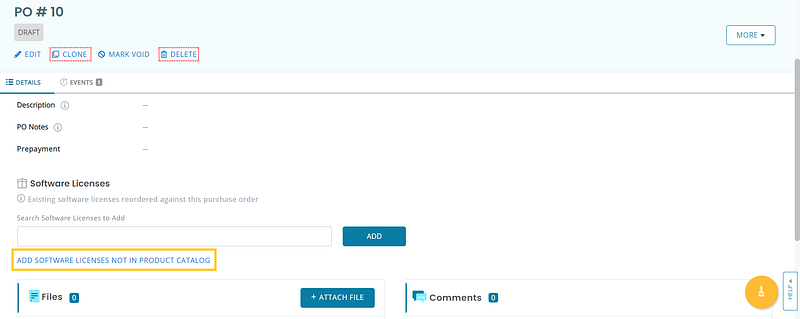
To create a PO for a new Software License, click on the ‘Add Software Licenses not in product catalog’ button as shown.
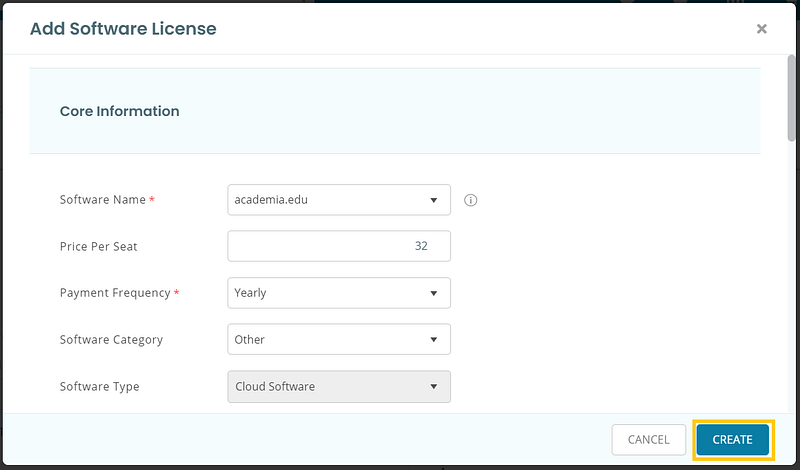
Enter details of the new license in the dialog box and hit ‘Create’.
Edit the number of seats you want to procure and their respective price. Then, confirm the PO and receive license seats as mentioned in Section 8.1.
The new license gets created as soon as you confirm the Purchase Order.
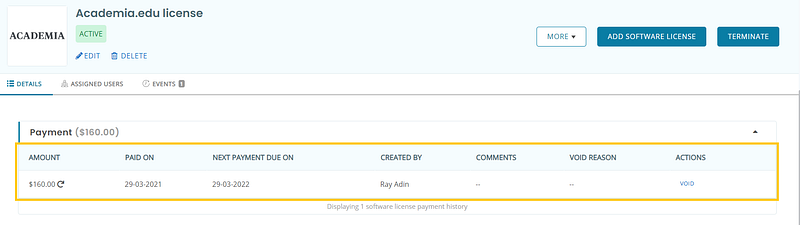
The initial payment made to purchase the new license gets added to the payment table as illustrated.
8.3. Custom Reports for Software POs
You can also create Custom Reports for Software POs to track your overall software expenses. For this purpose, follow these steps:
Step 1: Select Purchase Orders as the primary module.
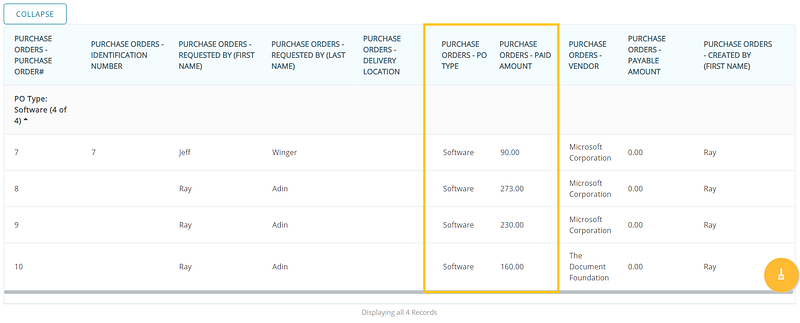
Step 2: Add columns for PO Type, Paid Amount, and other relevant data fields that you want to track.
Step 3: Apply a filter of ‘Software’ to the PO Type data field.

Now, run the report and you’ll get a detailed overview of your total software expenditures.
9. Deleting a Purchase Order
Purchase Orders can be deleted if they are in a Drafted or Void state. To do this, go to More → Purchase Orders → Click on a Purchase Order (Drafted/Void). From the Purchase Order Details page, hit the ‘Delete’ button.
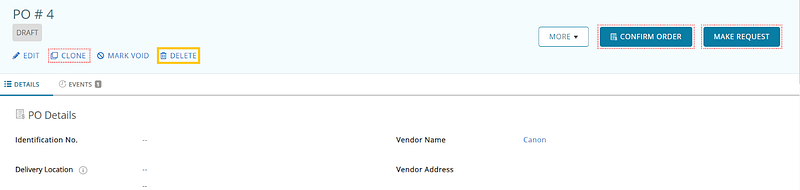
If it’s a drafted Purchase Order, you can clone, delete, and void it at this stage, as well as add items or edit any details you’d like.
If you want to delete a completed Purchase Order, you’ll first have to mark it void. As mentioned above, a Purchase Order can only be voided when it is in the Drafted or Completed state.
Note: Deleting or voiding a Purchase Order will remove all references to the order from the system, including reports. Items that were created through a Purchase Order must be first deleted or retired before the latter can be made void, and then deleted.
AssetSonar does not allow you to delete multiple Purchase Orders in a single go.
10. Communicating with vendors
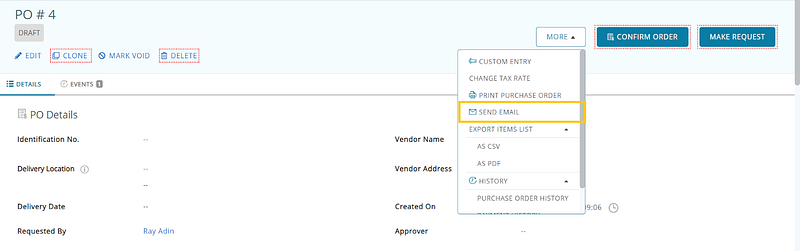
You can send emails to vendors at any stage of a Purchase Order. This includes all relevant correspondences such as quotations or pricing negotiations. Click on More → Send Email. This will open an email textbox that is pre-populated with the vendor’s email address.
You can also add Administrators to the correspondence, as well as CC any other individuals you’d like to send the email to:
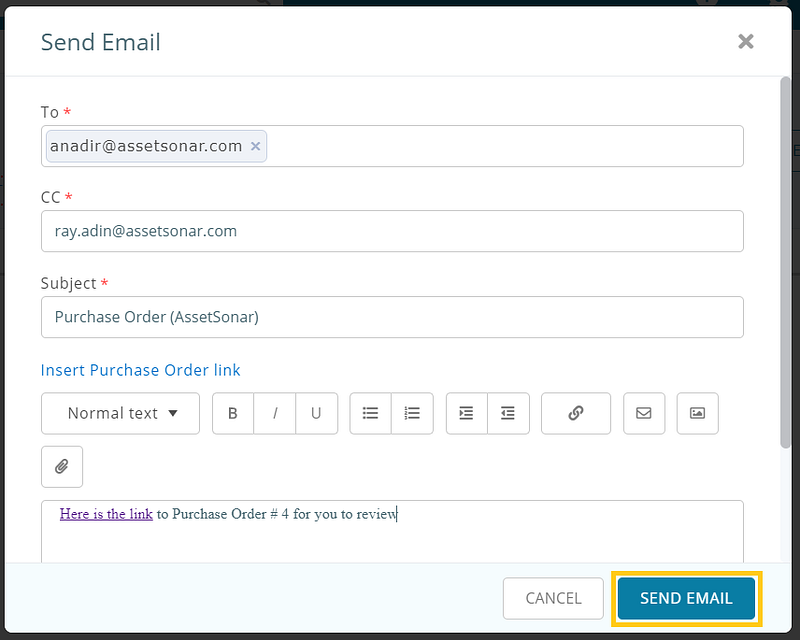
You can add a PDF link to the Purchase Order directly from this overlay (as shown above).
11. Documents and reports
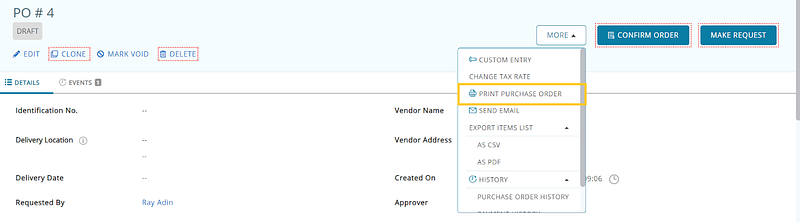
Clicking on the ‘Print Purchase Order’ button will download a PDF of the Purchase Order documentation that you can then send on to vendors or to people from the accounting department as further evidence.
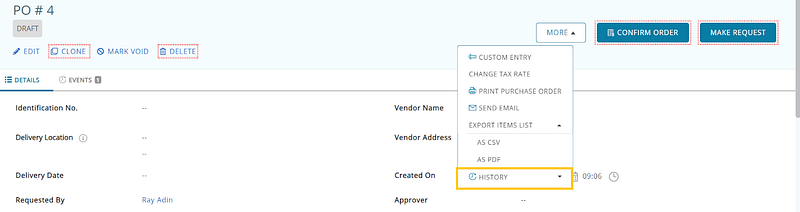
For more information, you can click on the ‘History’ button under More for a history trail of activities and information relating to the Purchase Order.
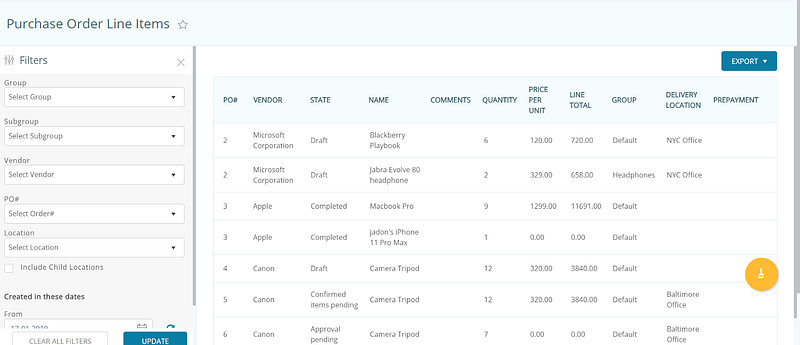
You can also get a summary of Purchase Order actions from Reports → Purchase Order Line Items Report. The end-results can be filtered according to your preferences:
From the Purchase Orders listing page, you can also take mass action for printing purchase orders.
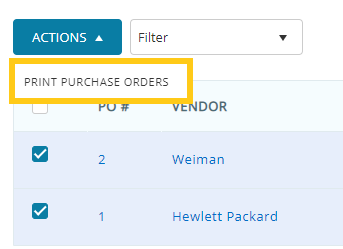
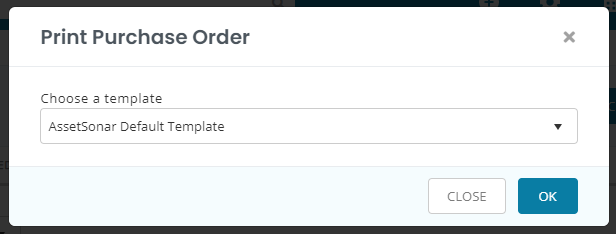
Once you have selected the POs, click on Print Purchase Orders and you will get this dialogue box to select the template.
The reports generated can also be exported in the form of a PDF or a CSV file.
12. Purchase Order alerts
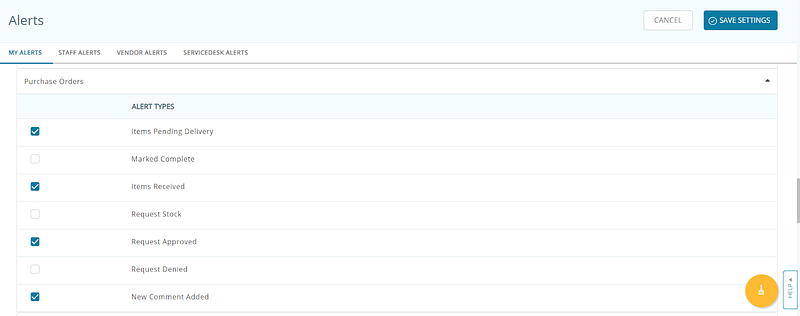
With alerts, you can stay on top of your Purchase Orders and get notified of actions performed on them. To enable them, go to Alerts → Purchase Orders and select your preferred alerts.
You can access alerts related to Purchase Order from the Notification Bell → Purchase Orders.
You can use different email addresses for sending out alerts on Purchase Orders using the SPF Settings. These email addresses can be applied to both the ‘From’ and ‘Reply-To’ addresses.
To do so, go to Settings → Company Settings → System Generated Emails → Enabled → Click the Edit action for Purchase Orders.
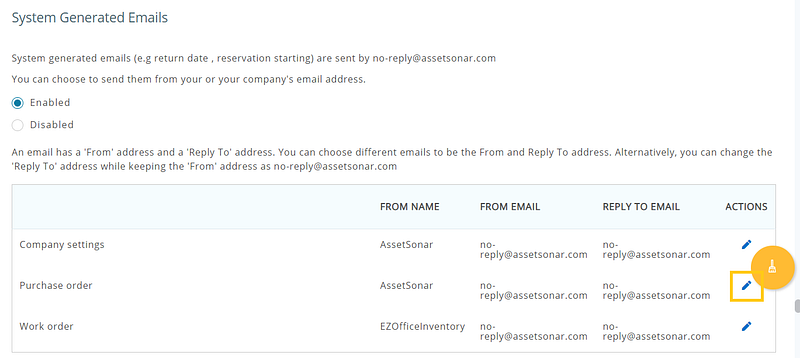
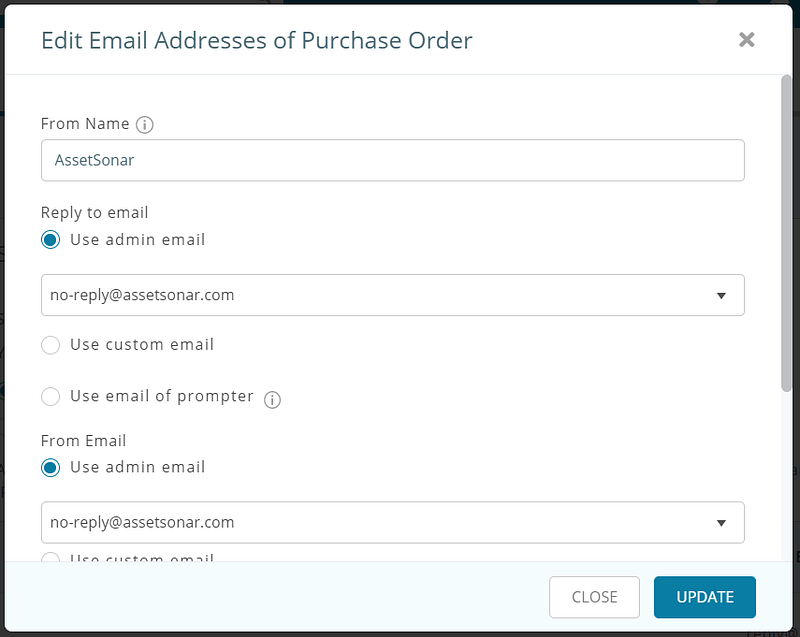
Here, you can define whether you want to use an Admin email address, a custom email address, or the email address of a prompter (the user who triggered action on a Purchase Order).
Read more: IT Asset Depreciation In AssetSonar
About AssetSonar
AssetSonar is the leading hardware asset management software used by IT-intensive organizations and businesses all over the globe. Sign up today for a free 15-day trial.
For more assistance, drop us an email at support@ezo.io. You can also visit our blog for detailed support posts.
Join the Conversation: Twitter | Facebook


