


The labels you choose for your product can reflect a lot of important information. It is therefore essential to make sure your labels are clear and direct. When trying to organize IT Assets, a seemingly obvious step would be to have them labeled clearly. Simple and easily understood labels are a great way to make sure you’re setting off on the right foot with asset tracking.
Contents
- Designing Print Labels
1.1. Specifying length metrics for Print Labels
1.2. Color Tags in Print Labels
1.3. Adding a custom field to Print Label - Printing Labels
2.1. What is Single Step Printing?
2.2. Mass Actions for Print Labels
2.3. Printing new labels
2.4. Printing labels for Inventory items - Print Label data
- Email Print Labels
- Ability to view and edit Print Labels
- Supported settings
- Other Frequently Asked Questions
1. Designing Print Labels
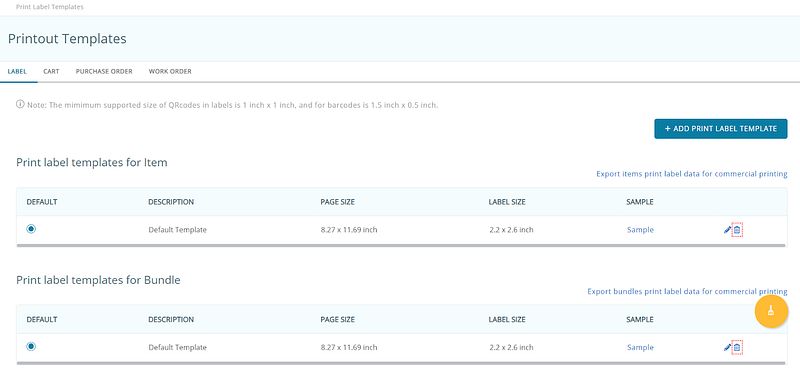
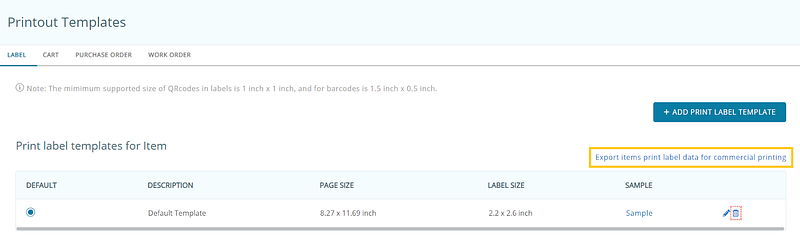
AssetSonar enables you to create and edit labels using the Label Designer. To access this, go to More → Printout Templates.
Here, under the ‘Label’ tab, you can add, edit or delete templates for the following Print label types:
- Items
- Bundles
- Members
- Locations
Learn more: How to design the layout of Labels using the template designer in AssetSonar?
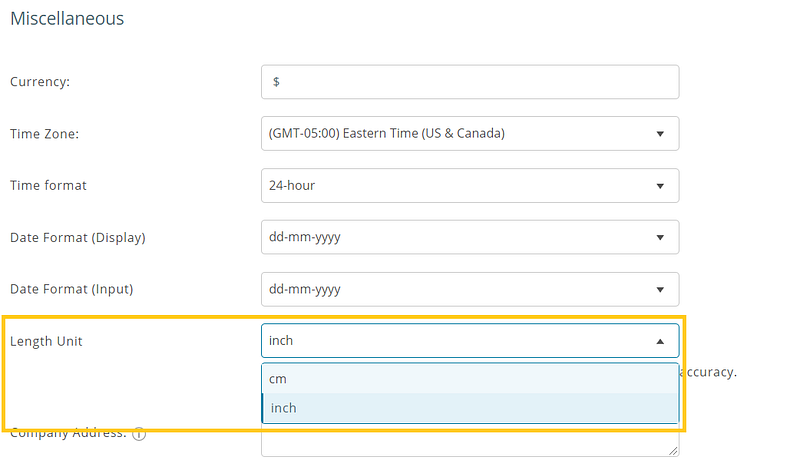
1.1. Specifying length metrics for Print Labels
AssetSonar gives you the option to choose between inches or centimeters as your default measurement unit while designing Print Labels. If you wish to specify the length of your Print Labels in centimeters, go to Company Settings → Company Profile → Standards and Formats → Length unit and select ‘cm’ as shown:
1.2. Color Tags in Print Labels
Label Designer now supports adding colors to labels. You can choose from 9 different colors and 2 shapes (rounds and bars) for these. Pick the shapes from the list of available design elements on the label designing canvas. Double click on a shape to change its color.
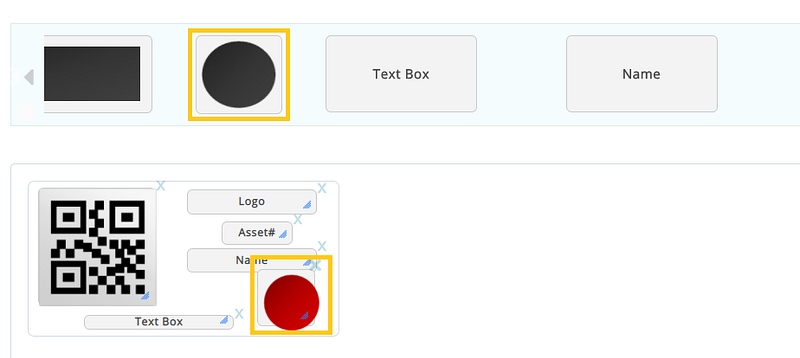
This comes in handy when you quickly want to identify an item’s category by looking at the label. Say, you want to use red tags for Macbooks and blue for Windows laptops. Use the red one to print labels for Macbooks and blue for Windows laptops to make it easy for employees to find the right brand in minutes.
1.3. Adding a custom field to Print Label
If you’d like a unique data point on your print labels, like item fragility, simply add the relevant custom field to the Printout Template.
You can add custom fields for any module to the Print Labels. Here’s how to get started:
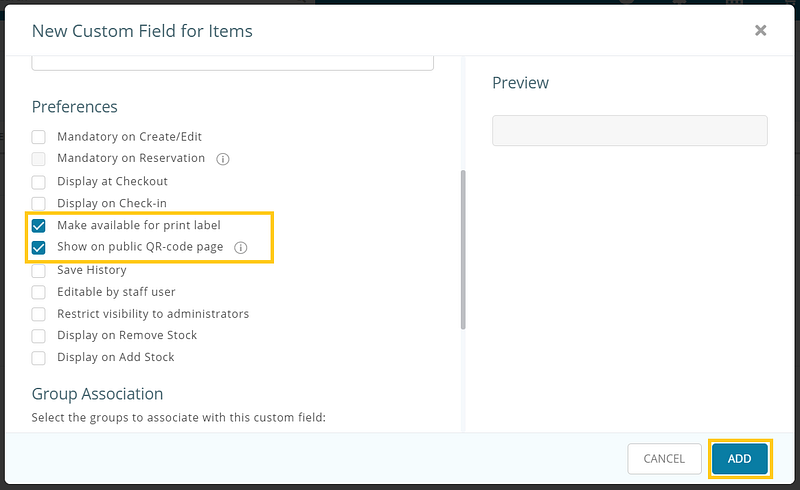
- To add a custom field to the list of available design elements, go to More → Custom Fields → <Your choice of module> → <Specific Custom Field>.
- Here, click ‘Edit’ and ensure that “Make available for print label” is selected. If you’re creating a new custom field, ensure the same.

3. Now, go to More → Printout Templates → Bundles. Edit a Printout Template.
4. You’ll be able to see the custom field in the list of design elements.
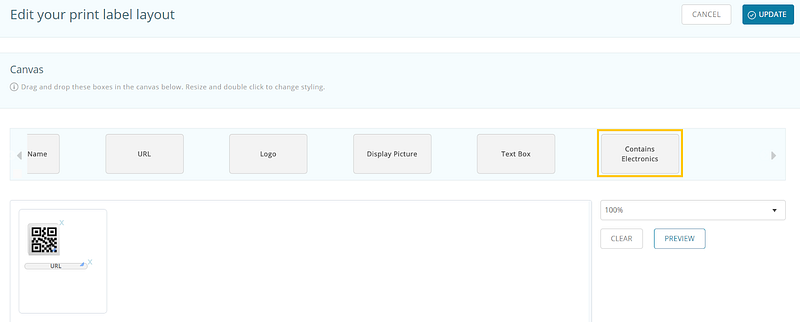
5. Simply drag and drop the custom field!
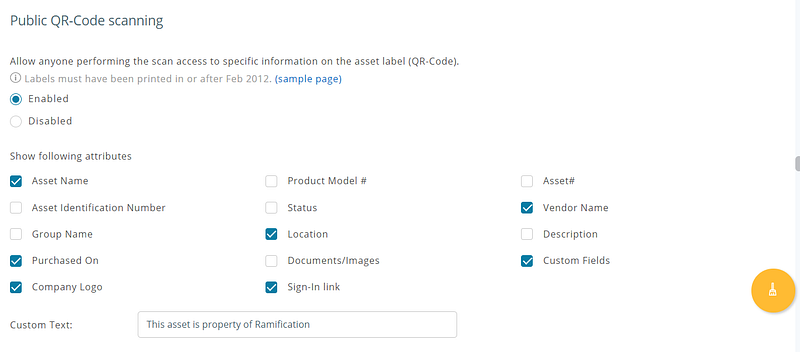
You can also have custom field information show up when someone scans the QR Code for an IT Asset. Enable Company Settings → Public QR-Code Scanning → Custom Fields → Update.
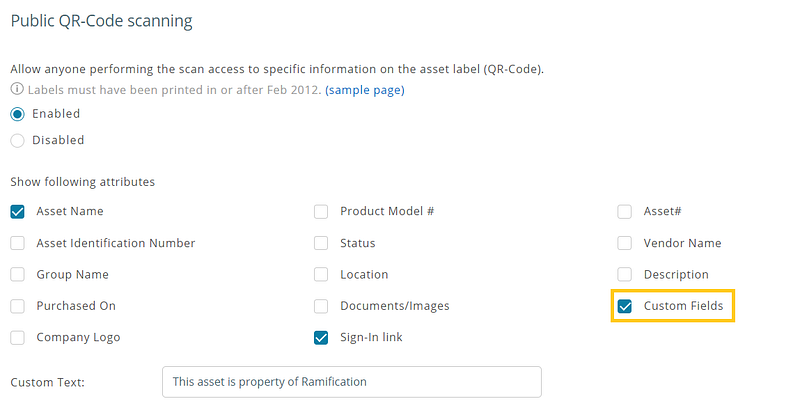
Make sure to have the relevant preferences selected for the custom field.
Learn more: QR Code vs. Barcode — Issues, practices, and recommendations
2. Printing Labels
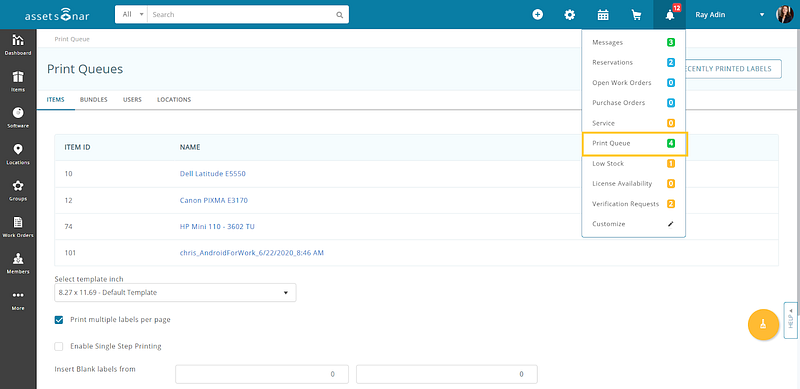
To print a label of an IT Asset, click the ‘Print Label’ button on the Item Details page. This will add the label to the Print Queue which can be accessed from the Notifications bell → Print Queue. This workflow takes place when ‘Single Step Printing’ isn’t enabled in the ‘Print Queue’ page.
Warning: Disable the pop-up blockers (if any) to continue printing labels.
Please note that when you click ‘Print Label’ on an Asset Details page, it goes to the Print Queue and you cannot perform the same action again for this specific item till you either hit ‘Print All’ or ‘Clear All’ in the Print Queue page.
Based on the image above (with Single Step Printing disabled), here’s what the options given refer to:
- Select template: You can choose a template here — default or custom label template. Print labels will be generated based on this template and its format. Learn more about how to customize print labels in AssetSonar.
- Print multiple labels per page: Enabling this will print multiple labels per page queued here rather than one label per page.
Read more: Can I print multiple asset labels on the same page? - Insert blank labels from: This enables you to insert blank spaces when mass printing labels.

To print queued labels, click ‘Print All’. You will be sent an email with a PDF attachment ready for printing, or you may revisit this page in a few seconds. Remember to enable ‘Email Print Labels’ alert in More → Alerts to receive this PDF attachment. If the alert isn’t enabled, you will be directed to print labels document online.
Learn more: Printing labels for Items associated with a Location
2.1. What is Single Step Printing?
Enabling ‘Single Step Printing’ in the Print Queue page allows you to print item labels directly without having to visit the ‘Print Queue’ page. It cuts down the process of going through a couple of steps and emails the attachment right away. Just check/uncheck the box and the setting will be updated. Hitting ‘Print label’ from an Asset Details page or mass action on the Asset Listings page generates an email with a PDF attachment, sent to you (if the ‘Email Print Labels’ alert is enabled).
For single-step printing, you can customize the template and multiple printing options before enabling it. The settings will take place even when single-step printing is enabled.
In the same manner, you can print labels for the other three modules as well. For Bundles, one print label per Bundle will be generated rather than different labels for every item added in a Bundle.
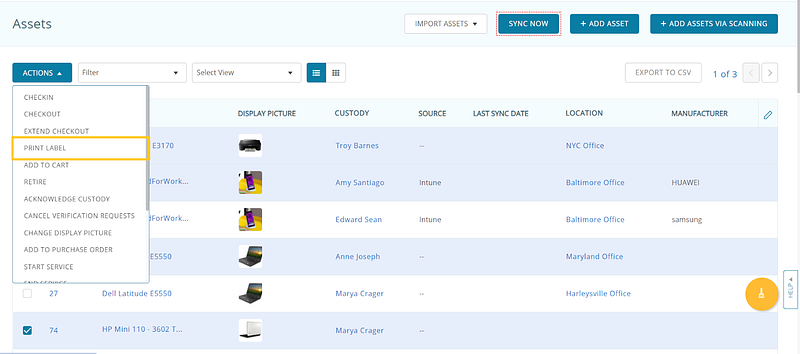
2.2. Mass Action for Print Labels
You can also print labels for multiple items in a single go from Items → Asset/Asset Stock/Inventory → Select Multiple Items → Actions → Print Label.
2.3. Printing new labels
Before you can print barcodes you must specify an ‘Identification Number’ for your items. This number is used to uniquely identify items and is used as their barcode number. In the case of QR Codes, you do not need to enter an identification number for your inventory items. To learn more about the identification number, click here.
Printing Barcodes (1D): Barcodes (1D) tags can be printed by AssetSonar to ensure backward compatibility in case QR-Codes are not suitable. (Note: The IT Asset must have its Asset Identification Number specified for Barcode printing since the number is encoded to form the Barcode).
Note: In order to print Barcodes, you will first need to create a custom print label template from More → Printout Templates → Label → Add Print Label Template. Select a template that has a Barcode area set and click ‘Print’. To learn more about customizing print labels, click here.
Using Existing Barcode Labels: If you already have Barcode labels printed, you can simply enter their Barcode numbers in the ‘Identification Number’ field on from Items → Inventory → Select Inventory Item → Edit. Once the Barcode number is recorded, the software will recognize the Barcodes upon scanning allowing you to easily scan and take actions on items. An easy way to add the identification number is through scanning. To do this, simply configure your external barcode scanner and scan your Barcode number into the ‘Identification Number’ field or use our mobile app.
To learn more about adding existing Barcodes using the mobile app, click here.
2.4. Printing labels for Inventory items
An important aspect of IT inventory control is labeling inventory items. AssetSonar allows users to generate new labels for their inventory items as well as use the existing Barcodes on their inventory items. Inventory items have one unique label that is pasted on all its stock items. This barcode or QR Code label can be scanned to bring up the inventory item and take actions like add or remove stock.
To print labels, go to Items → Inventory → Select Inventory Item → Print Label → Specify the number of copies you want to print.

Ever needed to quickly print labels in bulk for each of your stock items? You can also print labels for multiple inventory items from Items → Inventory → Check Inventory Items → Actions → Print Label. To learn more about mass printing labels, click here.
3. Print label data
Do you get your item labels printed from a professional printing service? We’ve added a feature to export the required data points to excel that you can send to a printing service. Have a look at More → Printout Templates → Export items print label data for commercial printing. Learn more.
4. Email Print Labels
An email is sent when print labels are requested for one or more items with PDF attached containing the labels. You can customize print labels from Settings → Print Label. Learn more.
5. Ability to view and edit Print Labels
Account Owners have the ability to view, create, and take all actions regarding Print Labels. Admins can view and edit them, however, Staff Users cannot view or edit the print labels. Learn more about types of Members.
Talking about Custom Roles, say, Emily has the role of IT Support Supervisor. This means she is an Administrator but only for the users and groups in her Team. Within the IT Support Team; she can run reports, add IT Assets, print labels, and add or remove employees.
6. Supported Settings
- Company Settings → Public QRCode Scanning: IT Assets get misplaced and lost in the field or even in the office for all sorts of reasons. Getting them back is a headache. But with AssetSonar, this headache can be reduced by showing anyone who scans the IT Asset’s QR Code — a phone number to call or details of an IT Asset at events or trade shows. To take advantage of these features, enable the ‘Public QR-Code scanning’ option from Company Settings, and select the attributes you’d like to display to those who scan the QR-Code (using their smartphones).
- Company Settings → Enable Compact QR Codes: The generated QR Codes will have fewer characters, including a smaller security code for stopping random guessing of URLs.
About AssetSonar
AssetSonar is a powerful ITAM solution used by IT-intensive organizations and businesses all over the globe.
For more assistance, drop us an email at support@ezo.io.


