

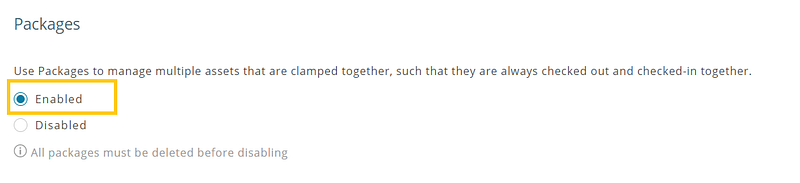
Packages are best described as IT Assets that are clamped together such that they are always checked out and checked-in together. A number of IT Assets can be clamped together to create a Package using our IT Asset tracking software. Actions such as check-in, checkout, reserve, and service, etc can then be performed directly on the Package instead of the constituent Assets. To do this, go to Settings → Add Ons → Packages → Enabled.
If your business requires flexibility, use Bundles to combine IT Assets together to reserve and check out with ease and speed. A Bundle acts like a checkout list which can be used to optimize checkouts based on item characteristics and availability. Learn more about Bundles.
Contents
- When to use Packages
- Create a new Package
- Take actions on a Package
3.1. Check-in, check out or reserve a Package
3.2. Take mass actions
3.3. Add Package to Cart
3.4. Re-assemble a Package
3.5. Service Packaged Assets - Packages vs Bundles
1. When to use Packages
Use Packages when you frequently need to take the same action on a set of IT Assets (excluding asset stock and inventory). For example, a GPS tracker bolted to a laptop. If the GPS tracker is Asset #1 and the Laptop is Asset #2, these two Assets will always be checked out, checked-in, and reserved together. If the GPS tracker gets permanently damaged (which is a once in a blue moon occurrence), it can be removed from the laptop and a new one can be installed. This is a perfect scenario where Packages should be used.
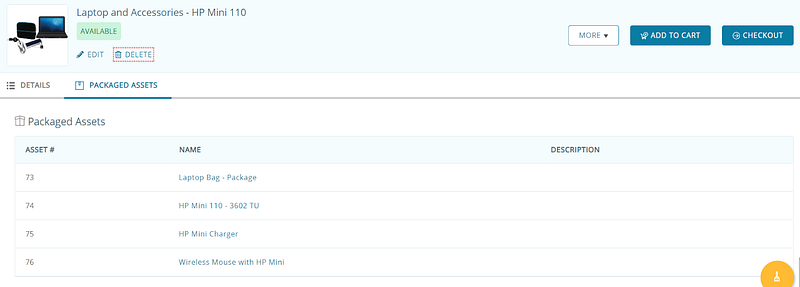
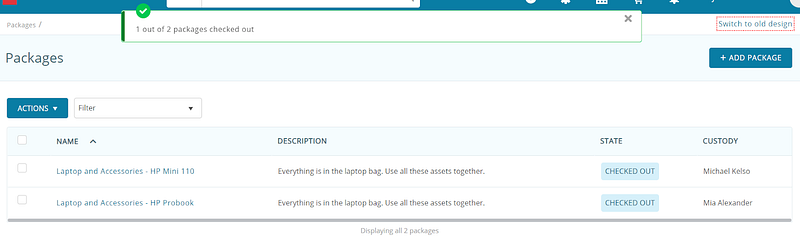
Packages can also be used where IT Assets are not literally attached to one another but are still checked out/in together. For example, a laptop bag, laptop, and its charger. If you plan to use these together at all times, these can be packaged together. Assets in a Package cannot be checked-in/out, individually. Here is a screengrab for a laptop Package:
2. Create a new Package
You can create a new Package from Bundles → Packages → Add Package. Packages can only have Assets; Asset Stock and Inventory cannot be added to a Package.
Let’s see how we create the Package for a laptop and its accessories.
- Enable Packages from Settings → Add Ons → Packages.
- Once enabled, go to More → Packages.
- Click the ‘Add Package’ button on the right.
- Fill in the data fields for Package Name and Description
- Define which IT Assets you want to clamp together against the ‘Packaged Assets’ field.
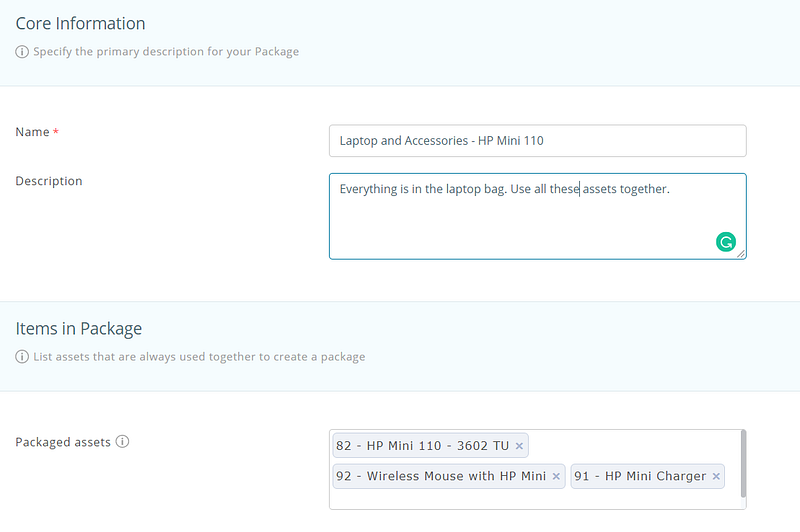
Note: You can only add IT Assets that are not checked out, in maintenance, or have outstanding reservations.
6. Hit ‘Create Package’.
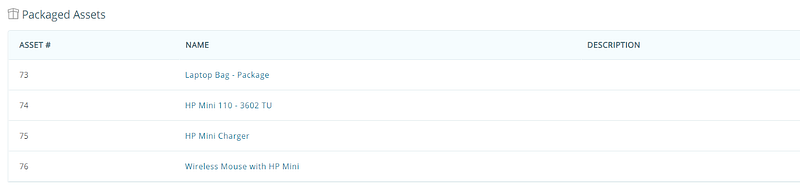
7. Once done, the Package Details Page will show a summary of the associated Assets.
8. Take the desired actions!
3. Take actions on a Package
Actions (including check-in, checkout, service, and reserve) affect all the Assets in a Package, at once. For instance, the entire Package will be checked-in/out whenever one of the associated IT Assets is checked-in/out. To perform these actions individually on an Asset, the Asset has to be removed from the Package.
3.1. Check-in, check out or reserve a Package
Packages can be checked out, checked in, and reserved from their Details page. From the Package Details Page, click the ‘Checkout’ button on the right-side menu to check out a package. An overlay will appear; fill in the fields and click ‘Checkout’.
3.2. Take mass actions
You can also take mass actions from the Package Listings Page. Go to Bundles → Packages, check the relevant Packages, and click on ‘Actions on Packages’. You can take the following actions:
- Check-in
- Checkout
- Reserve
Note: If a package is not available for mass action, a total count of Packages successfully acted upon will be displayed.
You can also apply the following filters to pull up specific Packages:
- All Packages
- Available Packages
- Checked Out Packages
- Packages in Custody of
3.3. Add Package to Cart
You can add a Package to the Cart from the Package Details page. Hit the ‘Add to Cart’ button and the Package will be added to the cart. You can then take actions on the Package from the Cart Details page including checkout, reserve, move, print, or export, etc.
Read More: Cart Management in AssetSonar
3.4. Re-assemble a Package
Items in a Package will always be checked-in/out or reserved together as these items behave as one Asset. However, you can re-assemble i.e. break or remake the Package (packaged Assets have to be available) when required. To do so, hit the ‘Re-Assemble Package’ button within a Package Details page.

3.5. Service Packaged Assets
You can schedule or start service or maintenance activity on a packaged Asset from its Details page. This will send all the Assets in that Package to maintenance, not just that particular Asset. Completing a maintenance event will make the Assets available again for checkouts and reservations. You can also record a service event if you want to make the Assets available.

Read More: Service and Maintenance Management — AssetSonar
4. Packages vs Bundles
While Packages and Bundles both group Asset, they differ in functionality and usage scenarios.
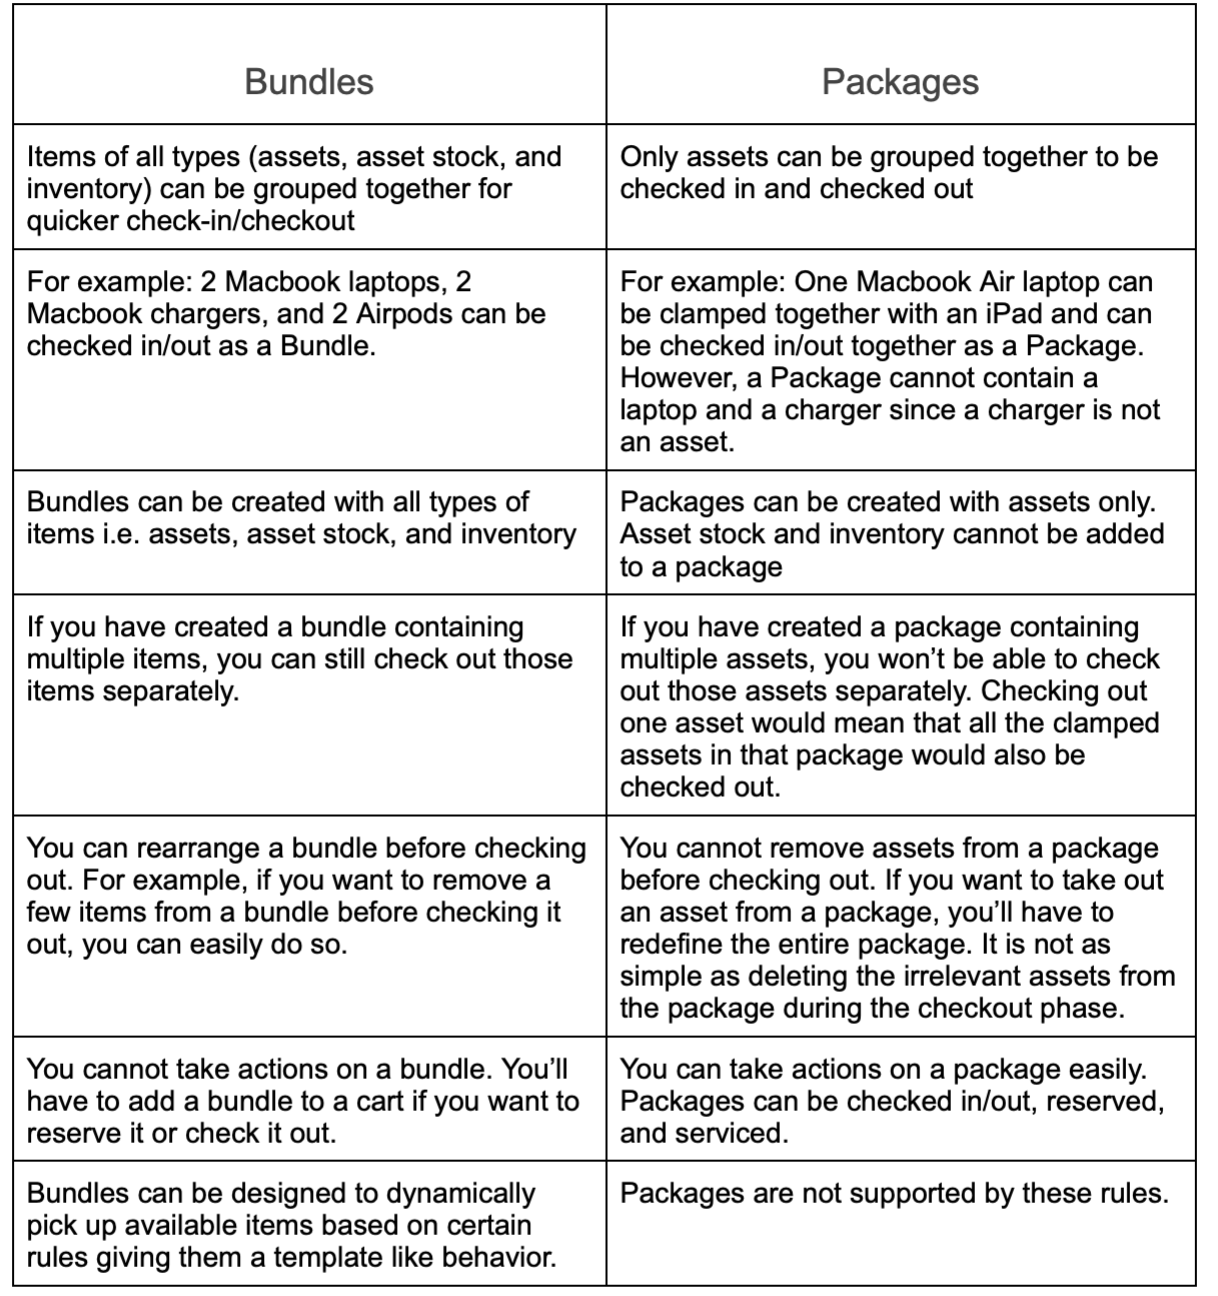
Read more: Bundles in AssetSonar
About AssetSonar
AssetSonar is the leading IT Asset Management software used by IT-intensive organizations and businesses all over the globe.
For more assistance, drop us an email at support@ezo.io.


