

IT Asset tracking software needs to be able to process thousands of business assets quickly and efficiently. Importing items into AssetSonar is extremely straightforward with our nifty import wizard. You can instantly add or update all items — including Assets, Asset stock, and Inventory — by setting up a CSV file and mapping the columns onto existing ones.
This guide will take you through the basics of Item imports, and provide you with some helpful tips to ensure seamless imports each time!
CONTENTS
- Custom Fields
- Adding IT Assets
2.1. Importing IT Assets via CSV files
2.2. Discovering IT Assets using the Agent
2.3. Mapping IT Assets
2.4. Merging IT Assets - Adding Asset Stock
- Adding Inventory
- Updating Items
- Mass Check-ins and Checkouts
- Bulk Import Templates
Before you start, it would be helpful to go through this quick guide on importing basics.
1. Custom fields
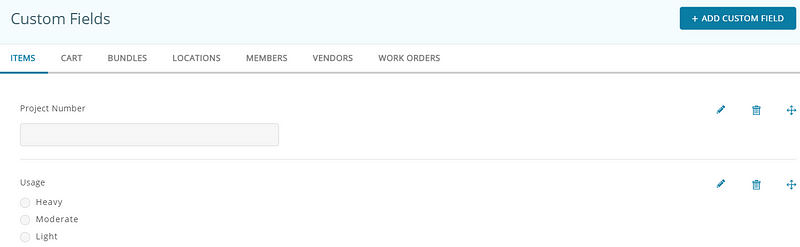
If the default mapping columns do not cater to all your Asset management needs, you can map onto tailor-made columns through Custom Fields. Go to Custom Fields from the side navigation bar by clicking on Menu → Custom Fields.
Below, we’ve set up some custom fields for tracking project numbers, usage type, and inspection dates.
With custom fields all set up, you can start the basic process for importing items. We’ve outlined the steps for importing Assets, but remember that you can import Asset Stock and Inventory the same way.
2. Adding IT Assets
You can either use CSV files to import IT Assets into the system or use our Agent to discover and add IT Assets used within your organization.
2.1. Importing IT Assets via CSV files
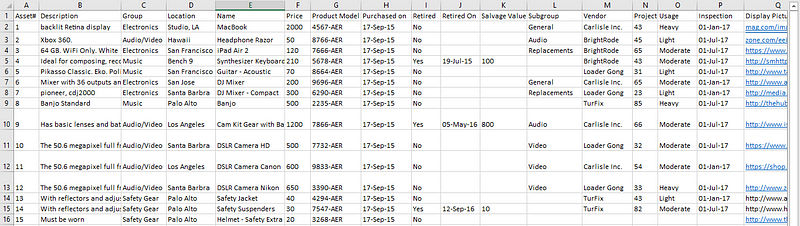
First, set up a CSV with columns about different Asset attributes. The following columns will be present for mapping Assets later by default, including the custom fields previously added:
You might want to add details for fields not present above. This is where your Custom Fields come into play. Simply add columns for them, so your CSV looks something like this:

Next, go to Items → Assets → Import Assets → Add New Assets.
Upload your CSV file, as shown below:
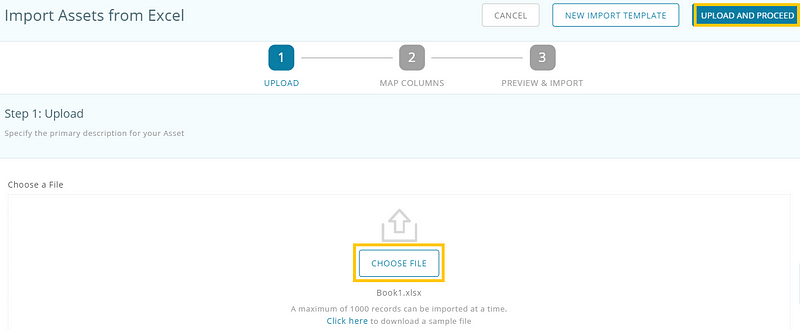
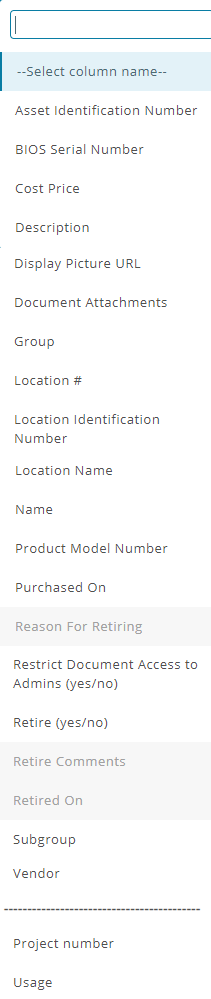
You can now start mapping!
Choose the relevant option from the dropdown, or skip a column if you have nothing to map it to. You can always scroll back and edit a previous column.
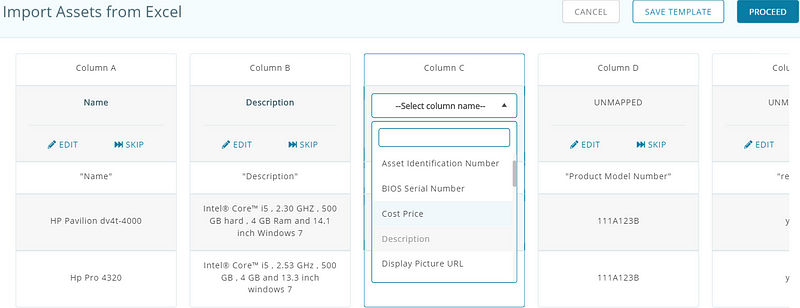
Note that the ‘Usage’ and ‘Project Number’ fields are custom fields created for this guide.
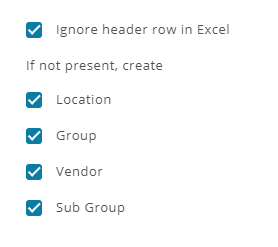
The settings below also provide you with a few options. If you have a header row describing the column type, the first checkbox will allow you to ignore it in the import.
Additionally, if you’ve associated an Asset to a location, group, subgroup, or vendor that doesn’t exist yet, you can ask the system to create these in one go during the new import.
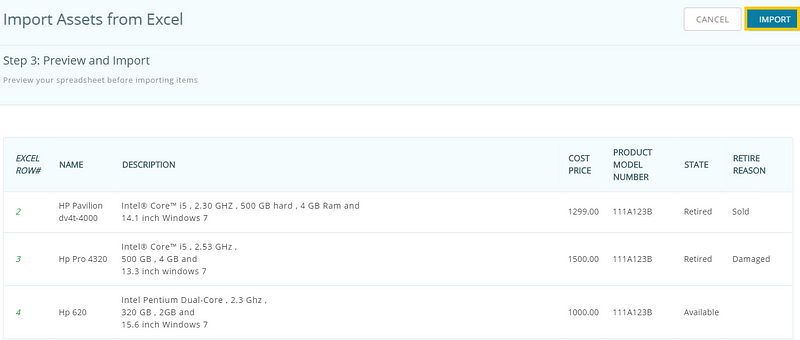
After you’re done mapping the columns, you can press the Proceed button for a preview of what your Assets will look like, as shown below:
2.2. Discovering IT Assets using the Agent
You can also add IT Assets into your AssetSonar account using our Agent.
First, install the Agent in each of the devices used within your company. Learn how to do this here.
Once you have installed the Agent, go to Settings → Company Settings → ITAM Discovery Agent and click ‘Sync Now’.
This shall discover and add all the IT Assets in which you’ve installed the Agent.
2.3. Mapping IT Assets
Let’s say, you first imported 10 laptops into the system using Excel. You assigned unique AINs to these IT Assets. Later, you installed the AssetSonar Agent on the same 10 laptops to fetch their configuration and drive data into the AssetSonar account. Now, this may result in duplicate IT Assets within your account. You can sidestep this issue.
AssetSonar detects whether the AIN of an imported IT Asset is identical to the BIOS Serial Number of an IT Asset discovered by the Agent. It then maps the discovered IT Asset to the imported IT Asset so you do not have redundant information in your account.
To enable this setting, follow the Settings → Company Settings → IT Asset Mapping → Select ‘Enabled’ pathway.

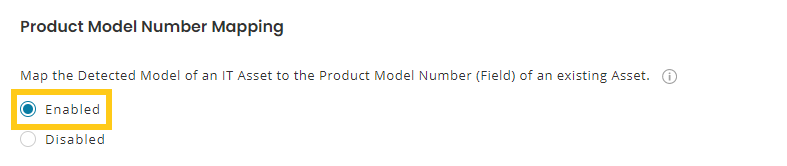
You can also map the detected Product Model Number of a Device onto the ‘Product Model Number’ field of an Asset that already exists in your database by following the pathway: Settings → Company Settings → Product Model Mapping → Enabled.
2.4. Merging IT Assets
AssetSonar also prevents data duplication by merging IT Assets based on the following attributes:
- MAC Address
- UUID
- BIOS Serial Number
You can enable this setting by going to Settings → Company Settings → Merging IT Assets and then selecting each of the options below:
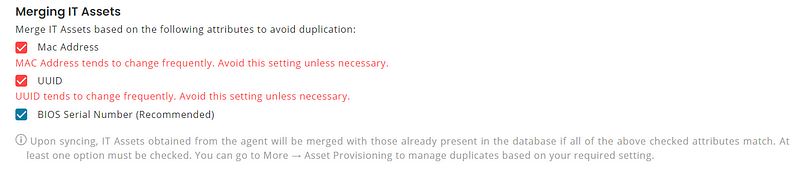
Note: We recommend using the BIOS Serial Number as the unique identifier.
3. Adding Asset Stock
The process for adding Asset Stock is the same as above. To start, go to Items → Asset Stock → Import Asset Stock → Add New Asset Stock.
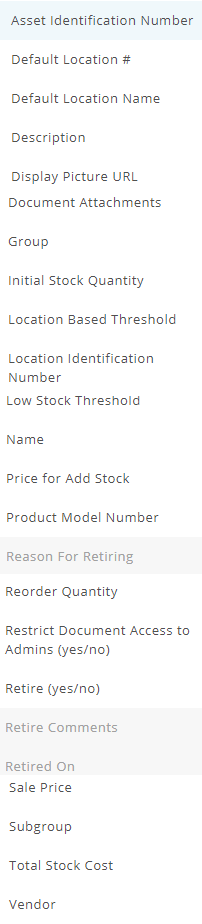
Below, you can see the Asset Stock fields that will be available for you to map to:

You can see that the fields available for mapping Asset Stock (and Inventory) are slightly different, with some notable inclusions such as fields for low stock thresholds and prices for adding and removing stock.
4. Adding Inventory
To add Inventory, go to Items → Inventory → Import Inventory → Add New Inventory. Similar to Asset Stock, you can see that the fields available for mapping Inventory are slightly different as well:
If you provide details on the quantity to be added to stock, the Stock Price column must be mapped.
Also, note that stock cannot be added or removed through imports. You can only set up the initial stock through an Add Import.
5. Updating Items
Items can be updated just as you would add them. For this, go to Items → Assets → Import Assets → Update Existing Assets. Please note that if you try to update Assets through the ‘Add New Assets’ button, you would be creating duplicates rather than updating Asset values!
6. Mass Check-ins and Checkouts
You can also instantly update Asset check-ins and checkouts using a CSV file. For this, go to Items → Assets → Import Assets → Checkin/Checkout of Assets. The columns available for mapping here are outlined below:
And as easy as that, you can add new items, update items, or change Assets’ check-in/checkout status using our Asset tracking software.
7. Bulk Import Templates
Note that only 1000 records can be imported at one time. If you want to do excel imports multiple times, you may want to create a Mapping Template from Items → Assets → Import Assets → Add New Assets → New Import Template:

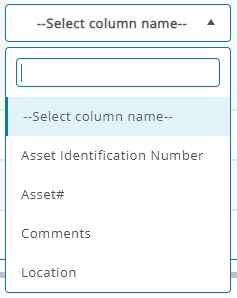
Here, you can choose what columns you’d like to map to later, and use this template repeatedly to speed up multiple imports. This is what your mapping options will look like:
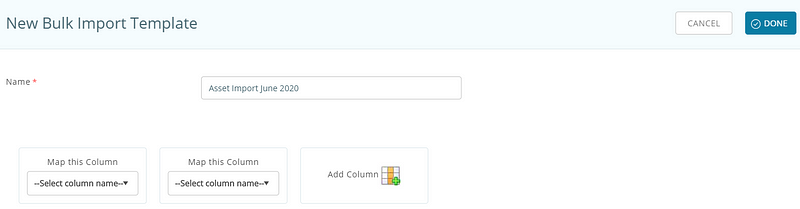
Click ‘Done’ in the upper right corner, and you’ll receive a confirmation about the columns you’ve chosen. You can also Edit and Delete these templates.
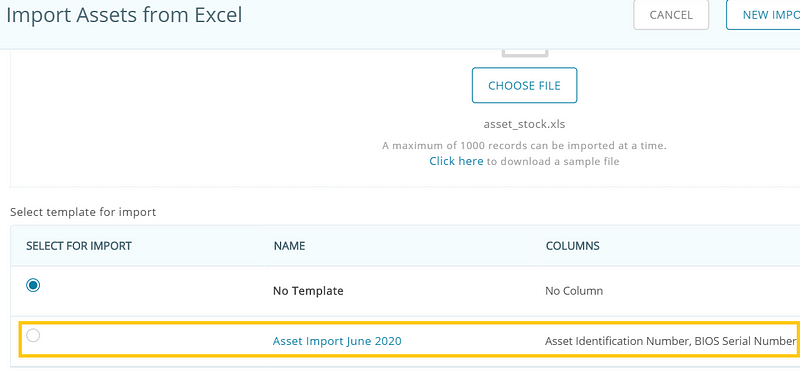
You can choose one of these templates when you do a new import. Here’s what this should look like:
Related Posts
Importing in AssetSonar — A Quick Guide
What information or data can I export from AssetSonar?
How do I import images and documents when importing from Excel?
About AssetSonar
AssetSonar is a robust IT inventory management software used by tech organizations and businesses all over the globe. Sign up today for a free 15-day trial.
For more assistance, drop us an email at support@ezo.io. You can also visit our blog for detailed support posts.


