

![[How-to] Use Custom Fields in AssetSonar](https://ezo.io/wp-content/uploads/2019/06/How-to-Use-Custom-Fields-in-AssetSonar.png)
For efficient IT Asset tracking and inventory management, AssetSonar comes with a predefined set of fields. However, we understand that every business is unique and you may need some custom fields as per your specific needs. To customize your inventory data depending on your needs, we provide Custom Fields, which can be used to track any data point with an Item, Cart, or Purchase order added to our IT Asset Management Software.
To utilize Custom Fields, go to More → Custom Fields from the side navigation bar.
1. Custom field use cases
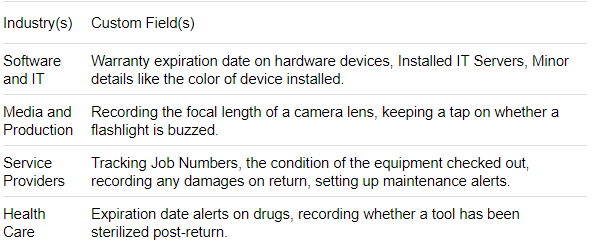
Here are a few examples of how our customers in various industries make use of this feature:
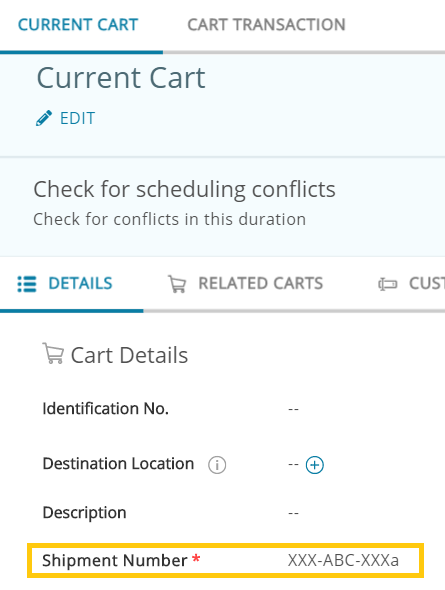
When using Custom Fields for Carts, you can track data points like shipment number, special handling instructions, and delivery fee for Cart # 777 which has been checked out to Emily Rose.
For Purchase Orders, a Custom Field can be defined as to what kind of binding (e.g. saddle stitch) you would like for the next stock of company handouts or what paper size (e.g. A4 or A6) should be used.
Similarly, you can add Custom Fields for Members, Vendors, Work Orders, and Bundles.
Let’s dig a little deeper!
2. Which modules can have associated custom fields?
- Items
- Carts
- Purchase Orders
- Members
- Vendors
- Work Orders
- Bundles
3. Types of custom fields
There are a few different types of Custom Fields in AssetSonar. The options available will change depending on which module you’re on:
- Checkbox: Choose between a number of pre-set values, making it easier to speed up processing times when dealing with high-volume items.
- Date Field (Alert): Specify date alerts to receive reminders on the specified date. This Custom Field can also be set to a recurring alert.
- Dropdown: Compress an extensive list of options and also set a default value.
- Multiple Choice: Quickly choose through a shorter list of options with all of them displayed.
- Number Field: Specify the quantity for a Custom Field and set a default value for it as well.
- Paragraph Text: Enable Users to add detailed comments and any other important details that may be out of the usual.
- Single-Line Text: For attributes that can have several different values that cannot be listed or categorized.
A Note on Boolean Custom Fields:
Boolean values are included in all custom field types except Items. They are great for providing quick insights into your business workflows! Is an employee working with you full time? Do you have a discount code with a vendor? You can ask Users ‘Yes/No’ questions and quickly process their answers.
You can, for example, use these insights to figure out whether a Cart is at its location of origin, or if it was inspected on the field. You can even run a Custom Report — using Carts as the primary module and the boolean as a column — and collate the responses for a better understanding of trends or bottlenecks.
It is important to note that the Custom Field has to be mandatory for the boolean value type. This is because Users must choose either a Yes or No value; not filling in either checkbox provides data that ultimately isn’t meaningful.
4. Custom fields for items
For Items: You can add Custom Fields from More → Custom Fields → Items tab → Add Custom Field.
4.1. Associating Groups to custom fields for items
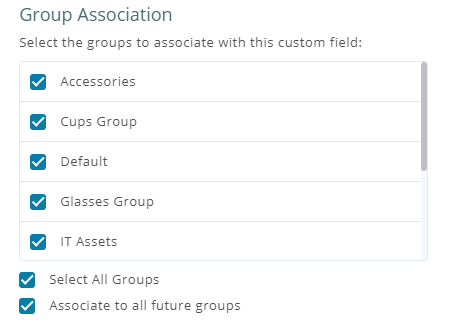
When you’re adding a custom field, you can choose to associate it with groups of items:
- All the groups i.e. all the items
- All the groups that you’ll create in future
- Only a few specific groups (use shift+click or ctrl+click to select a bunch in a single go)
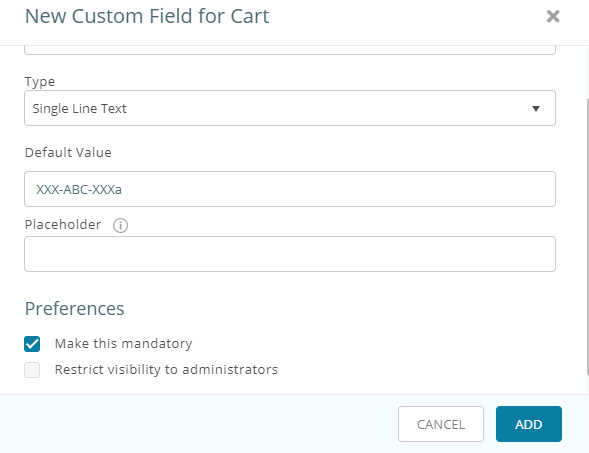
For Carts: You can add Custom fields from More → Custom Fields → Cart → Add Custom Field. Unlike Custom Field for Items, a Custom Field for Carts can be of 5 different types only i.e. single-line text field, number field, paragraph field, boolean, or a dropdown type. They cannot be associated with Groups.
You can choose between making this field mandatory or only restricting its visibility to Administrators.
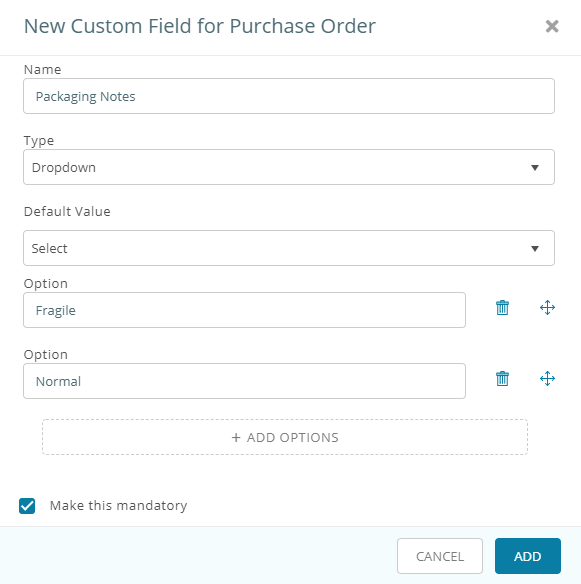
For Purchase Orders: You can add Custom Fields from More → Custom Fields → Purchase Order → Add Custom Field. Custom fields for Purchase Orders can be of 6 types, i.e. single line text field, number field, paragraph field, date field, boolean, or a dropdown type.
Similarly, you can add Custom Fields for Members, Vendors, Work Orders, and Bundles.
4.2. Linking custom fields to modules
You can also link custom fields to the following modules: Items (Assets, Asset Stock, Inventory), Locations, Bundles, Software, Purchase Orders, Carts, Work Orders, Vendors, and Users. For example, you can assign a default location or item owner to an asset to help users reference that data in the system.
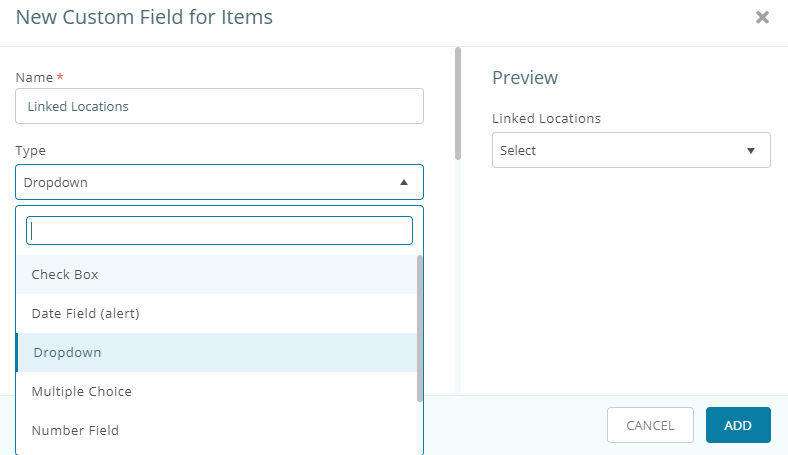
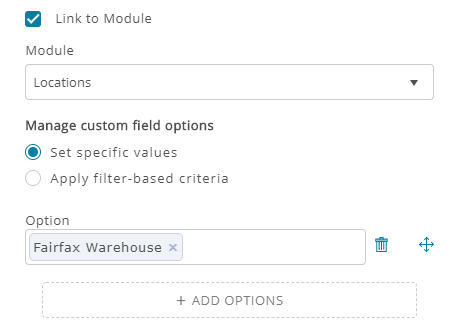
To add a ‘Link to Module’ custom field, go to More → Custom fields → Add Custom Field and choose the type ‘Dropdown’.
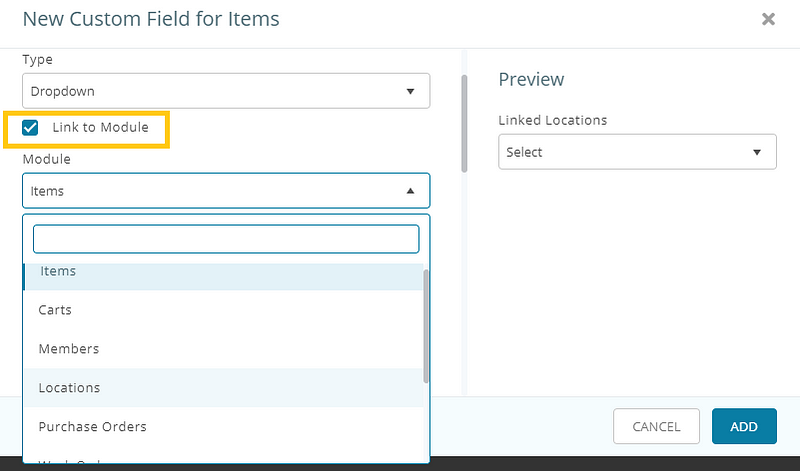
Select the ‘Link to Module’ checkbox and choose a module to link to from the options available:
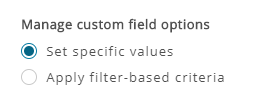
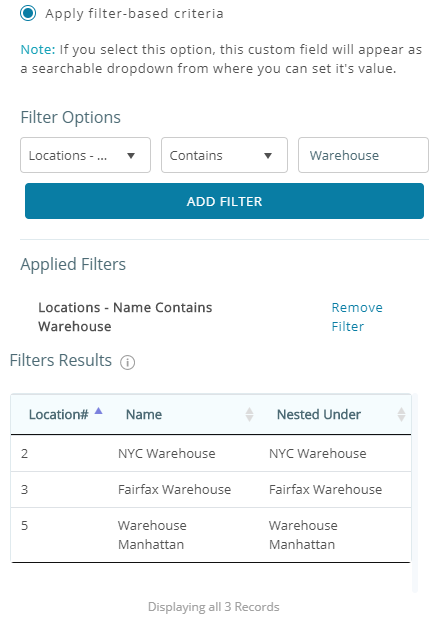
Now you can either enter specific values or select items by applying filter-based criteria.
In this example below, you can specify a location by searching and entering the name in the Options field.
You can also apply a filter based criteria. For example, if you are linking to a Location, you can apply the filter for name and pull up all locations with the name “Warehouse” in them.
Once you’re done, click ‘Add” to create the Custom Field.
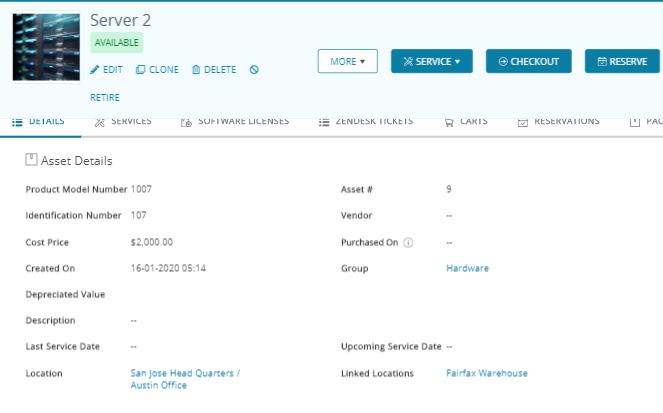
Now you can edit this Custom Field on the Asset details page. Go to the particular Asset details page and click on ‘Edit’. Then go to the custom field, search, and select the location from the dropdown menu.

After you link this location to the asset, it will be shown as a clickable link on the Asset detail page.
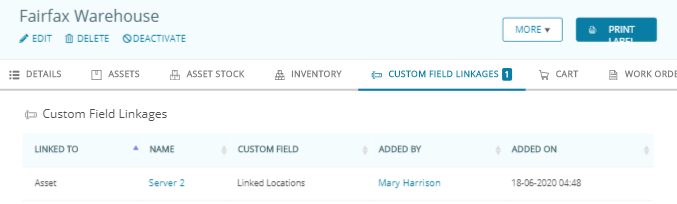
Likewise, it will appear under Custom Field Linkages on the Location detail page
Note:
- Link to Module custom fields cannot be set as mandatory due to data corruption issues.
- If the filter criteria or options in the custom field are changed, emails are sent with CSV files of all fields that were updated.
- The Custom Field linkages tab is only visible to Admins.
5. Different preferences for different custom fields: Items only
5.1. Mandatory custom fields for new items and reservations
– Mandatory on Create/Edit: When you enable this option, you’ll get to have an additional field while creating or editing an Item (at the bottom of the page under Custom Fields). For example, you want to record the color of every Item whenever a new Item is added to the system or being edited by a Staff User. This way you can make it a compulsion for the Users to fill in this field. See image below:
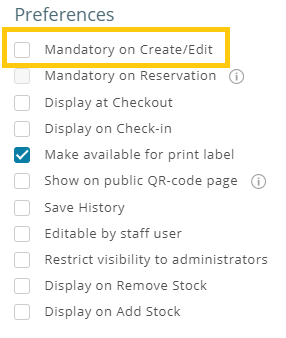
Note: This Custom Field will only appear on Item details pages that belong to the Group associated with it.
– Mandatory on Reservation: On enabling this preference, a Custom Field will appear whenever you reserve an Item for checkout. To enable this, you must first select ‘Display at Reservation’ under the ‘Display at Checkout’ preference. Useful when a User wants to reserve ‘white’ background sheets for an event.
5.2. Customizing Check-in/Checkout and other events
You can add Custom Fields of your choice on Check-in/out forms. The ‘Display at Checkout’ and ‘Display at Check-in’ options are available under Preferences when you’re adding/editing a Custom Field.
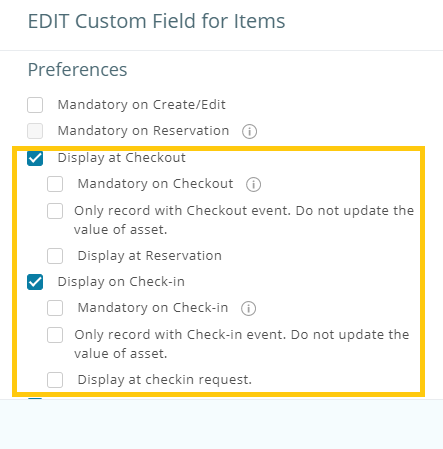
Here are some ways in which you can configure these settings:
- Selecting ‘Display at Checkout’ will show this Custom Field on the Checkout form. The User can enter a new value for this field.
- Selecting ‘Mandatory on Check-in/Checkout’ will show this Custom Field on the Check-in/Checkout form. The User then cannot check-in/checkout an Item without entering a new value for this field. Note: This field will not be pre-populated with the last value or default value defined by you when creating the Custom Field. The image below shows how the mandatory (*) and ‘display but optional to fill’ Custom fields appear on check-in/checkout forms:
- If you select ‘Only record with checkout event…’, the value entered by the User when checking out Assets will NOT be updated with the asset. It’ll only get recorded in the log for check-in/checkout events. These logs appear under an Item’s Details Page → History button → Check-in/out History, and Reports → Checkout events.
- Selecting ‘Display at Reservation’ shows the Custom Field on the Reservation form. The values recorded for the Custom Field(s) on Reservations are also recorded in the check-in/checkout events log when you check out a reservation.
- Similarly, you can configure how the Custom Field(s) will ‘Display on check-in requests’.
- You can also make it mandatory for the Users to set a value on check-in/out.
Note: All the above preferences can be used for any type of Custom Field for Items only.
5.3. Set up Date Alerts
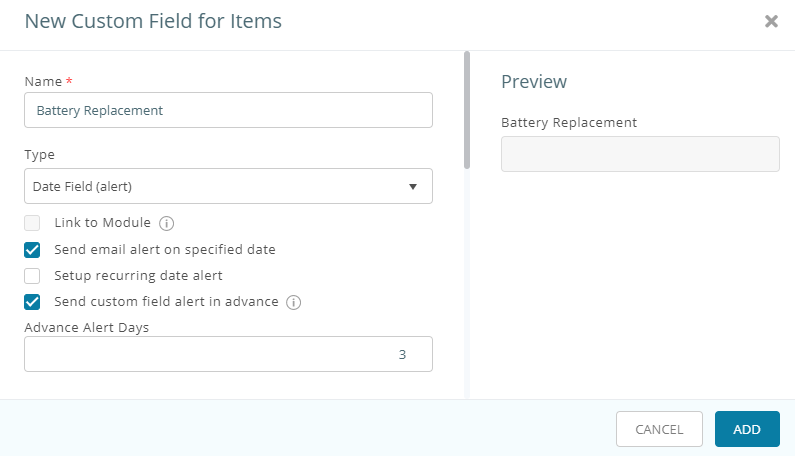
You can also enable date alerts using ‘date field’ type Custom Fields. For example, you may want to get an alert when a laptop battery expires. For scenarios where some equipment requires regular servicing, you can set up recurring date alerts e.g. a Server requiring inspection every 2 months.
When creating a ‘date alert’ Custom Field, you can either set to receive a notification on a specified date or set up recurring date alerts e.g. every year 3 times. An alert in advance can also be enabled for this type of Custom Field.
Read More: Setting up Services and Maintenance Events in AssetSonar
5.4. Editable by Staff User vs restricting visibility to Administrators
On enabling ‘Editable by Staff User’, all Users in your company will be able to view and edit this Custom Field. This option will overlap the settings configured in Company Setting → Access Control and More → User Listings.
On the other hand, selecting ‘Restrict visibility to Administrators’ will only enable the Admins in your company to view this Custom Field or edit it. Only one of the above two options, Editable by Staff User or Restrict Visibility to Administrators can be enabled at a time.
5.5. Save History
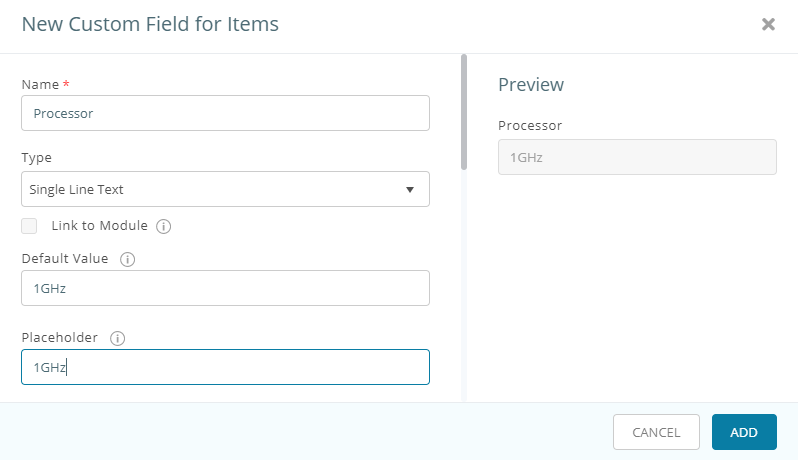
Keep a history trail of how a Custom Field value is changing over time for a particular item. Make sure that the ‘Save History’ option is checked under preferences for the Custom Field(s) for which you’d want to have a history record.
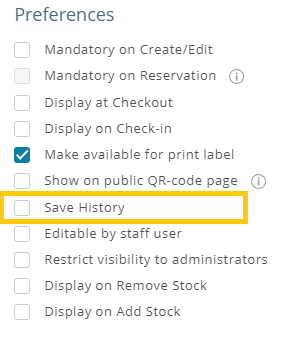
Say you have a Custom Field called ‘Processor’ for your Printers. You can track when was the Processor updated to 2GHz from 1GHz, and who made that change.
You can also export the history trail to a CSV.
5.6. Display on Sale and Display on Add Stock
Though the Custom Fields can be recorded and displayed on all types of Items and check-ins/checkouts. However, you can also choose to either display a Custom Field on remove and add stock forms or make it mandatory to record. Enable them under the preferences for Custom Field you’d want to display.
5.7. Other Options
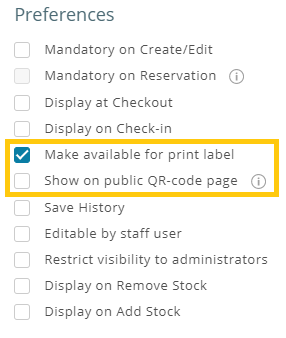
- Any Custom Field can be printed on a Print Label. To ensure that the Custom Field in question appears in the label design elements, you have to select the “ Make available for print label” option while creating or editing the field.
- You can also have a Custom Field shown when someone scans the QR Code for an Asset. Enable Company Settings → Public QR Code Scanning → Check ‘Custom Fields’ under ‘Show following attributes’.
- Make sure to have the relevant preferences selected.
6. Deleting Custom Fields
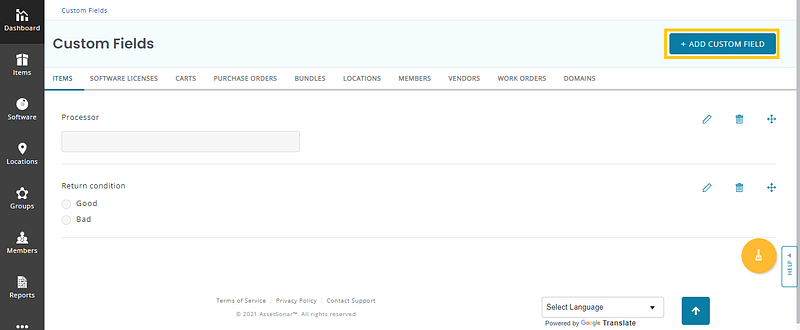
You have the option to edit/delete any Custom Fields under More → Custom Fields.
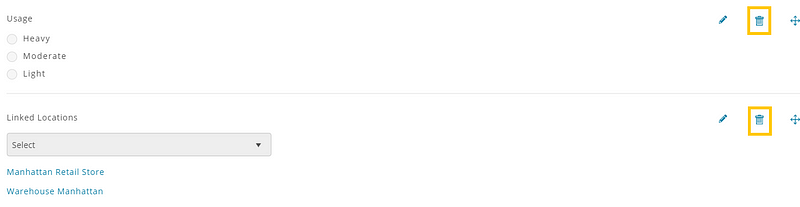
Warning: Deletion of a Custom Field will also delete the associated values for the Items associated and recorded with it. This applies to Custom Fields for Carts, Purchase Orders, and other modules as well.
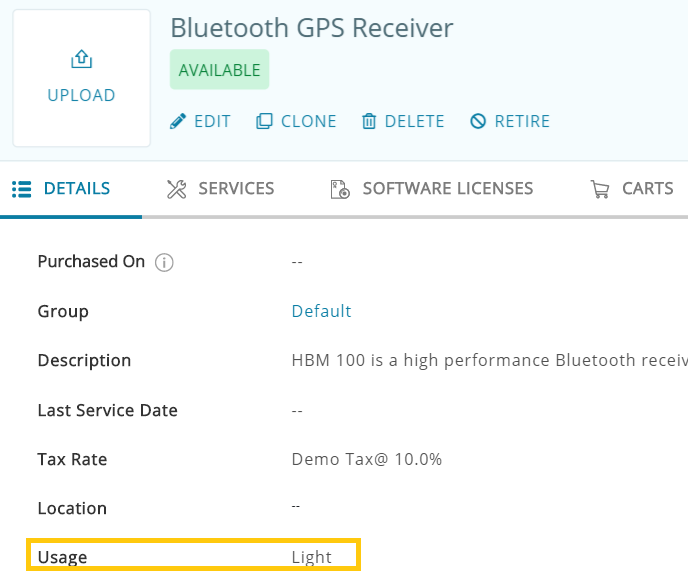
7. Custom Fields View on Item, Cart, and Purchase Order Details Pages
– All associated Custom fields will start appearing on the relevant Items’ details page. e.g. Usage will appear on the Asset details page. See the image below:
– Custom Fields on Cart Details Page (see image below):
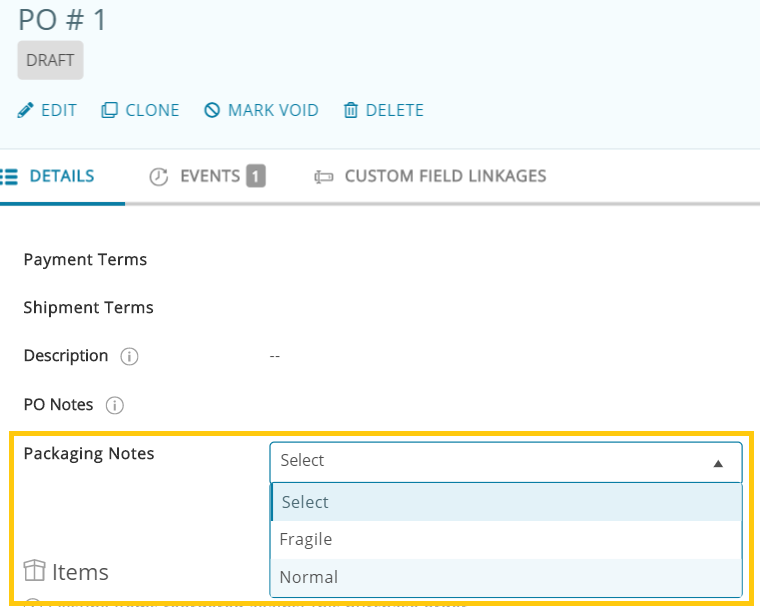
– Custom Fields on Purchase Order Details Page (see image below):
8. Custom fields for Software Licenses
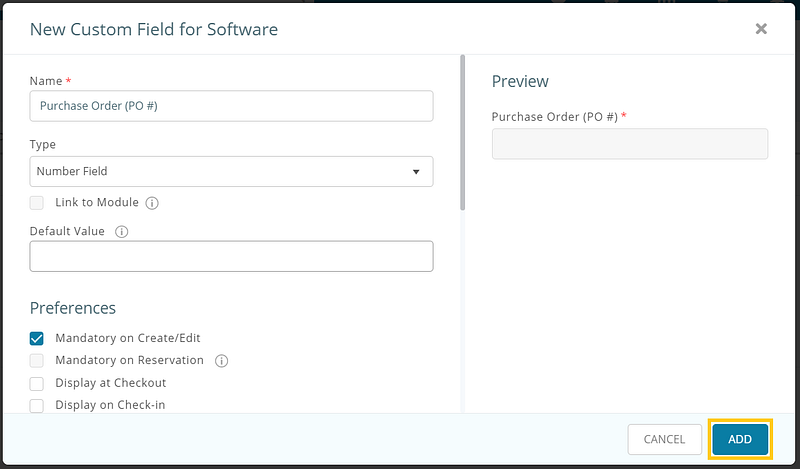
Suppose as an IT Admin, you wish to add and track details regarding Software Licenses that are not added in AssetSonar by default, for instance, the Purchase Order number (PO #) of a Software License.
You can track such data values by creating custom fields in the Software License module. To do so, go to More → Custom Fields → Software → Add Custom Field.

This pops open an overlay. Here, you can configure details for the relevant custom field. Click ‘Add’ when you’re done.
You can also select preferences for a custom field from the following:
- Mandatory on Create/Edit (cannot be selected if linked to the module is checked)
- Save History
- Editable by a staff user
- Restrict visibility to Administrators
9. Customizing Asset, Asset Stock, and Inventory Details
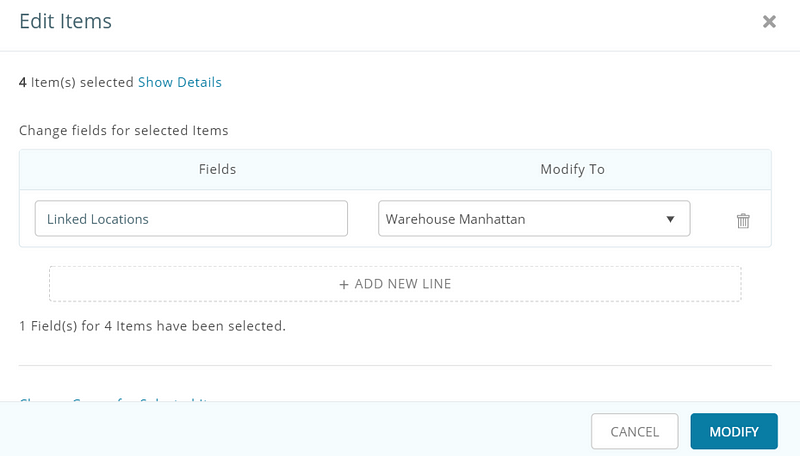
You can edit a single Item to update the Custom Field values. Or you can select a bunch of Items on Asset Listing (Items → Assets) and from Actions → Edit, and edit Custom Fields for all of them in a single go. The same goes for Inventory and Asset Stock listings. Say, you have a stock of 10 camera lenses that have a focal length of 65mm. You can mass edit all of them to update their focal length to 85mm.
10. Customizing Items Listing
The best part is that you can edit the Asset, Inventory, and Asset Stock listing tables to include columns that are more important to you. These columns can also include custom fields.
11. Alerts for custom fields
Custom Fields set as ‘date field’ under types when you create/edit a Custom Field receives an email alert on a specified date or recurring intervals.
Learn More: Types of Alerts for each User Level
12. Importing custom fields
Data for all the custom fields can be imported to your AssetSonar account from an excel sheet. The Custom Fields are available when you’re mapping columns during the excel import. Make sure to create all the required Custom Fields from More → Custom Fields → Items before importing data for them.
13. Reporting, API calls, and more
1. You can also get into more insights that involve Custom Fields from Reports → Custom Reports → Custom Fields Report. These reports can be filtered. You can export these reports to CSV format or upload them to your Dropbox account.
Learn More: How do I import Images and Documents into AssetSonar?
2. You can retrieve all your Custom Fields data and Custom Fields history recorded in our system via API calls.
3. Custom Fields can be searched through as part of the general search function.
14. Applications of custom fields
14.1. For custody verification
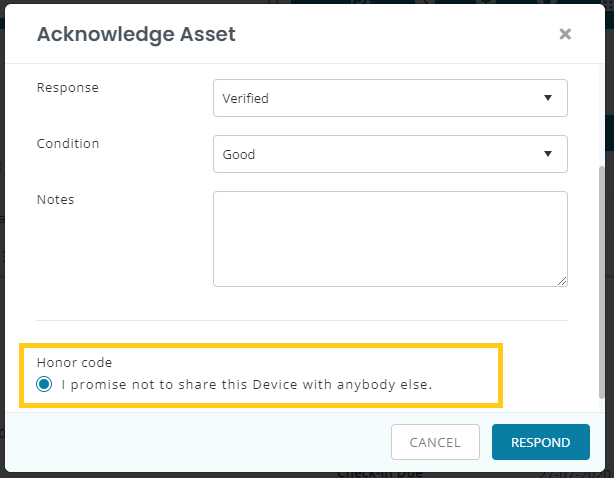
Let’s say, you’re an IT Admin in a university or an organization and you have to check out testing Devices to students or employees. The Devices are proprietary and should not be shared with another person. In such a case, you can set predefined fields that ask Staff Users to agree to an honor code while acknowledging possession of these Device(s).
To configure a custom field for this purpose, go to More → Custom Fields and click on ‘Add Custom Field’.
Now, create a custom field titled Honor code. Enter the relevant details and select ‘Display on Custody Verification’ and ‘Mandatory on Custody Verification’.

Now, add the custom field. This shall display the Honor Code to be selected by users every time they acknowledge custody of a Device.
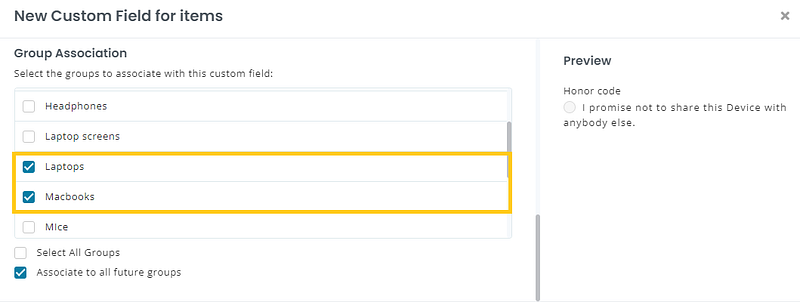
Note: If you want the Honor Code to be applicable only to IT Devices, you can select the relevant Groups while creating the custom field as highlighted below.
Have Feedback About our IT Asset Management Software?
AssetSonar is the leading hardware asset management software used by tech organizations and businesses all over the globe. Sign up today for a free 15-day trial.
For more assistance, drop us an email at support@ezo.io. You can also visit our blog for detailed support posts.


