

![[How-To] Install the AssetSonar ITAM Agent on your Computer](https://ezo.io/wp-content/uploads/2018/07/How-To-Install-the-AssetSonar-ITAM-Agent-on-your-Computer.jpg)
AssetSonar enables you to quickly and effortlessly organize, track, and report on your technology landscape from a single space. This blog shows you how to install our ITAM discovery agent and use it to keep tabs on an asset’s system and hardware details.
1. Before You Begin
The AssetSonar Agent is an application that runs on your PC and is supported on both Mac and Windows platforms. You will need the following to successfully install and run the agent:
- An active assetsonar.com (subscription/trial) account. If you don’t have a subscription or trial account, register here.
- A PC with any versions of the following OS: Windows 7, Windows 8, Windows 10 OR macOS 10.10 and above.
Note: For a seamless installation process, it is recommended that you restart your PC before installing the AssetSonar Agent.
2. Installing the AssetSonar Agent
2.1. Windows Installation Overview
In order to update and track the system and hardware details of all your IT assets, you would need to install the AssetSonar Agent onto each asset individually. Here’s how:
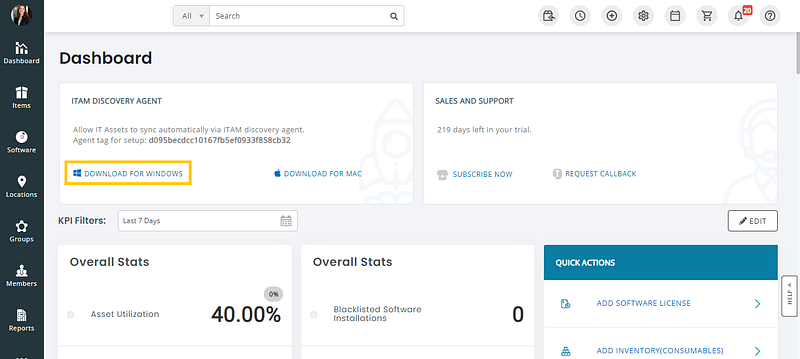
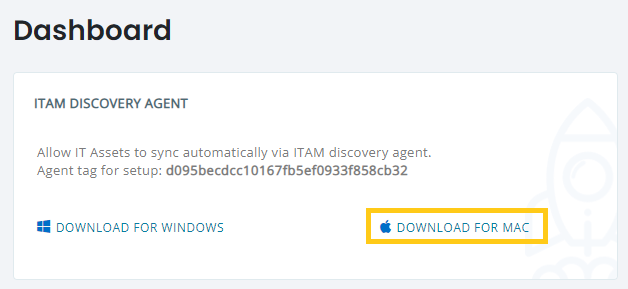
- Download the AssetSonar Agent application setup file for your OS and save it on your local computer. You can download the Agent from Dashboard → ITAM Discovery Agent → Download for Windows in your AssetSonar account.
Please note that we only support the following platforms for now:
- Windows 7.x
- Windows 8.x
- Windows 10
Note: Windows XP and Windows Server 2003 are not supported.
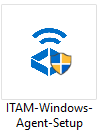
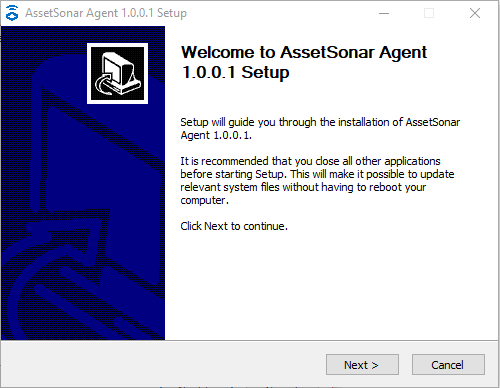
2. Launch the AssetSonar Agent setup wizard from its destination on your PC.
3. Follow the on-screen instructions.
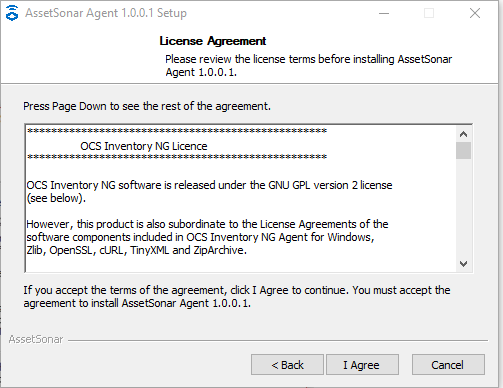
4. Click ‘I agree’.
5. Each company with an active AssetSonar account will receive a unique Asset Tag. Enter this Agent Tag into the dialogue box when prompted. The tag can be copied from the Dashboard of your AssetSonar account or from Settings → Company Settings → Policy → ITAM Discovery Agent → Agent Tag. Click ‘Next’ to begin the installation.
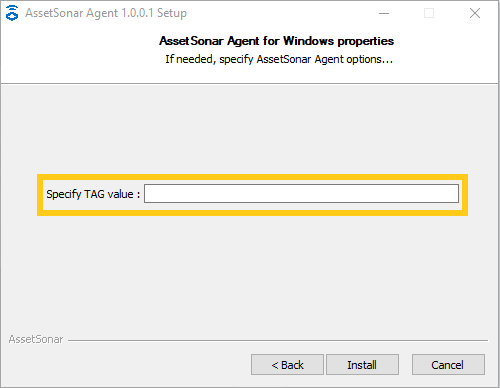
Note: The same Agent Tag must be used for all assets in a company.
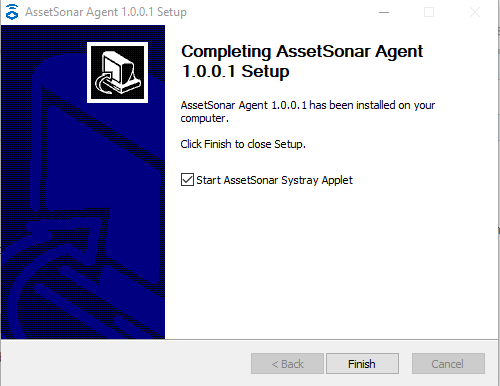
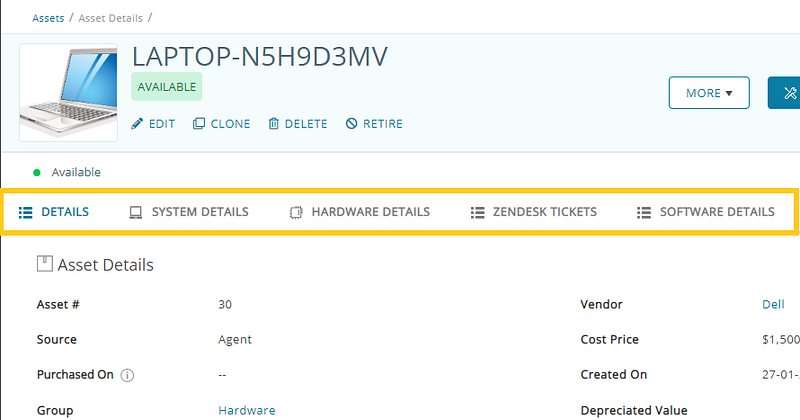
Installation is now complete. Your asset will appear in your AssetSonar account shortly. This is what you’ll see:
2.2. Mac Installation Overview
Again, for your macOS, you will have to install the AssetSonar Agent onto each asset individually. Here is how:
- Download the AssetSonar Agent application setup file for your OS and save it on your local computer. You can download the Agent from Dashboard → ITAM Discovery Agent → Download for Mac in your AssetSonar account.
Please note that we only support macOS versions of 10.10 and above.
2. Launch the AssetSonar Agent setup wizard.
3. The installer will open up and prompt you to follow the on-screen instructions.
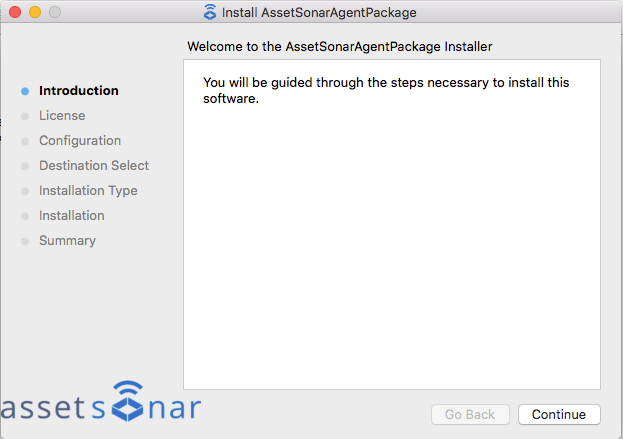
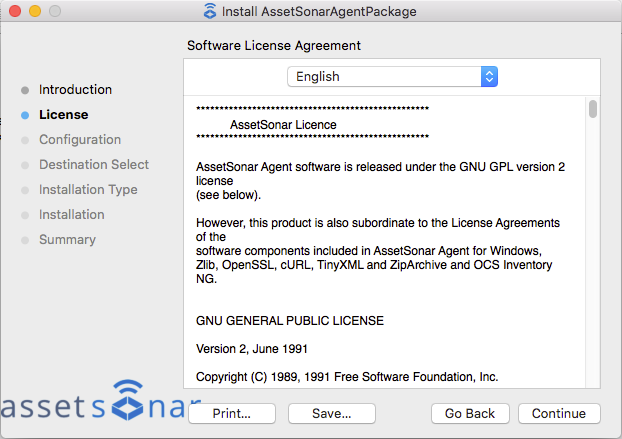
4. Click ‘Continue’. You will be taken to the Software License Agreement.
5. Each company with an active AssetSonar account will receive a unique Asset Tag. Enter this Tag into the dialogue box below when prompted. The tag can be copied from the Dashboard of your AssetSonar account or from Settings → Company Settings → Policy → ITAM Discovery Agent → Agent Tag. Click ‘Continue’ to begin the installation.
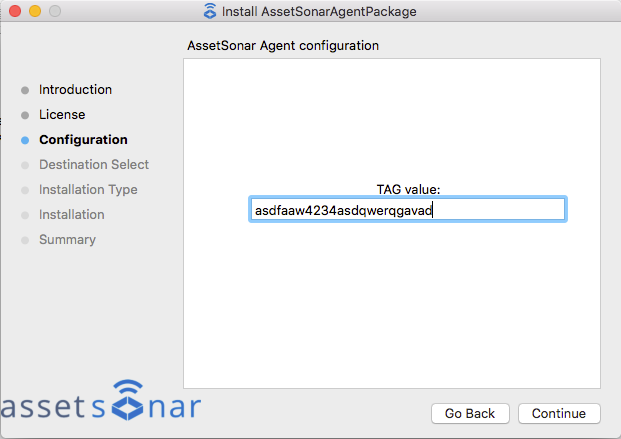
Note: The same Agent Tag must be used for all assets in a company.
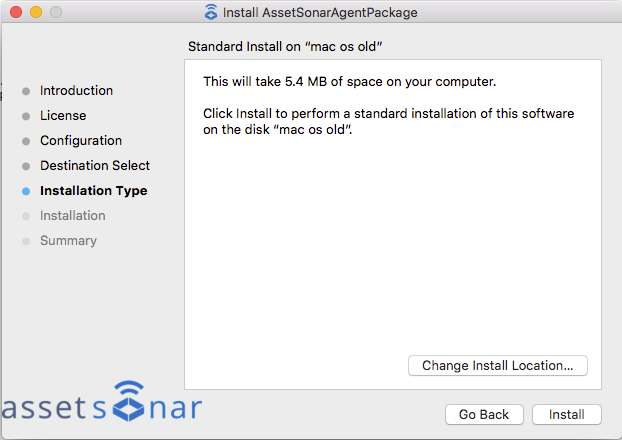
6. The next screen will ask you to proceed with the installation.
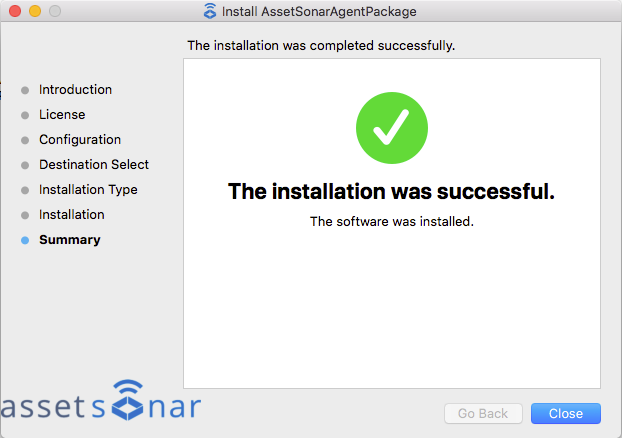
Installation is now complete. Your asset will appear in your AssetSonar account shortly. This is what you’ll see:

Note: The Mac version currently does not support the following hardware features- Input devices, monitors, and ports.
3. More on syncing data
Any device that has the AssetSonar Agent installed will be synced to its associated AssetSonar account. This association is created via Agent Tag.
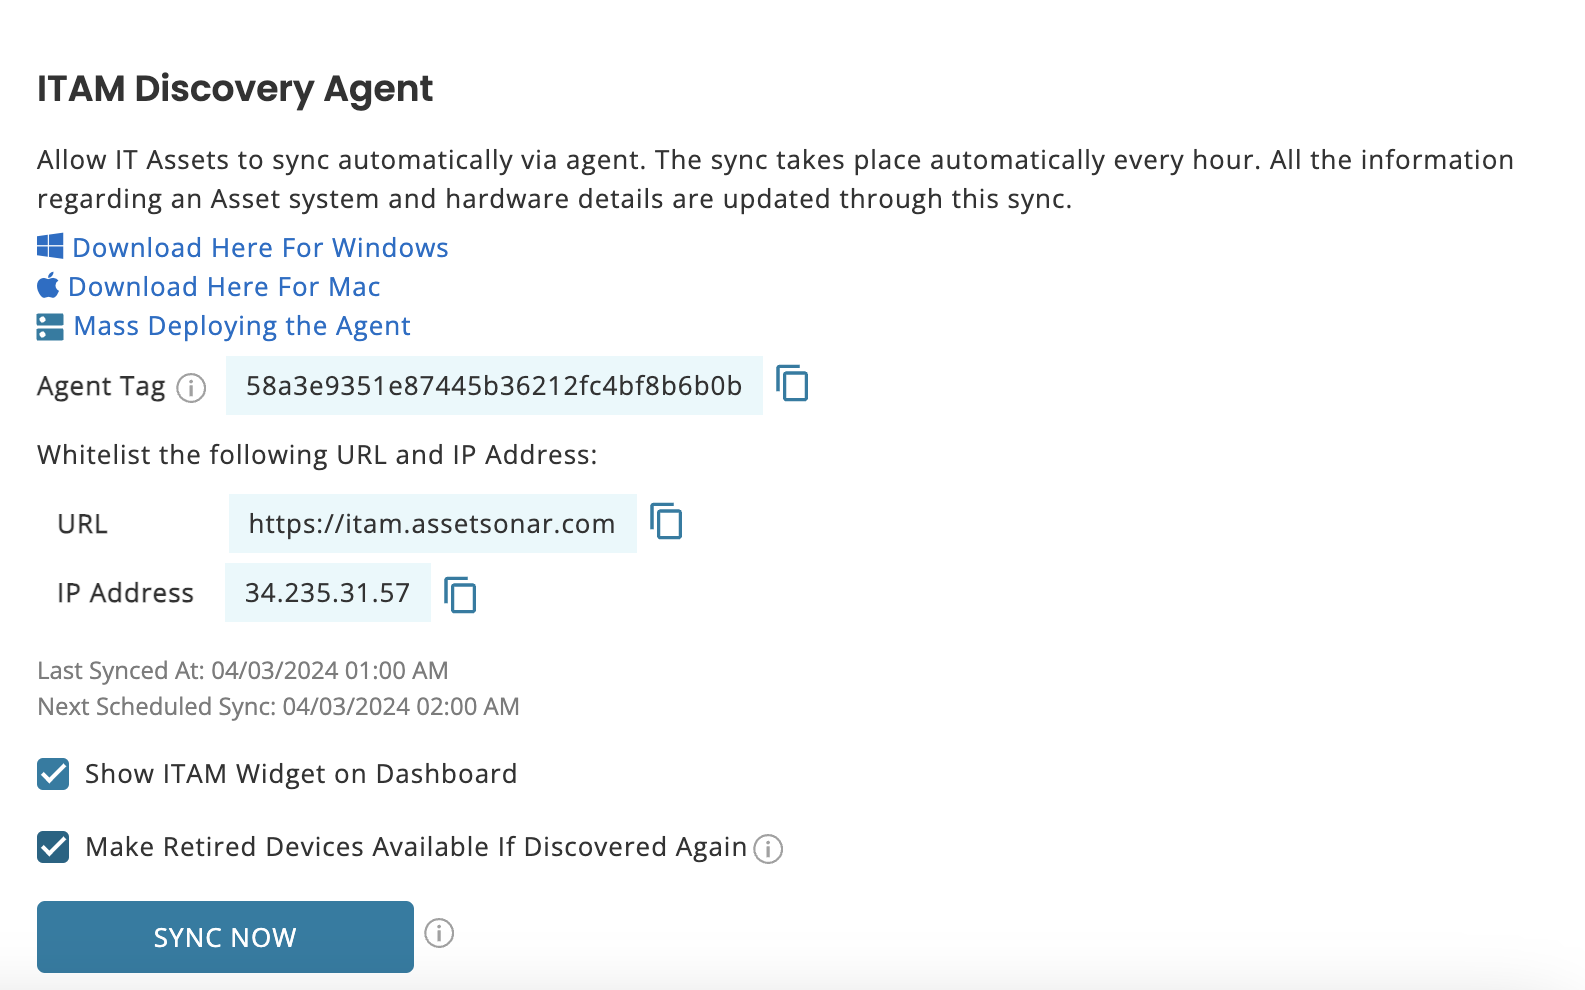
3.1. Sync frequency
A sync happens automatically every day and updates the system, hardware, and software details of devices fetched into your AssetSonar account via the ITAM Agent.
Go to Settings → Company Settings → Policy → ITAM Discovery Agent to see when the last sync took place, and when the next one is scheduled.
3.2. Email-based alerts after sync
After every sync, AssetSonar also sends email-based notifications to IT Admins in case there are changes in any of the following aspects of a device:
- Memory
- Storage (1% of total hard disk space change)
- Network
3.3. Mark retired assets active
In case previously retired assets in AssetSonar are discovered again through ITAM Discovery Agent sync, AssetSonar makes those devices available again. Check the box for the ‘Make Retired Devices Available if Discovered Again’ setting to enable this option as shown below:
3.4. Logical delays in the sync
Once the daily sync has run, it takes some time for the AssetSonar system to fetch updated device data.
Contact the Support team if the delay takes unnecessarily longer than expected.
3.5. What happens when an IT asset misses syncing?
Admins should receive an email alert for any missed syncs. A common use case is IT Assets that were inactive in the last 2 days. The system sends an alert that informs the Admin(s) and lists down IT Assets that were not synced in the past 2 days.
4. Uninstalling the AssetSonar Agent
If you wish to install an updated version of the AssetSonar Agent, you can uninstall the previous version and install the newer one.
Below, we outline how to uninstall the AssetSonar Agent on Windows and Mac systems respectively.
4.1. Uninstalling on Windows
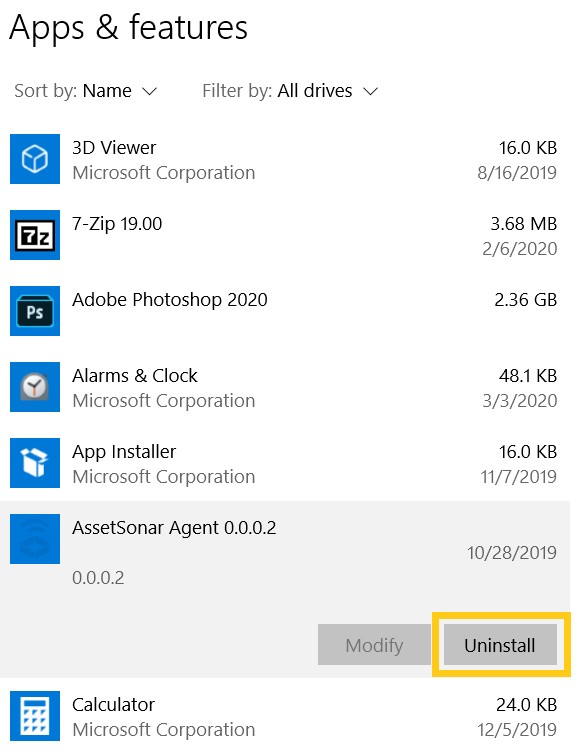
- Go to your Windows search bar, type ‘Apps and Features’, and click ‘Open’.

2. Select the AssetSonar Agent and click ‘Uninstall’. This action will uninstall the Agent.
Note: You must permanently delete the previous Agent file from your device before you head towards installing the newer version.
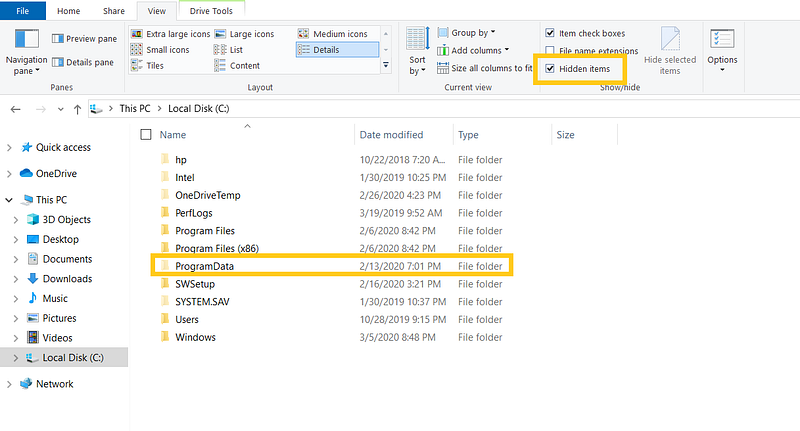
To accomplish this, go to Local Drive C on your device. Click on ‘View’ and select ‘Hidden Items’ to reveal hidden folders. Now, open the folder labeled ‘ProgramData’ as shown:
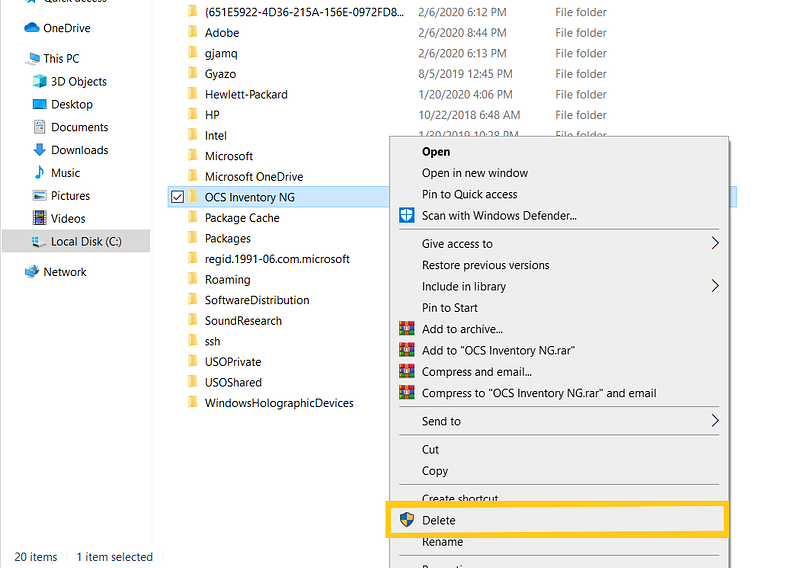
Right-click on ‘OCS Inventory NG’ and click ‘Delete’ to permanently delete the older version of AssetSonar Agent from your Windows device.
4.2. Uninstalling on Mac
In order to uninstall the AssetSonar Agent, you must carry out the following steps:
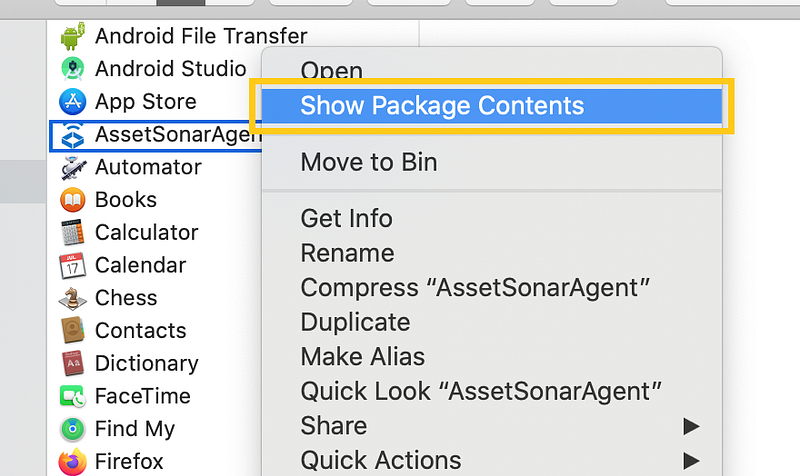
- Go to Finder → Applications. Select the ‘AssetSonar Agent’ from the list of installed applications. Right-click on the Agent and select ‘Show Package Contents’.
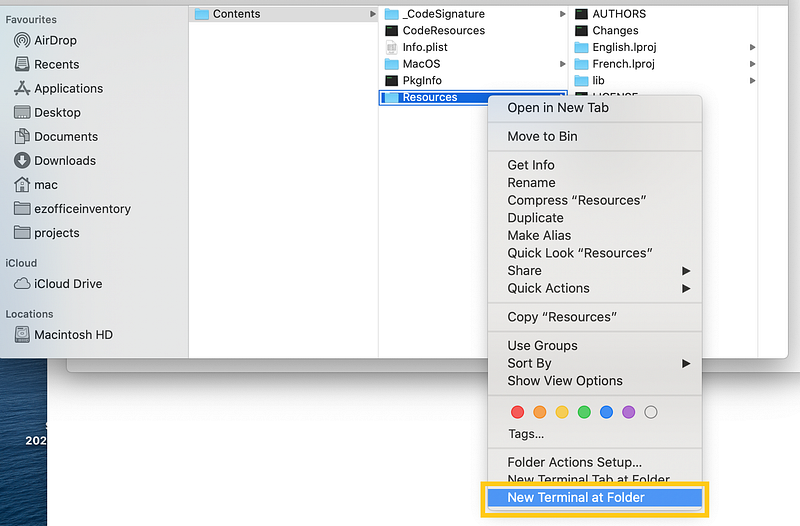
2. This will open up the ‘Contents’ folder. In this folder, right-click on the ‘Resources’ subfolder and select the option ‘New Terminal at Folder’.
3. This pops open a ‘Resources’ dialogue box. Type ‘sudo sh uninstaller.sh’ as shown below. Hit ‘Enter’.
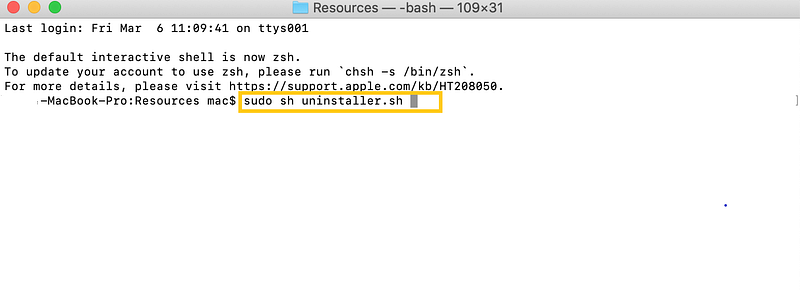
This shall uninstall the AssetSonar Agent from your Mac device.
You are now ready to install updated or newly requested pre-configured versions of the AssetSonar Agent.
5. Troubleshooting
If you encounter any issues with the ITAM Agent, refer to our detailed troubleshooting guide on Agent deployment here.
In case the Agent doesn’t work even after the troubleshooting steps listed in the guide, feel free to reach the AssetSonar Support team and email us the AssetSonar Agent log and conf files.
The log files list all the issues with the Agent, should they occur.
You can access the log files containing the Agent from your device by following these pathways:
- Windows: C Drive → ProgramData → OCS Inventory NG → Agent → ‘OCSInventory.log’
- Mac: Terminal → Var → Log → ‘OCSNG.log’
The conf file can be reached via: C Drive → ProgramData → OCS Inventory NG → Agent → Admininfo.conf.
Note: The admininfo.conf file is normally hidden along with other protected OS files. You can make it visible in the Agent folder by following these steps.
We may also need some identifiable information (such as the name or serial number) of the concerned device to further diagnose an issue. You can obtain this information by right-clicking the AssetSonar Agent icon in the system tray and then selecting ‘Show Inventory Information’. If for some reason, this returns an error, the Agent should be reinstalled.
Email the afore-mentioned files and the information to support@ezo.io and we’ll take care of the rest for you.
6. Additional integrations
You can also use our out-of-the-box integrations with Jamf Pro, and Microsoft SCCM, and Intune to import Mac, Windows, and Android devices into your AssetSonar account.
6.1. Discovery Source
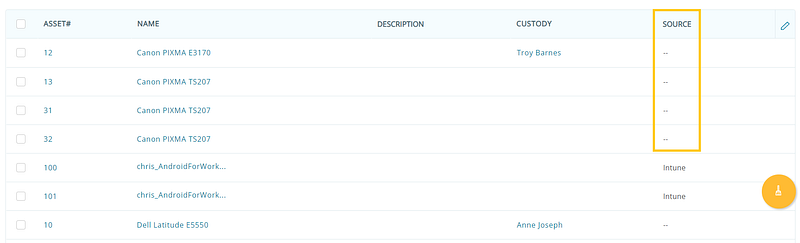
Once imported, AssetSonar shows an additional field by the name of ‘Source’ on the IT Asset Details page. For instance, in the image below, the Source of the discovered Mobile Asset is Microsoft Intune.
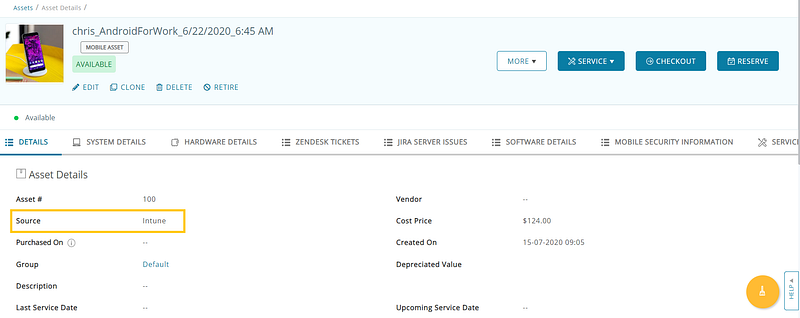
This field maps the discovered IT Asset with its discovery source. It also makes it easier for IT Admins to filter out and group IT Assets by their discovery source.
6.2. Filtering by Source
To filter IT Assets by their source, go to the Asset Listings page → Filter → Source → Select the relevant source, and apply the filter.
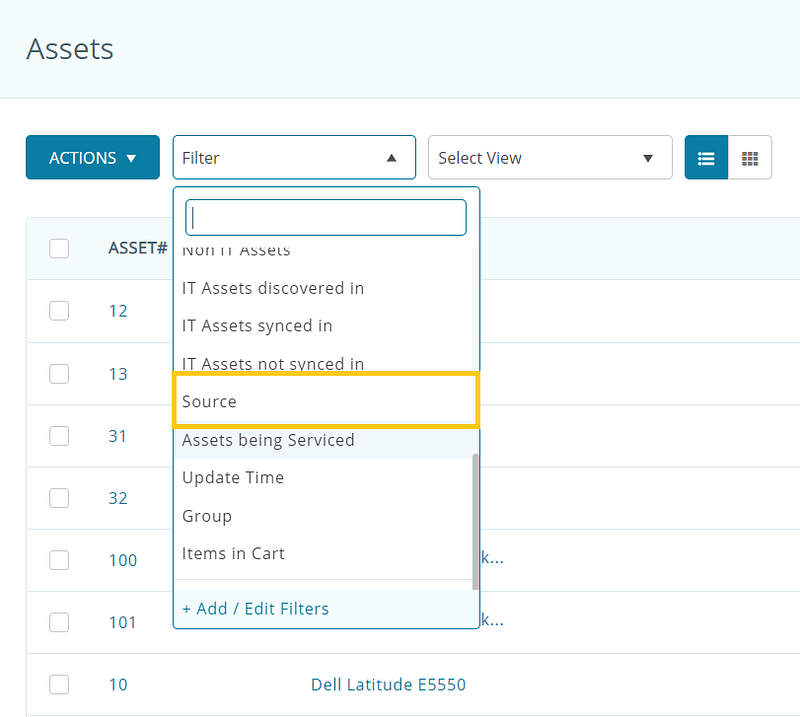
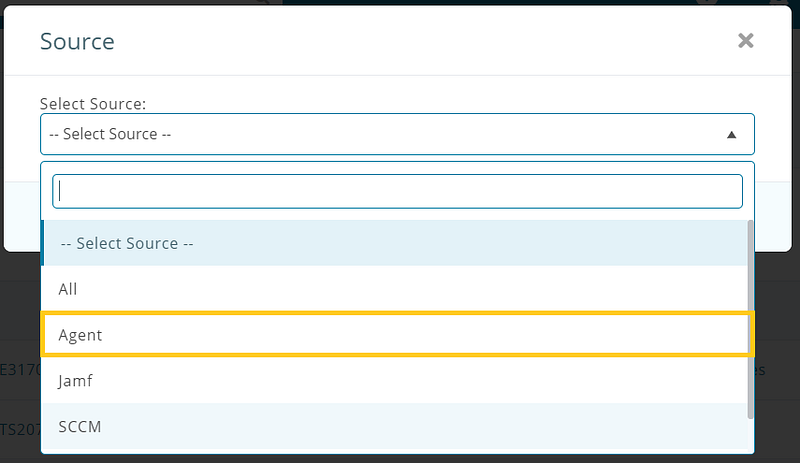
This shall list down all the IT Assets discovered by AssetSonar’s ITAM Agent.

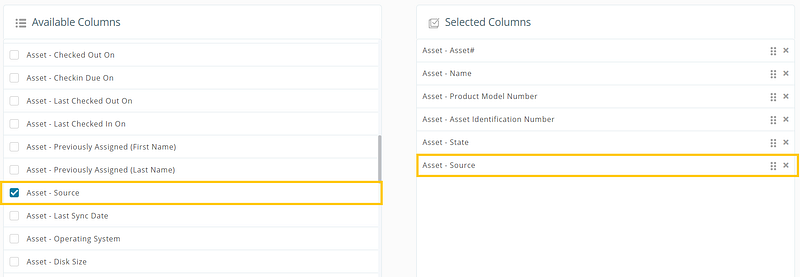
6.3. Running custom reports using Source
Let’s say, you want to run a maintenance service on all the Windows devices owned by your company. While some of these are available, some may be in the custody of employees. You can run a custom report to list all Windows devices by choosing ‘Asset — Source’ as a column, and specifying Agent or SCCM as the ‘Asset — Source’ as the filter.

The report now lists Windows devices that you can run maintenance events on.

Note: For non-IT assets, the Source column shows a ‘—’ value as shown below.
Note: We also support Debian-based Linux devices. To learn more about how you can install the AssetSonar Agent on Linux devices, click here.
About AssetSonar
AssetSonar is a powerful IT asset management tool used by tech organizations and businesses all over the globe.
For more assistance, drop us an email at support@ezo.io.


