

With our custody verification feature, you can request custodians to verify possession of Assets or Asset Stock items. This helps serve as proof that they are in possession of the items. If they don’t have the items, they can also deny the verification request and list down reasons as to why not.
Let’s dive deeper into the entire custody verification process and see how you can benefit from it.
Contents
- Enable custody verification
- Custody verification for Assets
2.1. Send custody verification requests for Assets
2.2. Send mass custody verification requests
2.3. Acknowledge custody of Assets
2.4. Custody verification for Assets in Packages - Custody verification for Asset Stock
3.1. Send custody verification requests for Asset Stock
3.2. Acknowledge custody of Asset Stock - KPIs for custody verification
- Apply filters to custody verification requests
- Mass respond to custody verification requests
- Custom fields for custody verification
- View custody verification history
- Reports for custody verification
- Custody verification for non-login users
- Custody verification through the mobile app
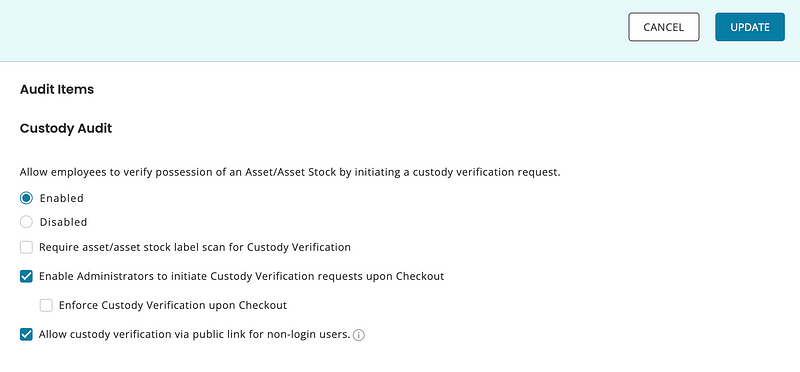
1. Enable custody verification
Enable this feature from Settings → Company Settings → Add Ons → Audit Items → Custody Audit and click on ‘Enabled’. Don’t forget to click ‘Update’ to save your chosen settings.
2. Custody verification for Assets
2.1. Send custody verification requests for Assets
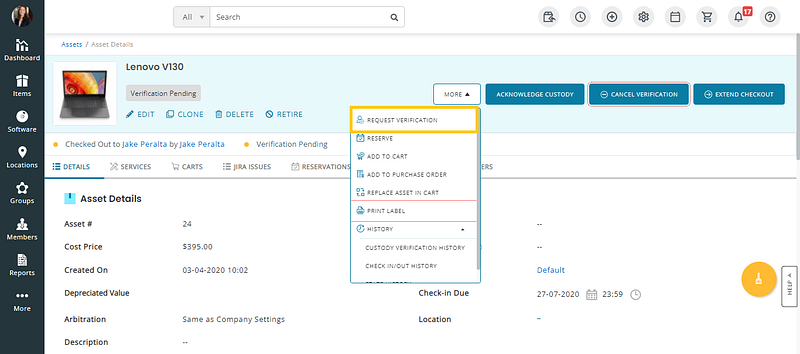
To send out a custody verification request for an Asset, first, go to Items → Assets and select the relevant Asset. From the Assets Details page, you just have to click on the ‘Request Verification’ button on the right. This will send a verification request to the relevant user.
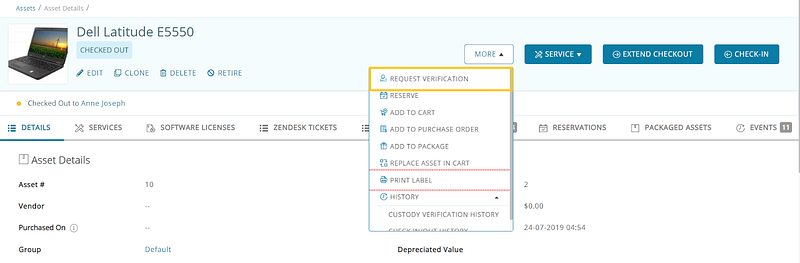
Note: The ‘Request Verification’ button does not show for Available Assets.
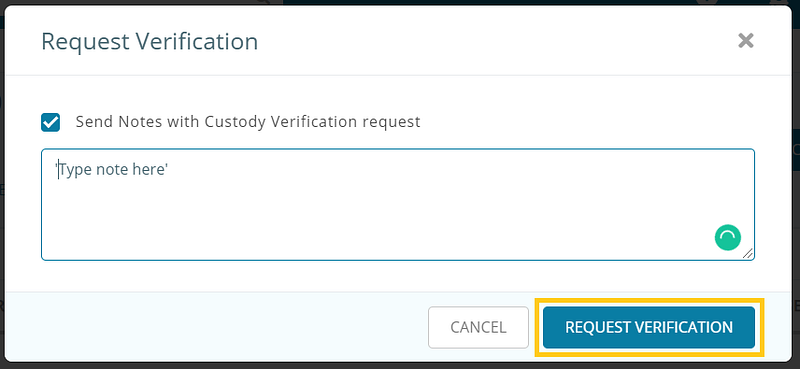
When you click on the button, an overlay appears where you can add any notes along with the verification request if you want. Once you’re done, click the ‘Request Verification’ button!
Once you’ve sent the custody verification request, the following users can respond to it:
- The Administrator
- The supervisor of the user the request is sent to, provided that the Asset is part of the supervisor’s user listing
- The person to whom the request is sent
2.2. Send mass custody verification requests
You can also send out mass custody verification requests. Go to Items → Assets and select multiple Assets from the listings page. Then from the Actions dropdown menu, click on ‘Request Verification’.
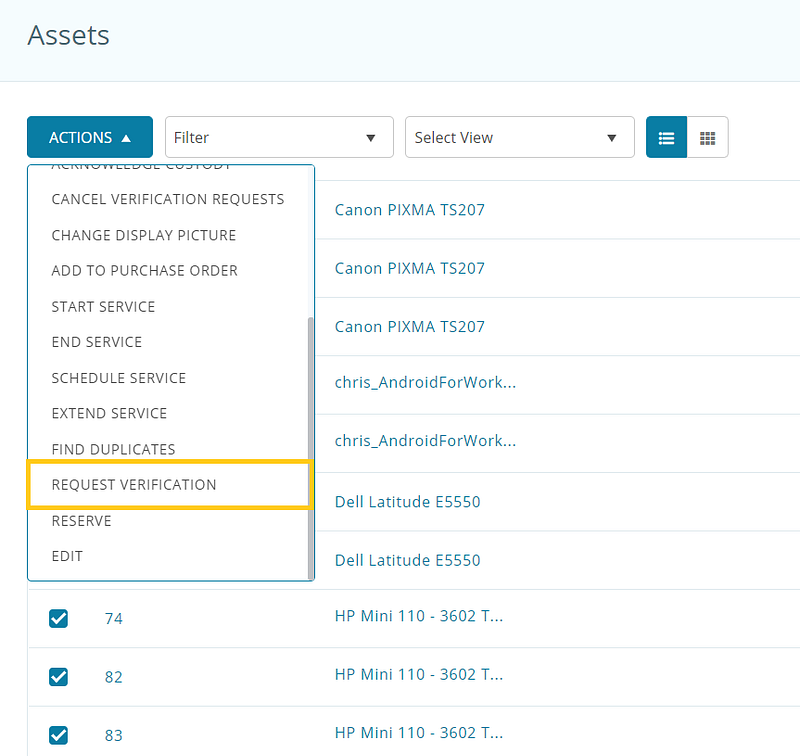
The following overlay appears, where you can add a note that applies to all the selected Assets:
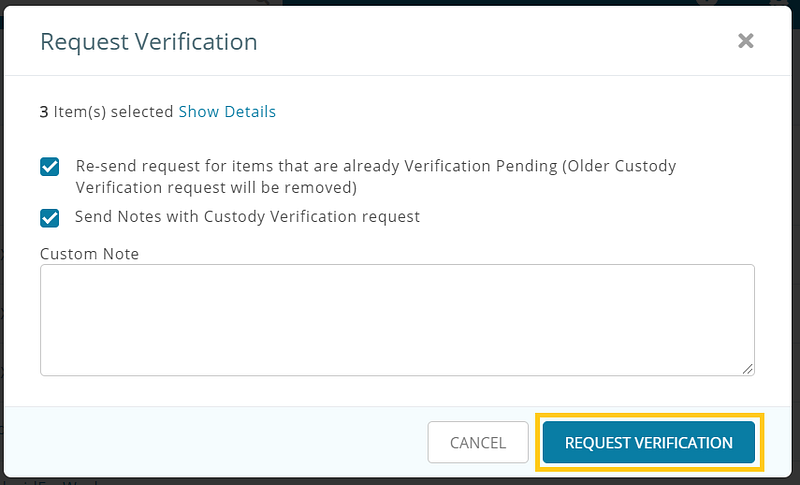
Note: The same functionality also extends to Asset Stock. However, there is no option to add any notes to the verification requests for Asset Stock.
2.3. Acknowledge custody of Assets
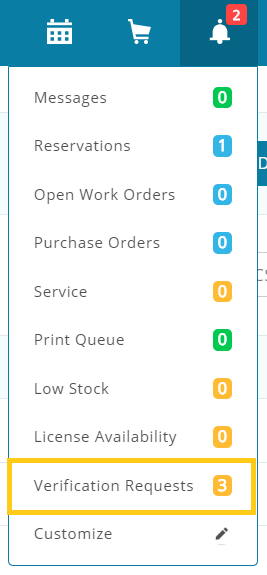
Once you receive the custody verification request, you can respond by acknowledging possession. To do so, click on the bell icon at the top right corner of your account and choose ‘Verification Requests’ from the menu that opens up.
This will take you to a list of all verification requests, whether they have been responded to or not.

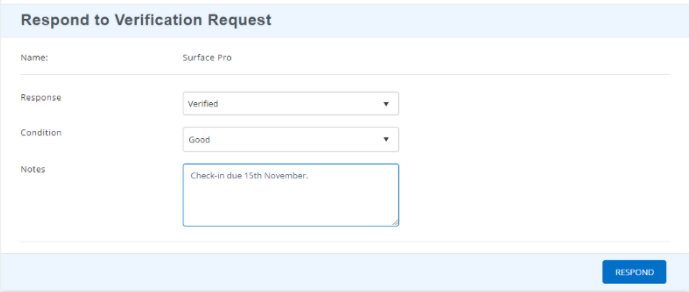
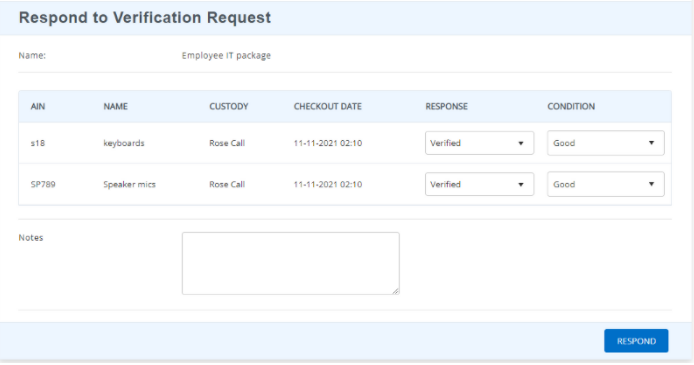
To respond to a request, click on ‘Respond’ for that particular Asset. This opens up the following overlay:
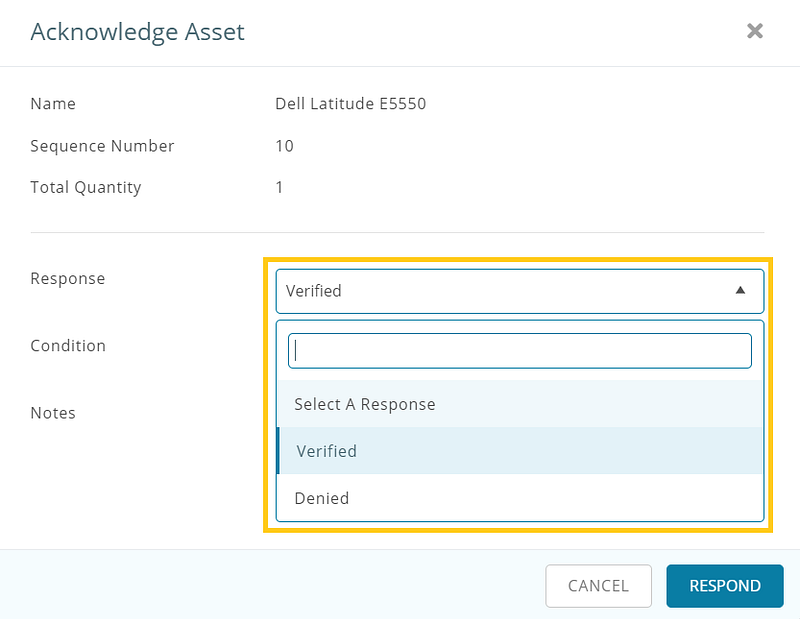
From the overlay, you can choose from either of the following two responses:
- Verified: Choose this option if you are in possession of the particular Asset.
- Denied: Choose this option if you do not have possession of the particular Asset.
You can further specify the condition of the Asset you are in the custody of by using the dropdown menu. In case your chosen response is ‘Verified’, the conditions you can choose from are:
- Good
- Damaged
- Broken
- Other
In case you choose ‘Denied’, then you can choose why you have denied the request. The conditions you can choose from are:
- Lost
- Stolen
- Other

Now Click the ‘Respond’ button and you’re done!
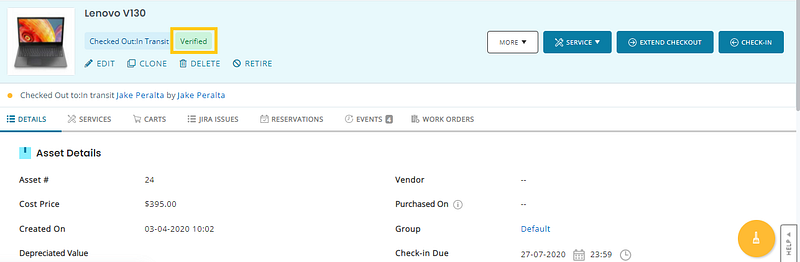
The verification status will show up on the item’s detail page as follows:
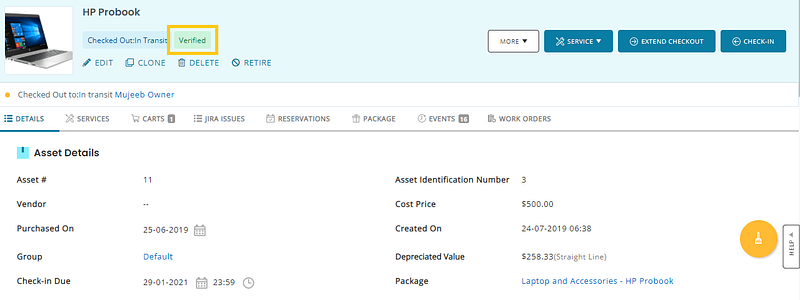
Note: Filling out the ‘Response’ field is mandatory. You cannot acknowledge possession by leaving the ‘Response’ field empty.
You can also respond to the custody verification request from the particular Asset Details page. Click on the ‘Acknowledge Custody’ button on the right and follow the aforementioned steps.

A user can also self-verify even if a custody verification request is not sent to them. To do so, open an Asset that is in your possession, click on More and select ‘Verify Possession’.
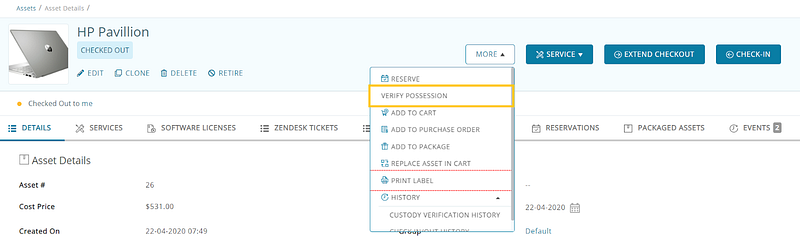
Note: This ability to self-verify is only available for Assets and is not applicable in the case of Asset Stock and Packages.
2.4. Custody verification for Assets in Packages
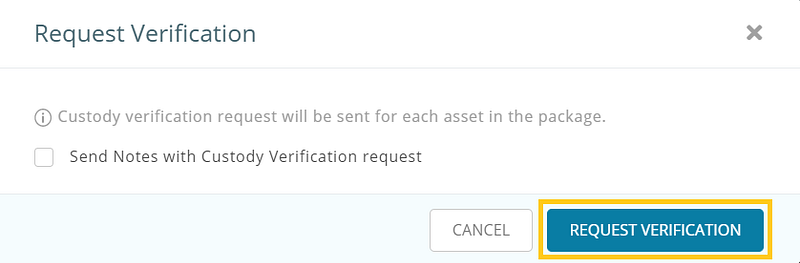
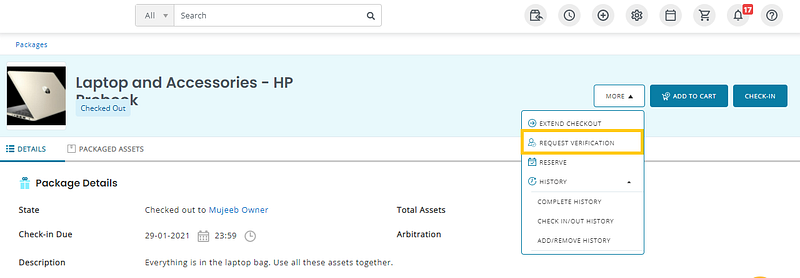
If an Asset is part of a Package, then you cannot send a custody verification request for that single Asset. When you go to More → Packages → Packages Listing page → Open a particular Package → More → Request Verification, the overlay that appears clarifies that the verification request will be sent for each Asset in the Package.
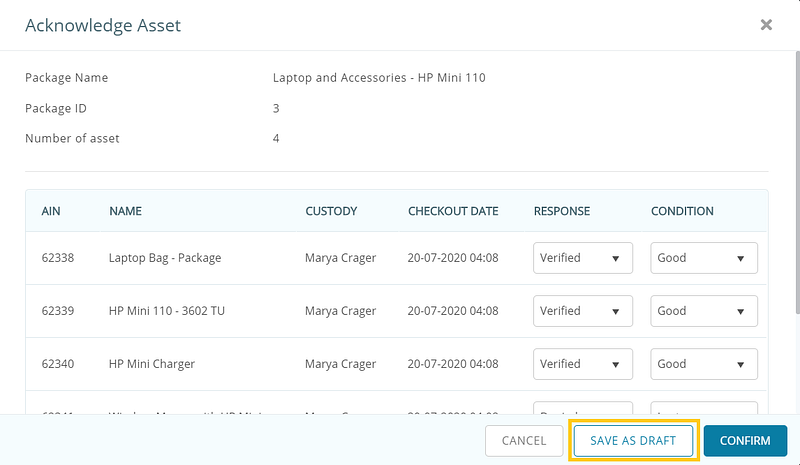
So the relevant user will have to respond to verification requests for all Assets in that Package. You can also save a response as a draft if you are not ready to submit it yet. However, this is only applicable for Packages and not for Assets. In the Draft state, the user can go back to edit the Conditions and Responses later on.
Read More: Use Packages for Checkouts with IT Asset Tracking Software
3. Custody verification for Asset Stock
3.1. Send custody verification requests for Asset Stock
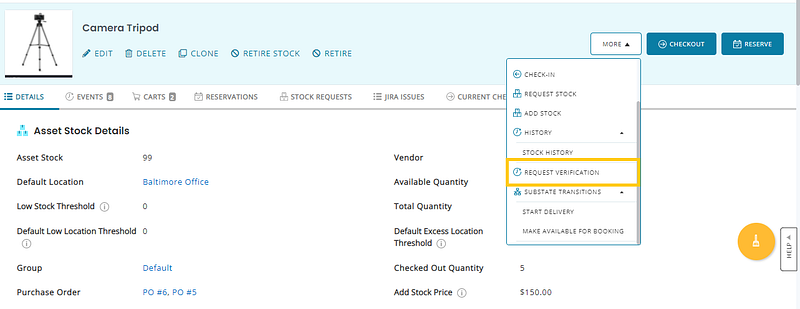
To send custody verification requests for Asset Stock, go to Items → Asset Stock and select the relevant Asset Stock. From the Asset Stock Details page, request its verification from the More dropdown menu.
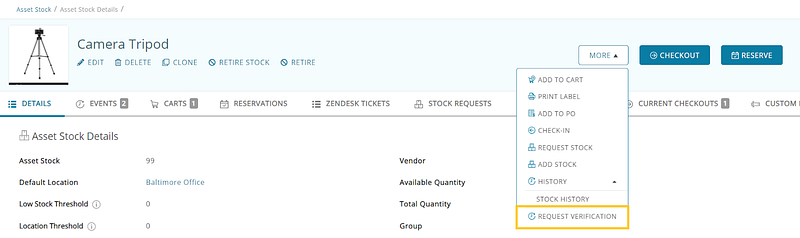
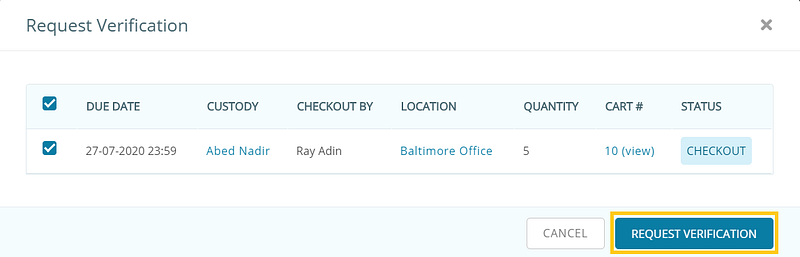
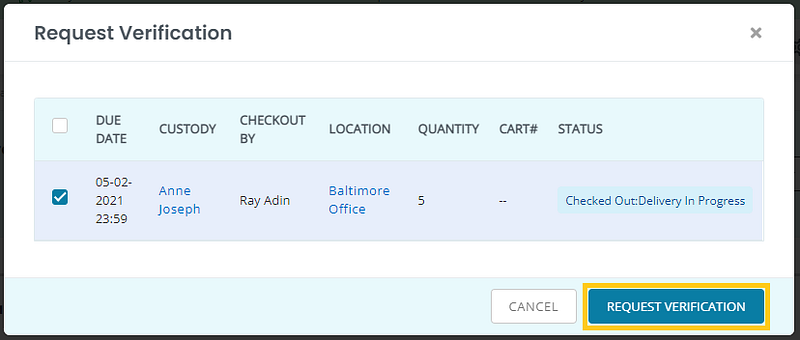
Once you do so, the following overlay opens and all you have to do is click on ‘Request Verification’:
3.2. Acknowledge custody of Asset Stock
Once you receive the custody verification request, you can respond to it by acknowledging possession. To do so, click on the bell icon at the top right corner of your account and choose ‘Verification Requests’ from the menu that opens up.
This will take you to a list of all verification requests. Once there, click on the Asset Stock tab.
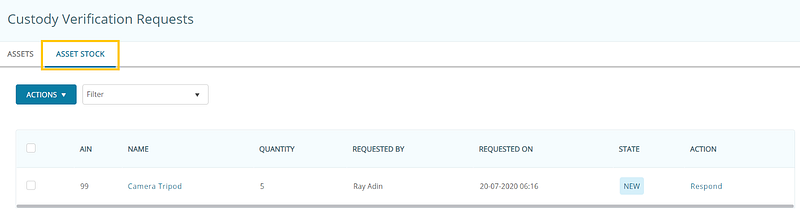
Previously, a custody verification request was sent for the line item ‘Camera Tripod’. To respond to that request, click on the ‘Respond’ button for that particular line item.
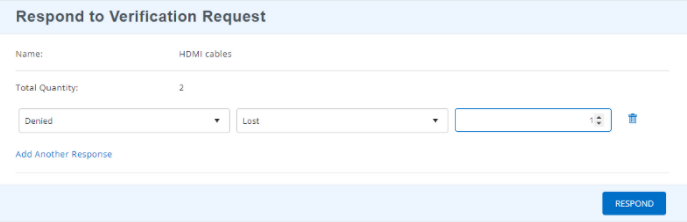
This opens up the following overlay:
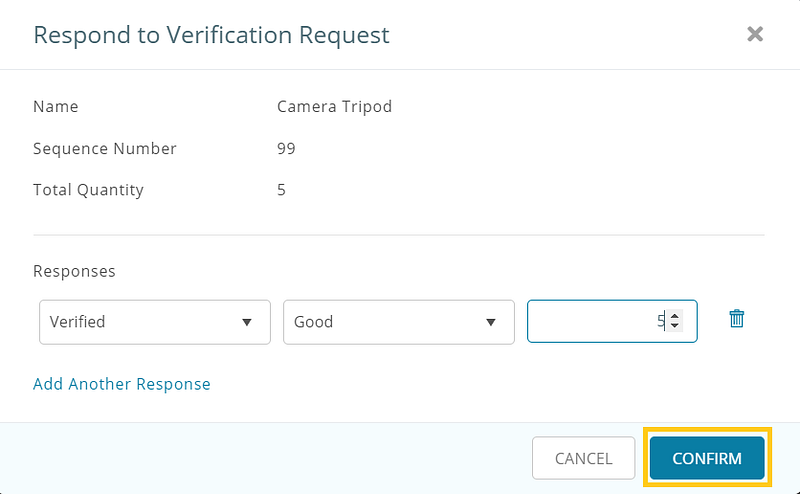
Similar to the response for Assets, you will have to specify a value for the ‘Response’ field and the ‘Condition’ field. However, you will also have to specify a quantity that you are verifying or denying possession of.
In the above visual, the total quantity of Asset Stock is 5 and the user is verifying custody of all 5. However, they cannot submit the response as is, because that leads to the following error:
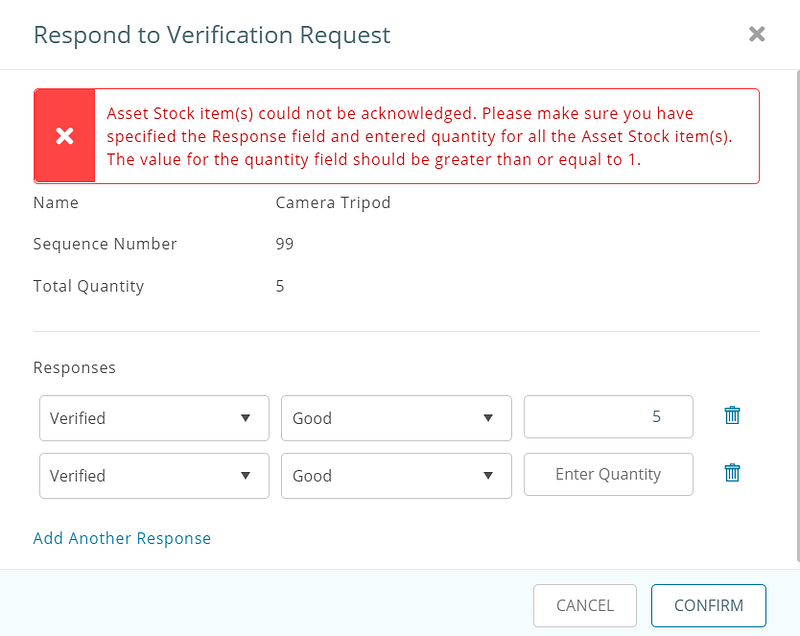
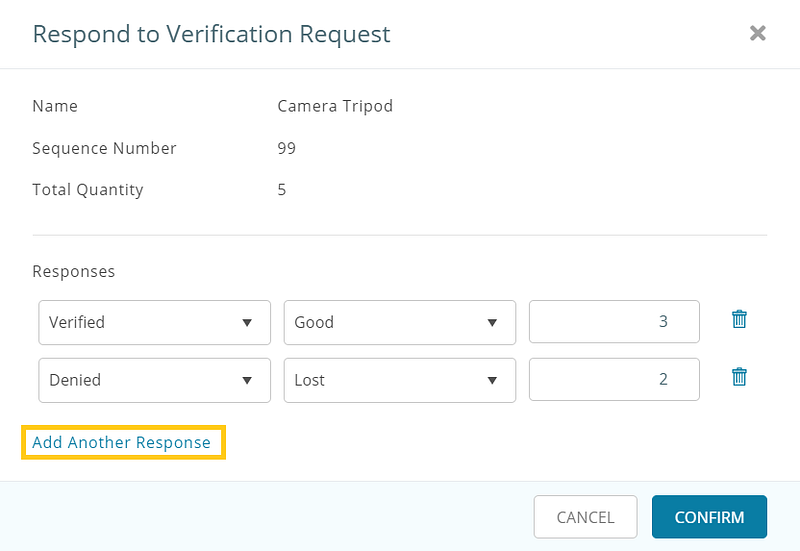
Therefore, to submit a response for Asset Stock, you must choose some response for the entire quantity, i.e. 5 in this case. So if you have custody of 3 items but not for the remaining 2, you must choose ‘Verified’ for the 3 you have and choose ‘Denied’ for the others. To add another response, simply click on the ‘Add Another Response’ button.
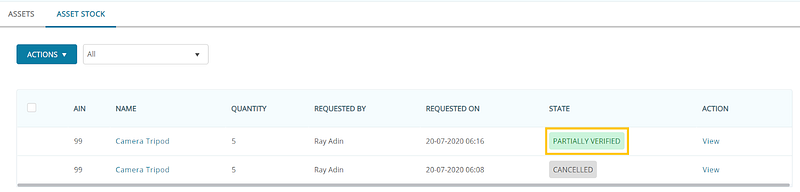
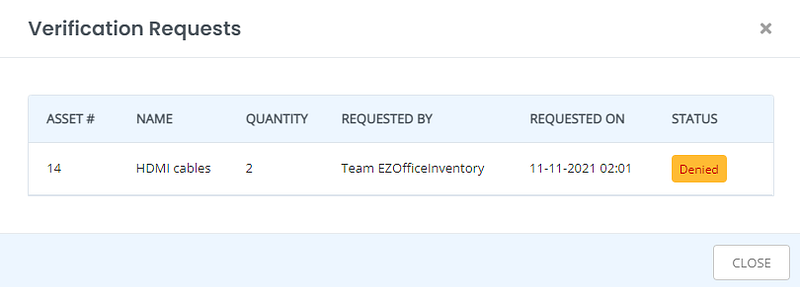
Such a response, in which you have chosen ‘Verified’ for some items and ‘Denied’ for the others, is shown as ‘Partially Verified’:
Note: Filling out the ‘Response’ field is mandatory. You cannot acknowledge possession and leave the ‘Response’ field blank.
4. KPIs for Custody Verification
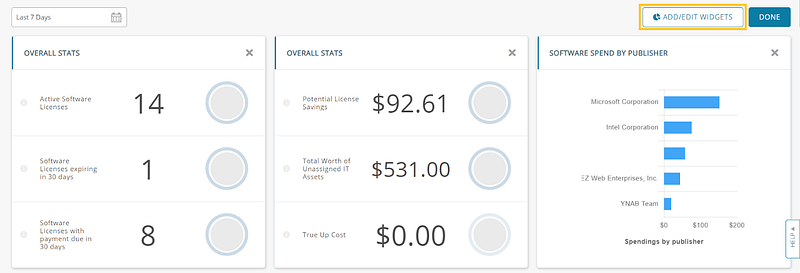
You can keep track of important KPIs related to custody verification, right from the Dashboard. To display the relevant KPIs, simply click on the ‘Edit’ button in your Dashboard. Then click on the ‘Add/Edit Widgets’ button, which opens up a dialog box where you can scroll down to see the entire list of KPIs and other setting options available to choose from.
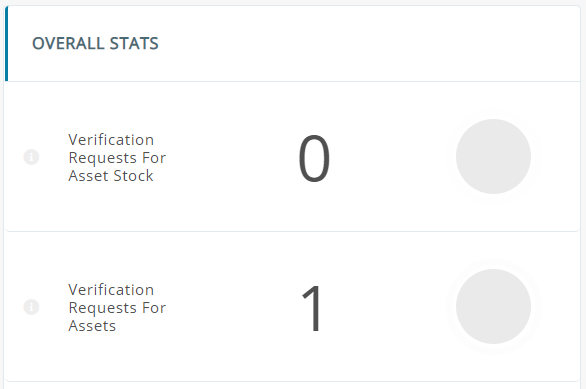
Here are the relevant KPIs you can choose from:
- Verification Requests for Asset Stock
- Verification Requests for Assets
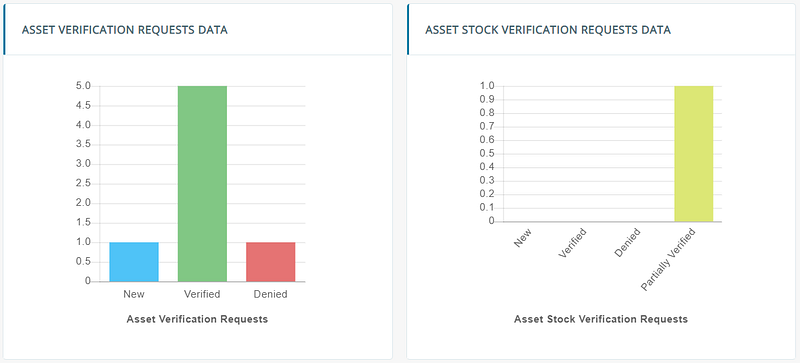
- Asset Verification Requests
- Asset Stock Verification Requests
Once you’ve made your selections, click the ‘Done’ button. This ensures that your chosen settings are saved and implemented.
Here’s a visual of the metric cards for custody verification:
Read More: Track Your KPIs With Advanced Dashboard in AssetSonar
5. Apply filters to custody verification requests
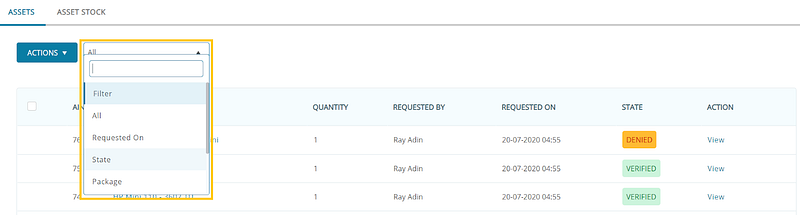
You can also filter the verification requests to make it easier to find the ones you’re looking for. To do so, simply click on Filter as shown below and select the one you want.
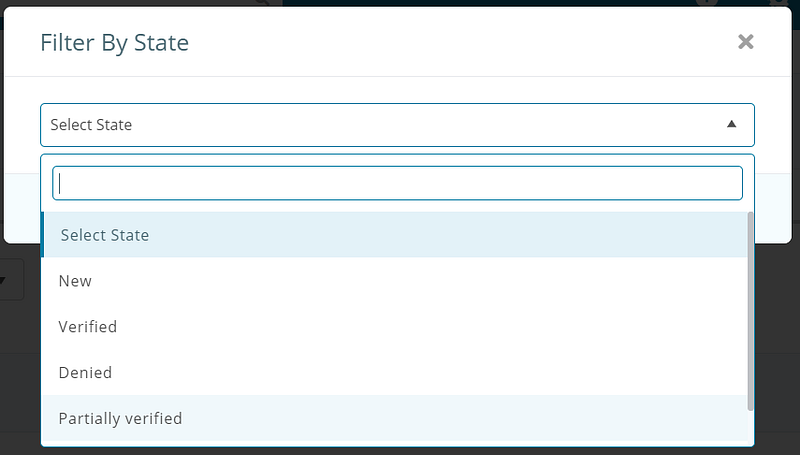
Let’s say you want to only see requests that you yet have to respond to, so you select the State filter from above. This opens up the following overlay, where you can specify which state:
6. Mass respond to custody verification requests
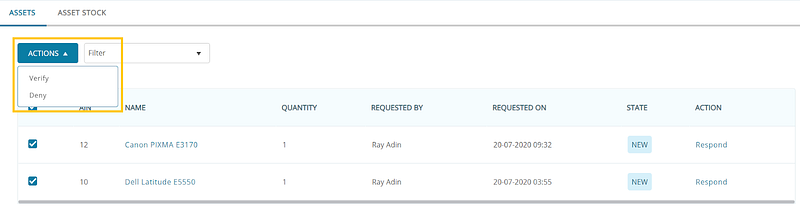
To simplify your work, you can also mass respond to custody verification requests. To do so, simply select the verification requests you have yet to respond to, then go to the Actions dropdown and choose the relevant response, as shown below:
Similarly, you can also mass respond to verification requests for Asset Stock items.
7. Custom fields for custody verification
Let’s say, you’re an IT Admin in a university or an organization and you have to check out testing Devices for students or employees. The Devices are proprietary and should not be shared with another person. In such a case, you can set predefined fields that ask Staff Users to agree to an honor code while acknowledging possession of these Device(s).
To configure a custom field for this purpose, go to More → Custom Fields and click on ‘Add Custom Field’.

Now, create a custom field titled Honor code. Enter the relevant details and select ‘Display on Custody Verification’ and ‘Mandatory on Custody Verification’.
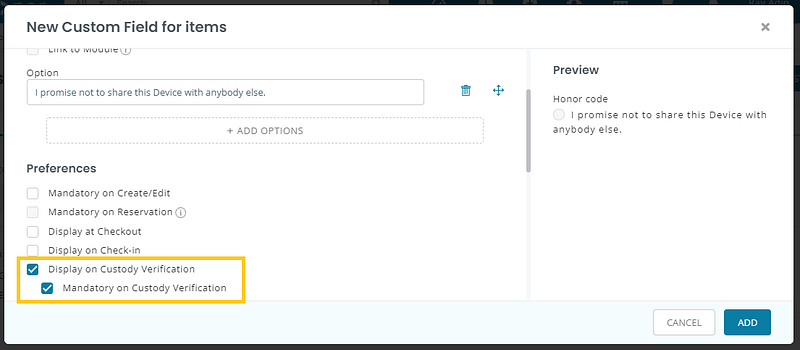
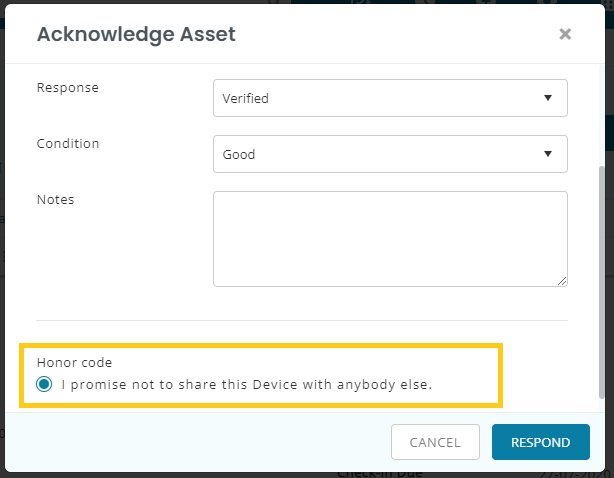
Now, add the custom field. This shall display the Honor code to be selected by users every time they acknowledge custody of a Device.
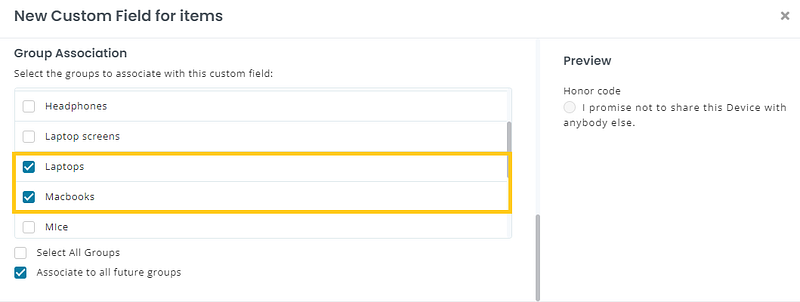
Note: If you want the Honor Code to be applicable only to IT Devices, you can select the relevant Groups while creating the custom field as highlighted below.
8. View custody verification history
You can view the custody verification history of any Asset or Asset Stock by going to their respective Details page. From there, click on More and select ‘Custody Verification History’.
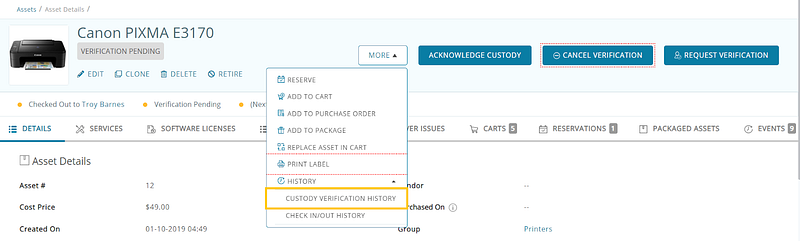
The following overlay appears, which details the entire verification history:

9. Reports for custody verification
Two new reports related to custody verification have been introduced. To generate either of them, go to More → Reports and you can see both the reports:
- Asset Custody Verification
- Asset Stock Custody Verification
Let’s look at the Asset Custody Verification report:
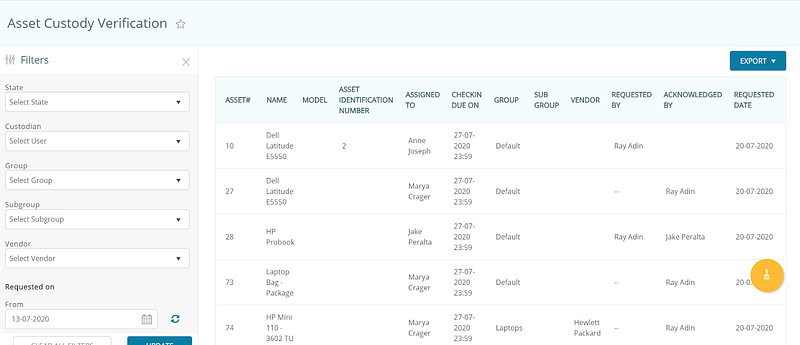
You can also apply filters to generate a more narrowed-down report.
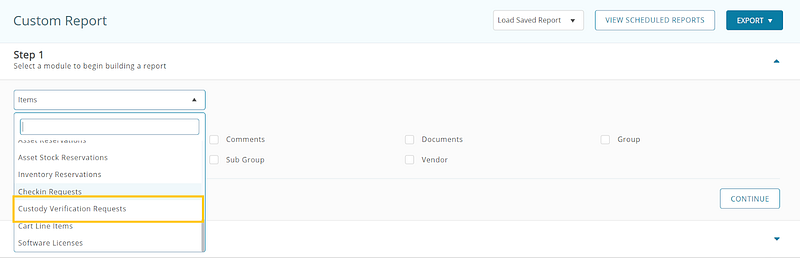
A new module for Custody Verification Requests has also been added when you create a Custom Report. This way, you can generate a report on all the verification requests for Assets and Asset Stock, and further narrow it down as needed.
10. Custody verification for non-login users
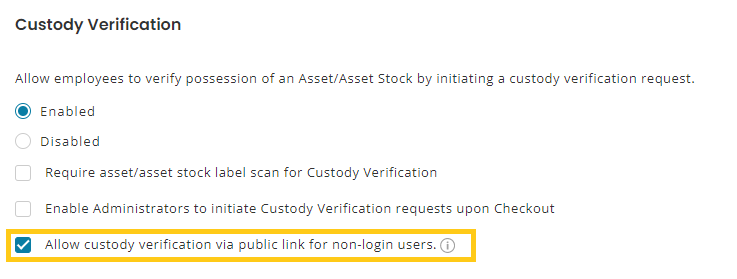
Go to Company Settings → Custody Verification and select ‘Allow custody verification via public link for non-login users’.
Note: If item label scanning has been made mandatory, it will not be applicable to public link verification.
When this setting is enabled, Admins can send non-login users requests for custody verification via email through a public link. Make sure that the user is subscribed to email alerts.

Note: Custody Verification alerts should be enabled from the Alerts module to send out requests.
For any Asset checked out to a particular non-login user, Admins can send custody verification requests. Simply go to the Asset Details page → More → Request Verification.
An overlay will appear asking you to confirm the verification request. Once the request has been sent, both the non-login user and Admin will receive an email alert. This is how it shows to the non-login user:
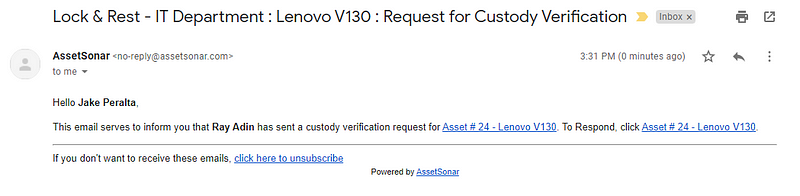
Once the non-login user receives the email, they can open the verification form from the link in the email. For Assets, the form asks for the following with any additional mandatory custom fields if enabled:
After the user has verified/denied the request, they can click on ‘Respond’. They will be redirected to the success message below:
“You have verified custody of [Asset Name].”
Admins can then check the Asset details page, where the verification status will be updated:
Similarly for checked-out Asset Stock items, go to the Asset Stock Details page → More → Request Verification.
An overlay will appear asking you to select the user you want to send the verification request to. Here you can select the relevant non-login user:
The non-login user will receive the email alert asking for Asset Stock custody verification. Clicking the link in the email will redirect the user to the following form:
The user has to enter the custody status and quantity for verification. Admins can view the verification responses from the Asset Stock Details page → More → History → Custody Verification History.
Lastly, Admins can send verification requests for Packages as well. Go to the Package Details page → More → Request Verification.
The non-login user will be sent out an email alert with the following verification form. Here the user will have to verify custody for all Items in a Package:
Admins can check the verification status from individual Item detail pages in the Package:

11. Custody verification through the mobile app
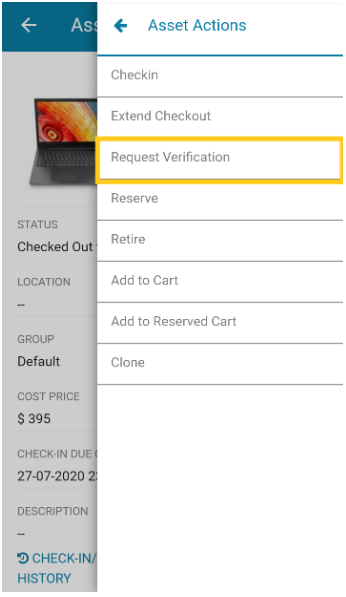
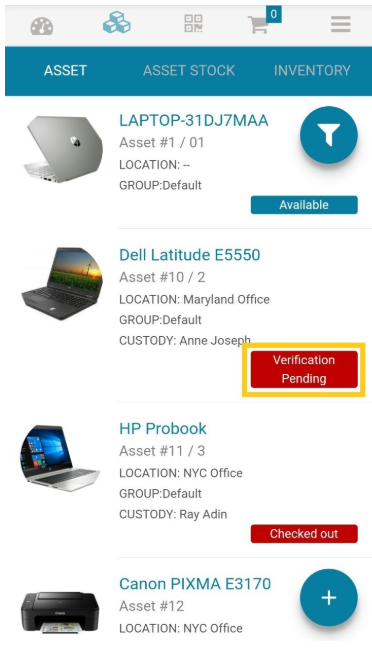
You can also send custody verification requests and respond to them right from your phone, using our mobile app. To do so, choose an Asset and click on the ‘Play’ button to open a list of possible actions you can take.
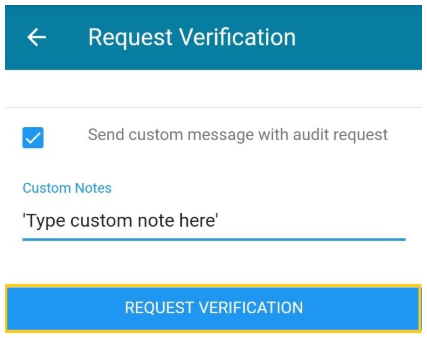
This opens up the following screen where you can add a note if needed before requesting verification:
From the Asset Listings page on the mobile app, you can easily view the status of each Asset, as shown below:
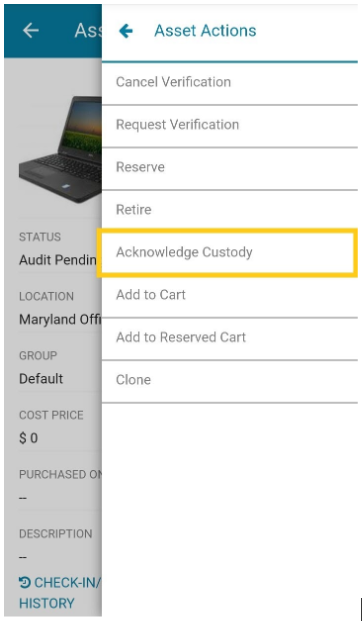
The user can then open the Asset, click the ‘Play’ button, and select the ‘Acknowledge Custody’ option to respond to the verification request.
Similarly, you can also carry out the same functionality for Assets in Packages.
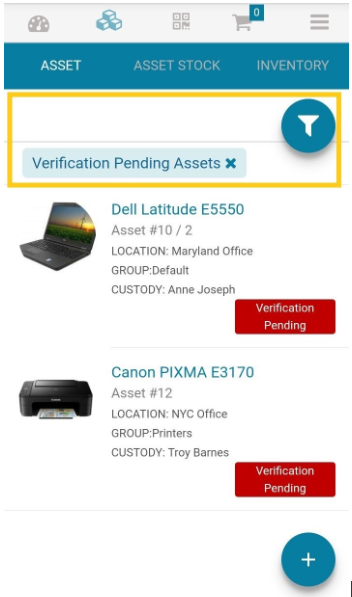
You can also filter the results on the Asset Listings page. Click on the funnel and choose the ‘Verification Pending Assets’ filter. Here is the end result:
Note: Custody verification for Asset Stock is not yet available through the mobile app.
Read more: Retiring Checked Out IT Assets in AssetSonar
About AssetSonar
AssetSonar is the leading IT asset management software. It allows you to track, maintain, and report on your IT equipment from anywhere, at any time.


