


Keeping your IT asset data updated and organized into Groups in AssetSonar is extremely important for effective IT asset management. It enables you to get an in-depth granular view of your IT landscape, run smart analytics, expedite employee onboarding, and enforce personalized access control.
However, this can be a challenge when your IT assets are being imported from different discovery sources i.e. Jamf, Microsoft Intune, or Google Endpoint Manager. Manually classifying such a diverse IT asset database into organized groups can be a tedious process. You may need to update spreadsheets for, let’s say, 5,000 or manually add each of these devices to their respective groups — wasting valuable time.
AssetSonar simplifies this process by automating the assignment of imported devices into Groups based on a specified set of rules. Auto-assign imported devices to Groups with respect to the former’s hardware and/or software characteristics and significantly reduce the manual effort and time needed to generate group-specific reports and KPIs. Facilitate timely, efficient IT asset management with Auto Assignment to Groups.
Let’s get started!
Contents
- Set up Assignment Rules
- Use cases
2.1. Asset landscape overview
2.2. General trends by Groups
2.3. Procurement
2.4. Onboarding
2.5. Configuring Custom Roles
1. Set up Assignment Rules
In order to automatically add Devices discovered by the ITAM Agent or imported from device management platforms, you must first set up certain rules that automate the process.
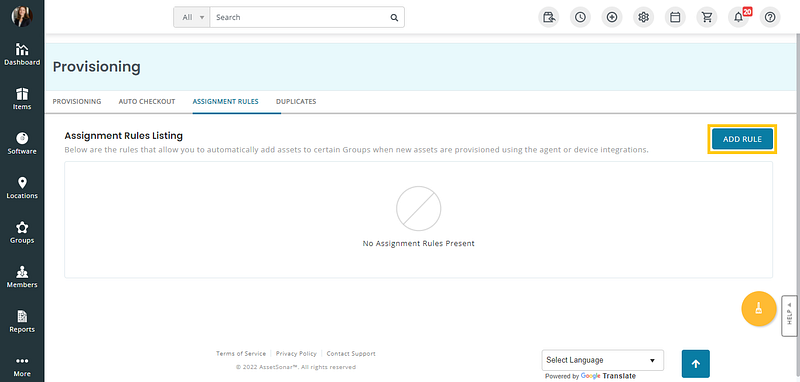
From the left navigation bar, go to More → Provisioning → Assignment Rules and click on the ‘Add Rule’ button.
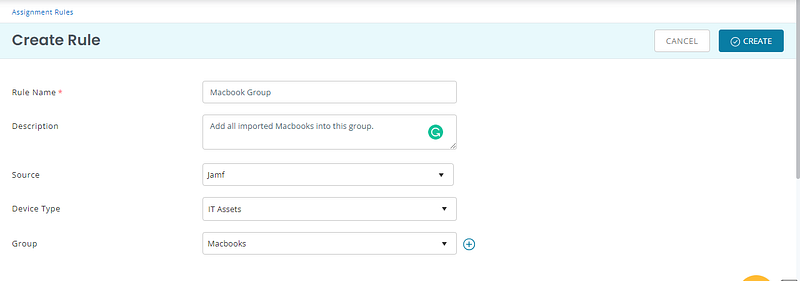
Add details of the discovery source, the type of Asset (IT or Mobile), and the preferred Group that you want to apply the Assignment Rule on.
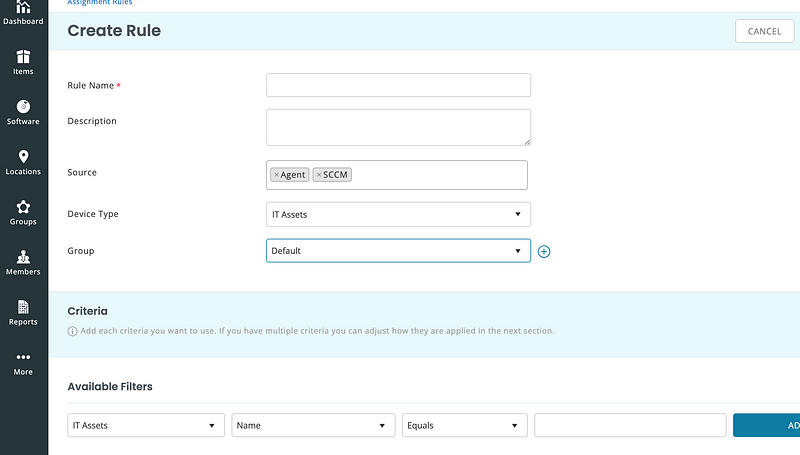
Note: You can also create a rule for multiple discovery sources as shown.
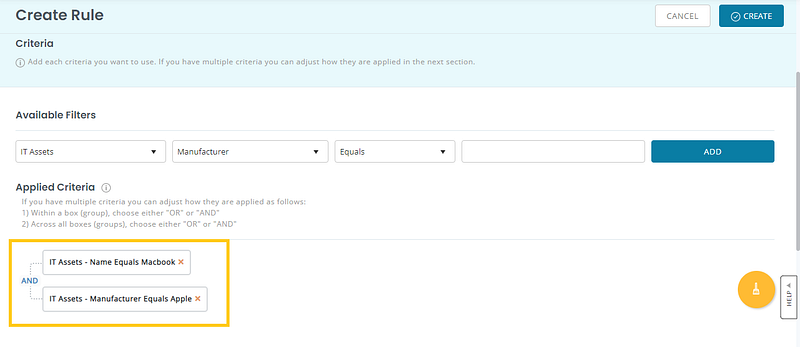
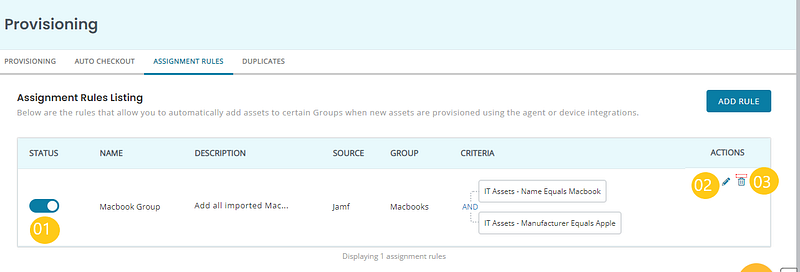
Now, scroll below and add the criteria based on which the rule must be specified. In our example, we have created a rule for the MacBook Group. According to our filters, any IT Assets imported from Jamf that meet both the specifications listed below will be automatically added to the MacBook Group:
- Name equals Macbook; AND
- Manufacturer equals Apple
You can choose to apply the filters for any hardware or software detail that you like such as Model, BIOS, Operating System, etc.
AssetSonar also gives you the option to conveniently switch between the AND and OR conditions to suit your needs. An Assignment Rule functions successfully only if:
- For AND condition, all the applied filters meet the criteria.
- For the OR condition, any one of the filters meets the criteria.
Hit ‘Create’ once done.
Once an Assignment Rule has been created, you can take three actions on it (as illustrated below):
- Activate/deactivate the rule.
- Edit the rule.
- Delete the rule. After the deletion of a rule, all the concerned Devices that are imported subsequently will be added to the Default group.
Note: Assignment Rules can only be specified for Devices that are to be imported in the future, not the Devices that are already present in the system.
2. Use cases
With this capability, you can take advantage of all use cases where Groups play a major role in AssetSonar. Assignment Rules make it easier and more efficient for you to achieve the end result.
Let’s look at some examples where Auto Assignment is useful.
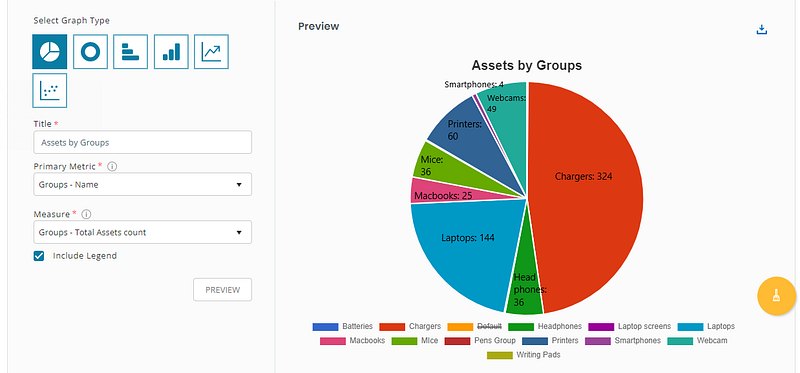
2.1. Get a detailed Asset landscape overview
If all of your Assets are added to the default Group, there’s no way to determine what your Asset landscape looks like. With Auto Assignment, you can not only see how many Macbooks, Chromebooks, Windows laptops, or mobile devices are in your entire organization but also see how many of these grouped Devices are present at each office/branch location. Gain detailed insights into the kinds of Assets that you own and their respective quantities as shown below.
2.2. Scanning general trends by Groups
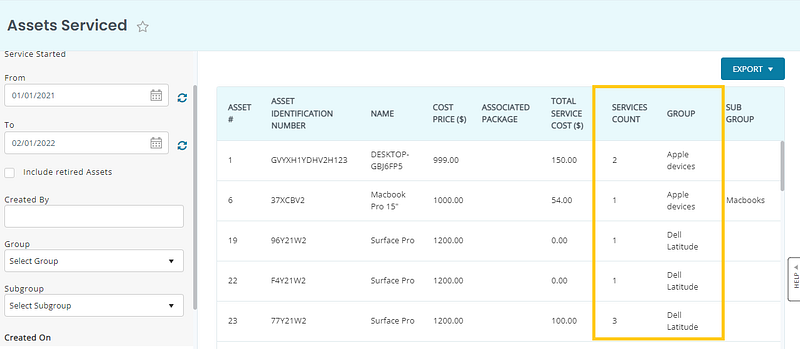
Running certain reports and graphs within AssetSonar and grouping data by ‘Group — Name’ also enables you to view trends by groups. As an IT Admin or Operations Manager, you can see what kind of IT equipment is being used more by employees, or gets broken down, transferred across office sites, and gets ordered more frequently than the rest.
Here’s an example. Run the report for Assets that have been serviced for the past year. By checking the services count for each Group, you can see which Group (Dell Latitude in this case) requires more maintenance efforts and thus needs to be replaced with better quality equipment in the next purchase cycle.
2.3. Making procurement decisions
One quick thing you can do when you have your Assets placed in the right Groups is to look at their availability based on their Groups. For instance, you can create a Custom Report for all your Macbooks and group rows by their Status i.e. Available or Checked Out. Next, apply the COUNT function for each State and create a Graph as follows.
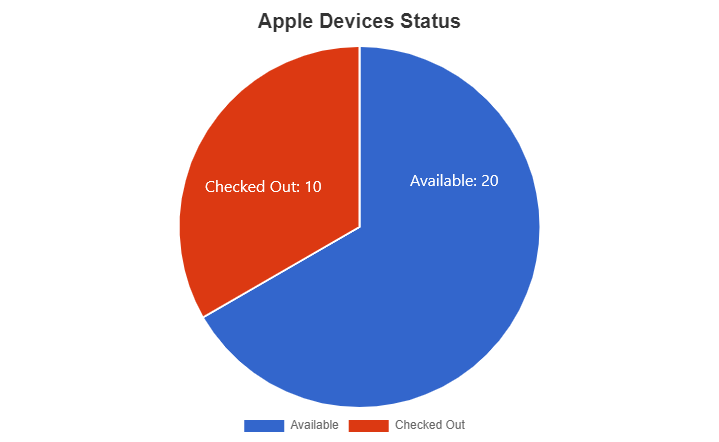
This use case is specifically useful when planning your procurement checklist for the upcoming hiring season and ensures seamless mass onboarding.
2.4. Creating onboarding kits
Another AssetSonar module where this functionality is particularly useful is Bundles. Accelerate employee onboarding as you create bundled onboarding kits by selecting Assets from different Groups. An onboarding kit may include components such as a Macbook, a charger, a monitor or an iMac, a cordless mouse, a headset, USB dongles, etc.
Let’s see this workflow in action!
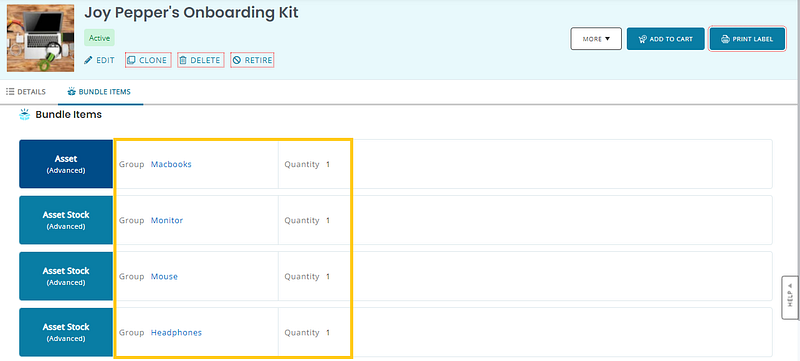
With Assets sorted into the right Groups, you can quickly create kits for a streamlined onboarding process.
2.5. Configuring Custom Roles
Most organizations have strict policies and restrict access to certain items by departments. You can enforce personalized Custom Roles for each department. Auto-assign Assets to their respective Groups. Then, while configuring Custom Roles for a department, you can specify all the Groups whose items are accessible by employees belonging to a certain department.
Let’s say, you’re creating a Custom Role for the Marketing team. You can give them access to the following Groups.

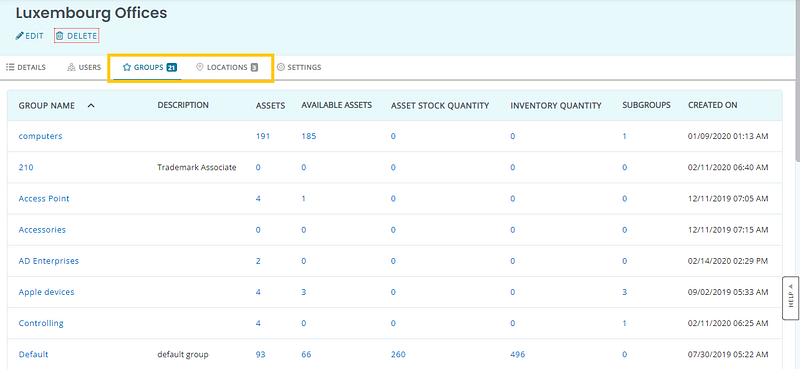
Pro tip! With the help of easily organized Groups, you can also set up Access Control by Groups and Locations for various offices or job sites. For instance, the User Listing for Luxembourg offices below gives access to users in the User Listing by certain Groups.
Read more: Guide 102: Organizing Items by Groups using IT Asset Tracking Software
About AssetSonar
AssetSonar is a powerful ITAM solution used by tech organizations and businesses all over the globe. Sign up today for a free 15-day trial.
For more assistance, drop us an email at support@ezo.io. You can also visit our blog for detailed support posts.
Join the Conversation: Twitter | Facebook | LinkedIn


